Wednesday, November 18, 2015

DIY Wild Bird Suet Feeder

DIY Wild Bird Suet Feeder

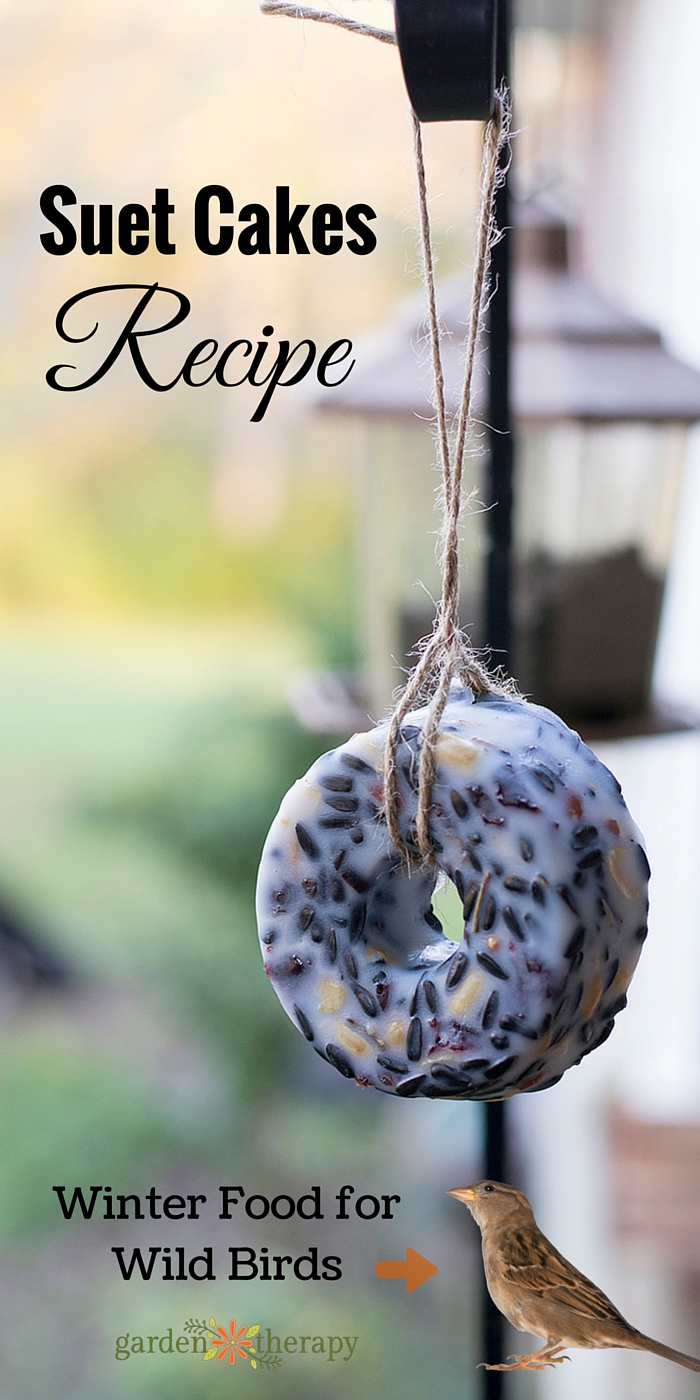
My family loves to bird-watch. We have several feeders in our yard and one of us is always watching out our front window, hoping to catch sight of a new feathered visitor to our front feeder. Although we put out seed year-round, we always make up a suet feeder (or seven) for the wild birds in the colder months. Want to be kind to your winter birds? Of course you do! So, let then eat cake (suet cake)!


DIY Suet Cakes for Feeding Wild Birds in the Winter

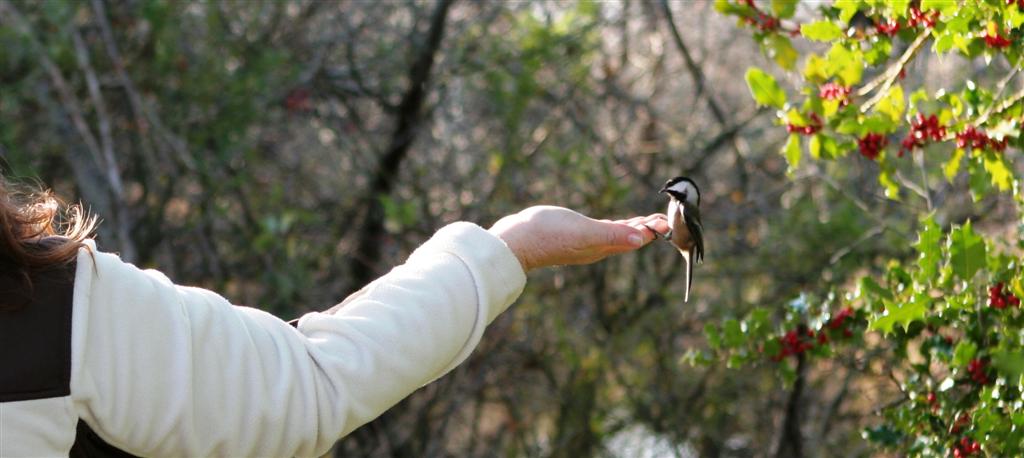
Suet, or rendered fat, is an important supplement for most birds. In the winter, the fat helps add to the bird’s stores of energy and help them survive the long, cold months. In the spring, the fat helps with the increased energy demands of nesting birds. Most birds that enjoy suet are cling feeders such as nuthatches or woodpeckers. However, many birds will partake in a helping of fat every now and then when food is scarce.


Hand feeding the chickadees

Making a wild bird suet feeder is simple and only takes a few ingredients.


Wild Bird Food Ingedients

Materials


  • Lard or vegetable fat (you need one that will stay solid at room temperature).
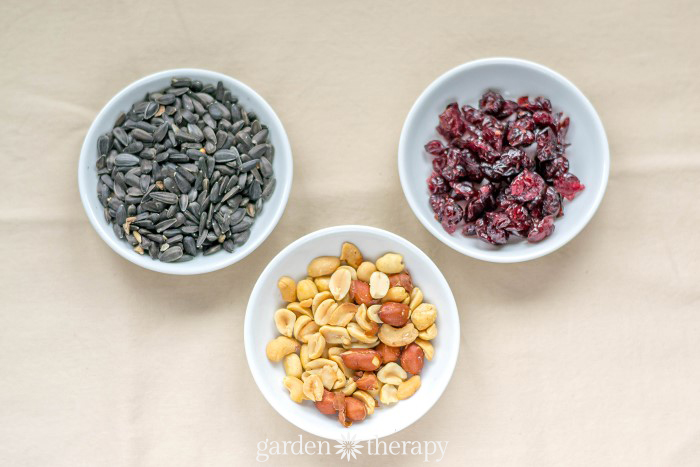
  • Bird seed
  • Dried fruit
  • Raw peanuts
  • A small bundt pan
  • Twine

Make it!


Gather your seeds, dried fruit, and nuts. I used equal portions of each. Mix them together in a large bowl.


Making Wild Bird Food

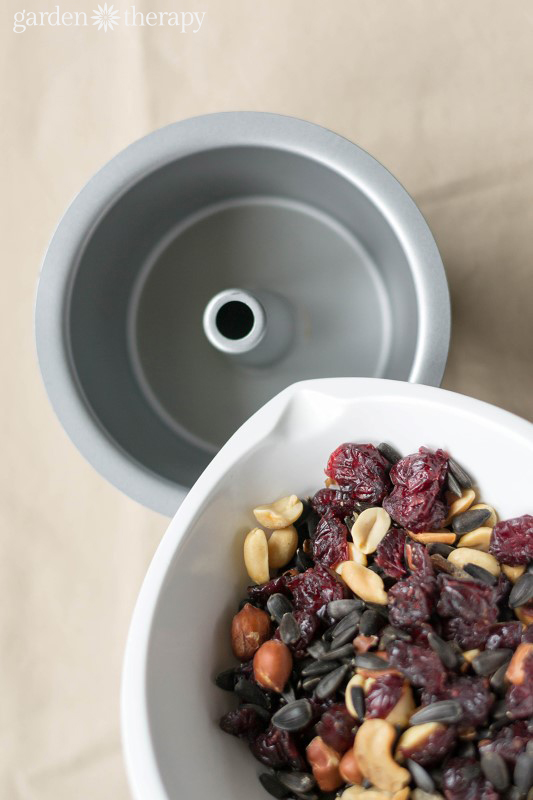
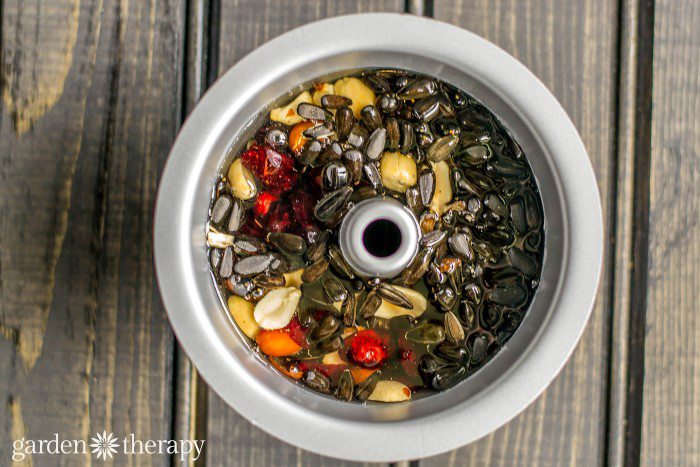
Add the seed mix to the mini bundt pan. Fill it about half full. Melt the fat in a double boiler. I used about half a pound of lard for two mini bundt pans.


Pour the melted lard on top of the seed mixture in the mini bundt pans. You can let the fat harden at room temperature or pop the pan in the freezer for an hour or so.


Making Wild Bird Food Suet

Once the fat has hardened, remove the suet from the mini bundt pan. You might have to run the pan under some warm water to help loosen the suet from the pan. Make a loop with a length of twine and tie an overhand knot at one end. Insert one end through the hole in the middle of the suet and insert one end of the twine through the opposite loop.


Wild Bird Food Suet Cakes Recipe

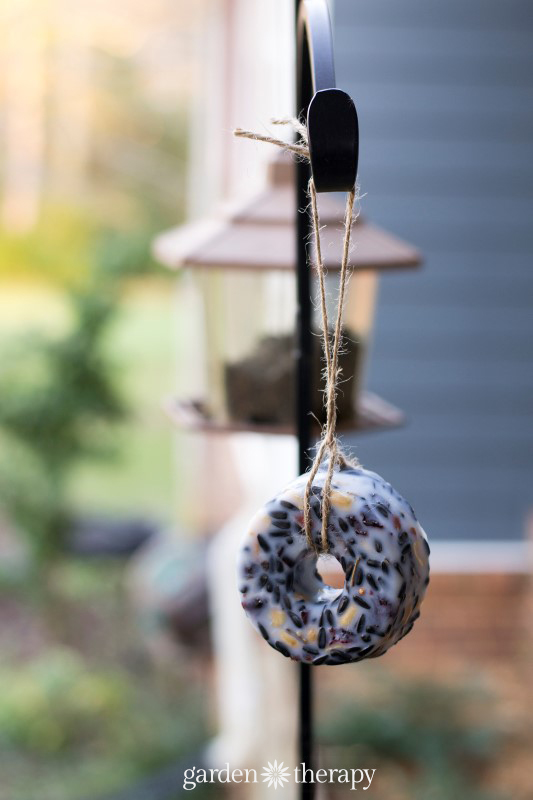
Hang your new suet feeder and wait for some happy birds!


Feeder Hanging Notes


Hang your suet feeder at least 5 feet from the ground and in some shade. The fat will stay solid at room temperature, but in warmer temps and direct sun, it can get soft or go rancid (depending on the fat you used). A great place to hang a suet feeder is in a tree, especially for insect eating birds like woodpeckers. An added benefit for adding a suet feeder to your yard is that the birds that visit your feeder will also reward you in the spring and summer months by eating the insects in your garden. A win, win for all!


You Might Also Like


How to make pine cone bird feeders

Original article and pictures take gardentherapy.ca site

Friday, November 13, 2015

DIY Use-What-You-Have Sparkling Garden Orb

DIY Use-What-You-Have Sparkling Garden Orb

Repurposed Garden Art Idea What is that giant ball of light in the garden? It’s my free version of a lighted grapevine ball.


I also have instructions for making decorative garden balls here: DIY Decorative Garden Ball Tutorial.


You’ve probably seen various orbs made from grapevines, chicken wire, or metal wire covered in outdoor holiday lights. After seeing the high price tags, I decided to make one using stuff I already own.


I always suggest “shopping” at home first, especially if you have any sturdy garden items in winter storage. If they can withstand the cold season, they’re fair game for winter garden art. Here I used metal wall planters.


DIY Use-What-You-Have Sparkling Garden Orb made from metal flower planters

I may receive a commission if you purchase something mentioned in a link on this post for sites including Amazon.com. Other links may go to websites where I have been paid to write a blog or article. See the entire disclosure here.


1. Gather Your Supplies


Some links go to my affiliate account at Amazon.com


Supplies for creating a DIY sparkling garden orb

  • (4) Metal wall planters (the “half circle” type—see the photo below).
    Each one is 1/4 of a sphere. Attach four together and —tada! —you’ve got a nice, big metal sphere.
  • Outdoor holiday lights. You’ll need 1-2 sets for each half of the sphere. The more the merrier. I used (2) 12-foot strings of lights.
  • Plastic cable ties and/or wire (to attach the planters together and secure lights to the planters)
  • Outdoor electrical extension cord (make sure it’s winter-safe and long enough to reach from the power source to the orb).
  • Thick twine (or wire) for hanging and securing the orb
  • Wire snippers

Curved garden planters for a DIY sparkling garden orb
I used cable ties to attach them together but you could also use small pieces of wire or some black duct tape.

Cable ties joining garden containers together for a DIY sparkling garden orb

Detail of lights attached to DIY sparkling garden orb
I attached my lights following the shape of the container, going up and down, working my way around.

Bottom half of a DIY sparkling garden orb
When both sets of containers have lights attached, join them together to form a sphere.

DIY sparkling garden orb on top of arbour
Here it is as the sun is starting to go down.

DIY sparkling garden orb

DIY sparkling garden orb
Just as I was taking the last photo the moon came up over the rooftops. Now I have two beautiful orbs of light.

DIY sparkling garden orb
~Melissa the Empress of Dirt ♛

DIY Use-What-You-Have Sparkling Garden Orb made from metal flower planters

Original article and pictures take empressofdirt.net site

Thursday, November 12, 2015

DIY Tomato Cage Bottle Tree

DIY Tomato Cage Bottle Tree

This tomato cage bottle tree is the story of a project a year in the making.


I started thinking about making this project a year ago.


I bought the supplies for making this project a year ago.


I even blogged about my frustration in not getting to make this project a year ago.


If I knew it was going to be so easy, I would have just made this *$#% project a year ago.


In actuality, it only took about ten minutes to put my bottle tree together.


The hardest part was chugging all that beer


I used a six pack of Bud Light Platinum, which comes in the prettiest shade of blue. When was the last time you said a bottle of beer was pretty?


And two tomato cages. I bought the cheapest ones that Lowes carries. They have three rings on them.


I used them upside down for the project.


I also used a pair of fence pliers to cut the caging. They are like wire cutters, but made for heavier fencing. I would think regular old wire cutters would probably work also.


The first cage on the left was left intact. I just bent the arms on the top of the cage (which is technically the bottom, but the top in this photo) outward a little so the bottles would not stand straight up, but rather lean outward.


The second cage’s top circle was cut off along with about 4 inches of the wire (this will make the bottle holding arms closer to the same length).


I slid cage number one over cage number two, rotated the cages, so the arms would be spaced out equally. Then bent cage number two’s arms out at the same angle as the first cage had been bent.


Put your bottle on the arms and you are good to go.


Unless you have a dog.


Lacey started to take quite an interest in the bottle tree, so I made some little stakes out of the left over pieces from the second tomato cage and poked them in the ground at the bottom of the cages in order to make the tree able to withstand a nosy dog.


Score one for the humans.


The moral of this story is you can either spend a year worrying about a project or just do the stupid thing. It might just turn out looking sort of cool. And blue.


Fun DIY Southern bottle tree made with blue beer bottles - super duper easy to make.

Delivered by FeedBurner


Original article and pictures take www.houseofhawthornes.com site

Wednesday, November 11, 2015

DIY Thrift Shop Bug House

DIY Thrift Shop Bug House
DIY Thrift shop bug house - make your own with a repurposed shelf and natural materials to attract beneficial insects to your garden.

I may receive a commission if you purchase something mentioned in a link on this post for sites including Amazon.com. Other links may go to websites where I have been paid to write a blog or article. See the entire disclosure here.


Keeping it Real


Yes, it would be silly to imply bugs really need a house to make a home, so consider this more a piece of garden art celebrating the beauty of nature rather than a tourism destination for all those little wigglies that bring nature to life.


Bug houses are really popular right now probably because it’s just a fun way to spend time outside, collect natural treasures, and build something with them. While they certainly will attract some insects, I just find them beautiful. Beneficial insects would be a bonus.


Making bug houses would be an enjoyable group project. Whether it’s a garden therapy activity in a hospital setting or an afternoon project for a group of children, it can be organized into stations where everyone has a role to contribute. Tasks could be divided based on interests and physical abilities.


It does get messy, so set up an outdoor work station where no one has to worry about the debris. It will all get cleaned up in the end. Or not.


Bug House Supplies


Some links go to my Amazon affiliate account. As always, I try and find my supplies second-hand at yard sales and thrift shops.


  • I used a house-shaped nicknack shelf as the frame but really, any durable wood frame (at least a few inches deep) will do.
    If you see an intersecting box shelf at the thrift shop, grab it! It would look really cool on a fence.
  • You may need pruners, clippers, or some sort of small saw for thicker pieces.
  • I actually ran the larger branch pieces through the miter saw (so fast and easy!) but just use what you have. Frugal keeps it fun.

Make a Bug House


Like my assistant helping with the photography?


DIY Thrift shop bug house - make your own with a repurposed shelf and natural materials to attract beneficial insects to your garden.

The sections of the house are stuffed with twigs, plant stems, pinecones, seed pods, and any other natural materials you can find.


I keep a yard waste pile in my garden for projects like this. Plus, the birds love shopping there for nesting materials.


It takes a fair amount of these things to fill the house, so don’t be skimpy!


DIY Thrift shop bug house - make your own with a repurposed shelf and natural materials to attract beneficial insects to your garden.

I like putting similar things together, so I sorted my pile by type/colour and set to work breaking everything into 3″ lengths to match the depth of the house.


If you were doing this with a group, you could have these work stations:


  • Hunters and gatherers – to get materials.
  • Sorters – putting like materials together.
  • Choppers – to break everything into same-size pieces.
  • Assemblers – putting the pieces into the frames (houses).

DIY Thrift shop bug house - make your own with a repurposed shelf and natural materials to attract beneficial insects to your garden.

This is definitely a project for nature nuts. Those who are insect-phobic need not apply! As I was breaking up the materials, I found all sorts of interesting insects, nests, and things. And yes, it was a tad ironic that I was dislodging insect habitats so I could build them a house!


DIY Thrift shop bug house - make your own with a repurposed shelf and natural materials to attract beneficial insects to your garden.

Cram everything in quite tightly so it will stay in place as things settle and gradually disintegrate.


DIY Thrift shop bug house - make your own with a repurposed shelf and natural materials to attract beneficial insects to your garden.
I hung mine on the fence—again, regarding it more as a piece of art than a potential home for wild things. Although you never know…

~Melissa the Empress of Dirt ♛


PS: My assistants think you will enjoy this DIY bird and butterfly water feeder. Now, if I could just teach them to do the tidying up…


DIY Thrift shop bug house - make your own with a repurposed shelf and natural materials to attract beneficial insects to your garden.

DIY Thrift shop bug house - make your own with a repurposed shelf and natural materials to attract beneficial insects to your garden.

Original article and pictures take empressofdirt.net site

Monday, November 9, 2015

DIY Terra-Cotta Fountain

DIY Terra-Cotta Fountain

DIY Terra-Cotta Fountain


I’m always telling folks how to jazz up an outdoor room by adding a small water feature. The sound of the water is soothing and can act as a white noise if you happen to live by a noisy highway or in a townhouse complex with neighbors that don’t value your down time as much as you do.


I did this fountain up for a DIY event for the Downtown Langley Summers Series and I have to say that I have thoroughly enjoyed taking my own advice. The water is bubbling away right now as I work on my patio and it sounds wonderful… ahh.


This project was for the set I titled ‘Gotta Terra Cotta’ since these pot’s seem to be trending right now. Here is how you can make one of these for yourself for about $30.


You’ll need a series of stacking pot’s and saucers. The saucers don’t have holes in them so you’ll need to drill them yourself. Don’t freak out… I was SO worried they were going to crack but I followed this advice and made it out in one solid piece.


DIY Terra Cotta Fountain 2

Soak the saucers for about 24 hours before you do this and use a masonry drill bit. Start small and gradually increase the drill bit size so you don’t crack the tray.


DIY Terra Cotta Fountain (1)

Once you have the hole big enough to slide your pump tubing through you can create little ridges around the outer edge for the water to drip through. I just used my Dremel Tool for this, but I found that it really didn’t make much of a difference in the water flow… you could skip this step or make your divots deeper.


I used a 70 GPH pump since it can push water straight up to 2′. There is a smaller one of 50 GPH, but I recommend that you don’t go below 70… it was just enough push to make the water flow consistently for this 18″ high fountain.


DIY Terra Cotta Fountain 1

Plug the bottom pot’s hole with bonding putty and let dry 24 hours. Do this when you soak your saucers then everything will be ready when it’s time to put it together.


Assembly time. Let me first tell you what NOT to do.. I learned this the hard way. Don’t cut your tube until you know where you want it to sit inside the top pot. Test your water flow before you add any pebbles or stones. Once you add those, it’s impossible to keep them from slipping under the pot rims if you need to lift them to do any adjustments.


DIY Terra Cotta Fountain (2)

If your pump doesn’t seem to be flowing, you may need to flick it to remove air bubbles that may get stuck. Also, most of these little pumps (available at garden centers) have a small adjustment knob to control the flow rate. I got this pump from Art’s Nursery here in Langley, BC.


Arts

If everything seems to be flowing well, then place your cool DIY Terra-Cotta Fountain into it’s new home. You won’t want to move it again unless it’s necessary. Once you got it placed and turned on, THEN you add your decorative stone.


I used sea glass that I collect every time I go to the beach. If you somehow managed to remain relatively dry during this entire process… have a beer, you earned it.


If you are soaked from the elbows down with the occasional splash across the shirt, have a beer, you earned it.


This is just one of the dozens of cool outdoor DIY projects I made this season. Click on my Garden Crafts page to see more and if you don’t want to miss any of my gardenista projects… then subscribe!


Subscribe


Original article and pictures take www.sowanddipity.com site

Thursday, November 5, 2015

DIY Succulent Garden Art Ideas

DIY Succulent Garden Art Ideas

Here’s a bunch of ideas for displaying succulents in your garden. From wreaths to tackle boxes to old boots, you name it, succulents can be planted there.


If you want to grow more, see how to propagate succulents.


Succulent Garden Art Project Ideas

I may receive a commission if you purchase something mentioned in a link on this post for sites including Amazon.com. Other links may go to websites where I have been paid to write a blog or article. See the entire disclosure here.


Succulent Bird Cage


Plant a succulent bird cage and more DIY Succulent Garden Ideas

Vintage bird cages make ideal succulent planters, especially the ones with the wider door openings so you can reach in and the plants can spill out. This one was created by Susan StLouis of Goderich, Ontario.


This has detailed instructions on how to turn a birdcage into a hanging garden planter.


Want to make babies? See how to propagate succulents from the ones you have here.


DIY Framed Succulent Wall Planter


DIY Framed Succulent Wall Planter tutorial
You can make this! The complete tutorial from Gardening on a Shoestring is here.

Succulent Wreath


Make a succulent wreath: 9+ DIY Succulent Garden Ideas

How beautiful is this? With a patchwork arrangement of succulents and moss, wreaths like this are gorgeous in the garden.


There’s a few options for assembling succulent wreaths.


Most start with a metal wreath form.


  • Use floral wire or chicken wire to hold everything in place or
  • A leg of pantyhose (yes, you heard me right) threaded onto the wreath form with small cutouts where you want to insert the plants.

As the plants grow, the wreath fills in, becoming gorgeous and lush.


Succulent Pillow


Succulent-pillow

I adore this Succulent pillow by Plantillo on Etsy.


Have a look at the shop to see more options including a giant cacti and more.


Succulent Fairy Garden


Make a succulent fairy garden: 9+ DIY Succulent Garden Ideas

There are lots of small-scale plants that look great in fairy gardens, and succulents like these ones with tiny flower-like buds are a really easy choice. There are lots of fairy garden how-tos and project ideas here.


Succlent Garden Art Projects


Creative succulent projects for your garden
These projects from creative garden bloggers will have you

growing succulents in unexpected and fabulous places.


Succulent Fishing Tackle Box


Plant a succulent fishing tackle box: 9+ DIY Succulent Garden Ideas

Are you on Team Rust or Team Paint? For me, it depends on the item. I noticed this fishing tackle box at a yard sale and knew I had to have it (50 cents). The old paint colour and patina just grabbed me.


When I bought the old, folding stool at another sale, the vendor said, I bet you’ll have that painted before you get home. But nope, I love it’s rusty-peely self just as it is.


Tackle box planter: 9+ DIY succulent garden ideas

The tackle box is the summer home for some of my succulents. I’ll move them to another pot when they come indoors for the winter. Make sure you always use container soil made for succulents (or prepare your own) for healthy, happy plants.


Succulents + Hypertufa Planters = Love Match


How to make hypertufa garden containers

Succulents produce a lot of babies. It’s always good to have containers ready so you can pop them in a new location and give them room to root and grow. See how to make hypertufa containers here.


Succulent Watering Can


Plant a succulent watering can: 9+ DIY Succulent Garden Ideas

Yes, I am a watering can fanatic. Occasionally I get so consumed with planting them, I find myself without a good one for watering the plants!


There’s lots of watering can garden art ideas here.


Succulent Chair Planter


Plant a succulent chair: 9+ DIY Succulent Garden Ideas
I saw this chair on a garden tour. Chicken wire and moss are used to hold the plants in place. You can see more details and ideas here in my

Gallery of Garden Art Chairs.


Succulent Garden Bench


Plant a succulent garden bench: 9+ DIY Succulent Garden Ideas

This photo isn’t the greatest but I wanted to show this idea. This old garden bench is planted the same way the chair (above) is: chicken wire forms the outer support for the moss, soil, and succulents. It’s a fun idea for a rickety old bench.


Succulent Shoes & Boots


Plant a succulent boot: 9+ DIY Succulent Garden Ideas

Plant a succulent boot: 9+ DIY Succulent Garden Ideas

Plant succulent shoes: 9+ DIY Succulent Garden Ideas

I think I see a planted boot or shoe in just about every garden I visit. I’m particularly fond of the ones that use crazy, older shoes.


You can see planted skates plus a whole bunch of creative garden container ideas here.


Outdoor Succulent Plant Shelf


Plant a succulent plant shelf: 9+ DIY Succulent Garden Ideas

Take apart a wood palette or use 2×4 lumber to build it: a DIY outdoor plant shelf like this one can store a lot of plants on a wall.


If you like to keep tropical plants and succulents outdoors in the warmer months, this a a great way to display them plus it’s easy to do all the watering.


Are you ready to make some succulent garden art?


~Melissa the Empress of Dirt ♛


DIY Succulent Garden Art Ideas

Original article and pictures take empressofdirt.net site