Thursday, January 28, 2016

Flower Pot Wreath

Flower Pot Wreath

I did my own version of a flower pot wreath this past weekend! You guys know how much I love all-things terra cotta and with spring just around the corner, I’m in the mood to do some new projects with terra cotta flower pots!


flower pot wreath

For my wreath, I used faux succulents because I knew I wanted to put it in a little nook in the kitchen that doesn’t get a lot of light! But you could just as easily tuck some live succulents into this sweet wreath if you hang it near a window or on a porch!


flower pot wreath

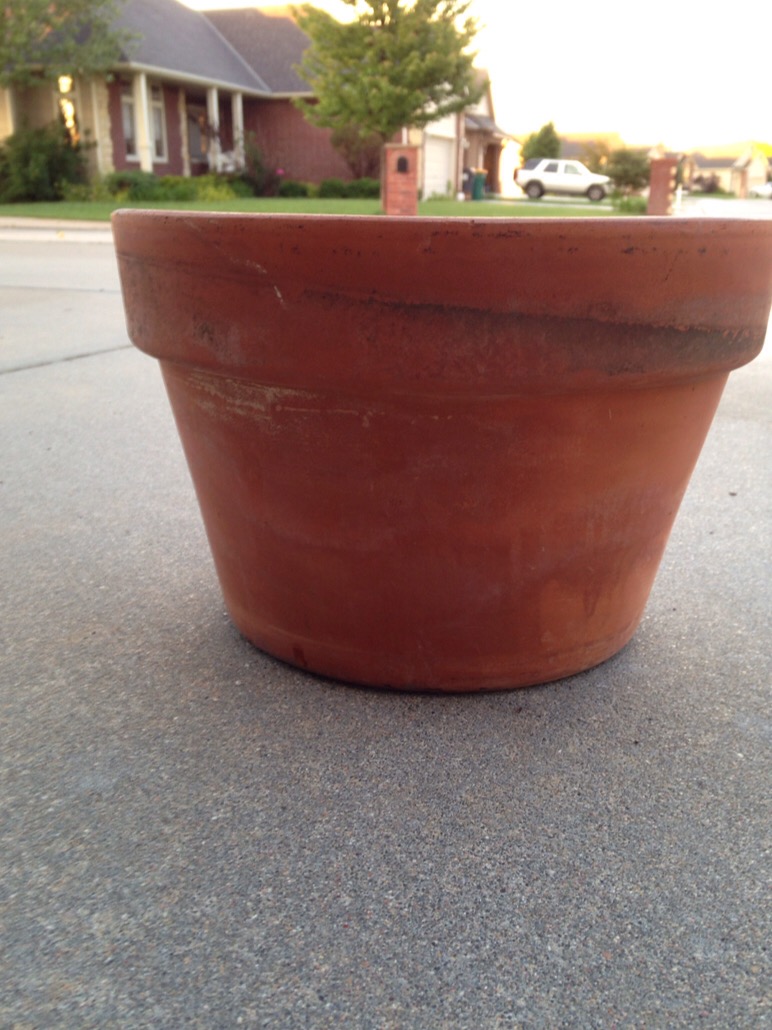
First I started with terra cotta pots that I painted to look aged (I tell you about that HERE)


Flower Pot Wreath

*Grapevine wreath- I used 14″


*four 4″ terra cotta pots


*Sixteen 2″ terra cotta pots (get one or two extra just in case you want to add some!)


*Paint for the adding patina to the pots (I use craft paint in white & green)


*Twine or heavy gage wire (I used both!)


*Moss


*Styrofoam


* Four Faux or real plants (depending on where the wreath will hang!)


*Burlap Ribbon for hanging wreath


I placed the 4 larger pots at the 12-3-6-9 positions on the wreath…wire these on first and place them so they can hold a plant-(in other words…don’t put them upside down!)


Play with the smaller pots to see where you think they look the best! I tried twine & wire to attach the pots to the wreath…both work great! Just feed the wire/twine through the hole in the pot and wrap through the wreath and tie off on the back…


terra cotta wreath 5

terra cotta wreath4

terra cotta wreath6

Glue (with glue gun) Styrofoam into smaller pots that will be filled with moss…


terra cotta wreath7

I added a bit of hot glue to keep the moss in (on the pots that weren’t sitting straight up)


terra cotta wreath 8

Add the faux or the real plants (use Styrofoam & moss with the faux plants & hot glue to keep them in place)


Add a bit of hot glue between pots where they touch to make certain the don’t flop all over the place


terra cotta wreath 9

Ohhhh I love it! Add a bit of burlap ribbon for hanging or a strong wire…


terra cotta wreath 10

My little wreath is bringing a little springtime to a space between m breakfast area and my kitchen…it absolutely makes me happy every time I see it!


terra cotta wreath00

If you make one, I’d love love love to see your take on this! If you can shoot me a photo I’d love to put it in this post!


And for those of you who like your creativity in video form…here’s the video tutorial!


Sending love sweet friends xo


One of my sweet friends made one of these wreaths and I wanted to show it off! (If you make one- I’d love to see a picture…email me! ) xo


009

Original article and pictures take www.allthingsheartandhome.com site

Tuesday, January 26, 2016

Flower Pot Fairy Garden

Flower Pot Fairy Garden

You know how when you’re married, each spouse takes on the duties they are good at / like to do?


Well I do all of the decorating on the inside of the house, and Topher takes care of the landscaping outside of the house.


Yesterday, I decided to shake things up a little bit around here, and I crossed the line in the sand and ventured to outdoor land. Mind you … I didn’t venture further than the front steps, but I do what I can.


I found a big flower pot out in our garage.


For this project, I needed to take a section out of the side of this pot, so I pulled-out my Dremel (loaded with a carbide cutting tip), covered-up with my facemask, and threw on my trusty 3M safety goggles.


Be warned … although the cutting isn’t difficult, terra cotta dust goes everywhere, so I found a place outside where I could work.


When I was finished, I replaced the cutting tip with a grinder tip and smoothed-out some of the sharper edges.


Once I had my section removed, I was ready to fill the pot with soil.


I placed a coffee filter along the bottom of the pot to allow the water to adequately drain without losing any soil, and then I simply added the dirt.


I filled-in my pot with potting soil and found a place for the removed section of terra cotta.


Next, I placed moss all over the surface and around the half-buried section.


I then added a tiny bridge, a little hut and a house, a little door and a couple of little gnomes. I also added in some different colored moss for some more color.


I thought it turned out super cute, and my little Fairy Garden will be there to greet anyone who comes up to the door!


Flower Pot Fairy Garden

Flower Pot Fairy Garden

Original article and pictures take www.restorationredoux.com site

Flower Fairies

Flower Fairies

Want to have some fun with the kids or grandkids or just amuse yourself on a summer day? Make Flower Fairies to leave around gardens for folks to find!


Use a dried poppy seed pod or two and some acorns and fine-tipped permanent pens. Draw little whimsical faces on each one and, then the fun begins. If you also want to have arms for your fairies, a few dried twigs or flower stalks broken into pieces will do the trick.


Place Flower Fairies inside flowers in your own landscape or pop them into blooms found on your walk, in a park or community planting. You don’t need to pick the flowers, just insert fairy head and arms and leave them in place! What a delight for passers-by to spot as they go about their daily errands or exercise!


Having a family gathering? Leave these little wee folks around for a scavenger hunt for the children.


These little Flower Fairies will not harm the plant and are biodegradable, so you can leave them without worries. Enjoy a little fairy fun and brighten someone’s day, including your own!


Flower Fairies http://ourfairfieldhomeandgarden.com/flower-fairies/
Coneflower Fairy

Flower Fairies http://ourfairfieldhomeandgarden.com/flower-fairies/
Coneflower Fairy

Flower Fairies http://ourfairfieldhomeandgarden.com/flower-fairies/
Shasta Daisy Fairy

Flower Fairies http://ourfairfieldhomeandgarden.com/flower-fairies/
Shasta Daisy Fairy

Flower Fairies http://ourfairfieldhomeandgarden.com/flower-fairies/
Lily Fairy

Flower Fairies http://ourfairfieldhomeandgarden.com/flower-fairies/
Pink Phlox Fairy

Flower Fairies http://ourfairfieldhomeandgarden.com/flower-fairies/
Pink Phlox Fairy

Flower Fairies http://ourfairfieldhomeandgarden.com/flower-fairies/
Phlox Fairy

Flower Fairies http://ourfairfieldhomeandgarden.com/flower-fairies/
Asiatic Lily Fairy

Flower Fairies http://ourfairfieldhomeandgarden.com/flower-fairies/
Lacecap Fairy

Flower Fairies http://ourfairfieldhomeandgarden.com/flower-fairies/
Day Lily Fairy

Flower Fairy http://ourfairfieldhomeandgarden.com/flower-fairies/
Day Lily Fairy

Flower Fairies http://ourfairfieldhomeandgarden.com/flower-fairies/
Hydrangea Fairy

Flower Fairies http://ourfairfieldhomeandgarden.com/flower-fairies/
Make Flower Fairies for some whimsical fun!

Original article and pictures take ourfairfieldhomeandgarden.com site

Thursday, January 21, 2016

Flea Market Gardening - Real people, real gardens, real projects! Gardening and garden junk ideas

Flea Market Gardening - Real people, real gardens, real projects! Gardening and garden junk ideas


Festive Ways to Decorate Your Porch for Christmas Ammie Peters designed beautifully festive decorations for he front and side porches and all her ideas are…


Original article and pictures take www.fleamarketgardening.org site

Wednesday, January 20, 2016

Five Essential Rules of Flower Arranging

Five Essential Rules of Flower Arranging

Funny, despite being a former prosecutor, I am not really one for rules per se.


But sometimes the “rules” can make things much easier.


There are some rules for good reason after all.


This is the case with flower arranging, or taken very seriously, floral design.


Simply following my five essential rules of flower arranging will produce gorgeous arrangements every time.


I guarantee it.


essential rules of flower arranging Rules of floral design http://mysoulfulhome.com

Five Essential Rules of Flower Arranging


Want to create stunning arrangements for any & all occasions and for SOOOO much less than you would pay a florist?


Ok, get your clippers & meet me at the table…


Flower arranging http://mysoulfulhome.com

You’ll just need a few things to arrange flowers like a pro every time.


  • flowers
  • container
  • ( told you this would be easy! )
  • clippers
  • serrated knife to cut the foam to fit container
  • floral picks with wire ( optional, to sturdy weak stems )

Floral design supplies http://mysoulfulhome.com

Ok, here we go ~ ready for my 5 rules of floral design?


  • Pick one WOW flower ~ the $$ bloom, the center of attention

  • Vary the texture leaves, petals, shapes, flat, lacy etc

  • Pick flowers of varied sizesWOW flower biggest, medium and small supporting players

  • Create depth ~ by pushing some flowers further into the foam, others seem to spring out of it ~ deep & dimensional

Essential rules of flower arranging Blue and white lacey arrangement http://mysoulfulhome.com

I made six arrangements and nine nosegays, including foam & containers, for under $100 for an event last weekend.


White peony blue hydrangea centerpiece http://mysoulfulhome.com

If my volunteer organization had purchased these at a florist they would have been about $50 each for the centerpieces & $20 each for the nosegays. That is $480 conservatively.


Saved $$ and I had a grand time making them. Here are the centerpieces ready to go into my trunk for delivery.


Blue & white centerpieces http://mysoulfulhome.com

The white peonies were my WOW flower, the hydrangea the theme of the event color.


White peonies http://mysoulfulhome.com

Each bloom was anchored in Oasis foam in a $.99 container


The Lady’s Mantle, chartreuse filler & pale yellow button flowers worked for texture. Pushed in here & pulled out there create they also created depth.


essential rules of flower arranging Loose blue and white floral arrangement http://mysoulfulhome.com

I am partial to loose arrangements, but loose should not be construed as tossed together.


Blue floral centerpiece http://mysoulfulhome.com

Following my 5 essential rules of flower arranging let’s you get the lovely loose look ~ by no accident.


And because it is no accident, you can replicate it every time with all different blooms.


You know the rules – go create something beautiful!


And…if you liked this post, I bet you will love my book! My Soulful Home ~ a year in flowers. Get it here.


My Soulful Home a year in flowers book http://mysoulfulhome.com

** Kelly **


Original article and pictures take mysoulfulhome.com site

Monday, January 18, 2016

Find Peace of Mind in a Mini Succulent Zen Garden

Find Peace of Mind in a Mini Succulent Zen Garden

Tap into your inner bliss and capture the intimate essence of nature by creating your very own miniature succulent zen garden. One of my resolutions for this year has been to make more time for self-love and self-care. So far, I’ve fallen in love with my home yoga practice, enjoyed long soaks in a hot bath, and have found myself eager to reconnect with nature through gardening.


How to Make a Therapeutic Succulent Zen Garden

Gardening is something that can be done anytime of year, no matter where you live! I don’t mean digging holes in the snow to plant lettuce, but instead looking at indoor plant projects that can be done no matter what the weather is like. As I looked out my window to see the sun shining, I got the urge to get in some gardening. But then by the time I got my boots on to play outside, the wind was biting and the rain was pouring. Ah, the Pacific Northwest is so unpredictable. To avoid getting drenched outside, I decided to work on a simple gardening project indoors while watching the crazy weather from my living room window.


I remember my mom having a desktop zen garden when I was little and loved playing with the tiny rake in the sand. With that in mind, I gathered up a few supplies and made my very own succulent zen garden that feeds my need for nature and tranquility, along with a healthy dose of nostalgia.


Materials:


  • Shallow, decorative bowl
  • Small succulent
  • Sand (2 colors)
  • Small paper cup
  • Small rocks (for decoration)
  • Chopstick or other ‘drawing’ tool

Succulent Zen Garden Step (1)

Make it!


Choose an indoor succulent for this project that will grow slowly and maintain a tidy shape. Haworthia, Gasteraloes, and Crassula, do well, as will a cactus. On the other hand, rosette-shaped succulents like Aeonium and Echeveria will quickly grow tall and spindly trying to get more sun. Learn more about growing and caring for succulents in the Essential Guide to Succulents.


Transfer your small succulent plant to a paper cup. I had to trim my cup to be slightly shorter so that the plant wouldn’t stick out too much from where I wanted to place it in the bowl.


Succulent Zen Garden Step (2)

Add some sand to the bottom of the bowl and nestle your plant into place.


Succulent Zen Garden Step (3)

Then fill the bowl up with sand.


Succulent Zen Garden Step (4)

Once the bowl is full, you can then choose the second color sand to fill in around your plant. I personally love the look of the black and white sand I chose to use and like the moon shape it created when I added the white sand around the succulent only.


Succulent Zen Garden Step (5)

Add a few natural rocks for decoration around your succulent and then use a chopstick or other ‘drawing’ tool to doodle a design into the sand.


DIT Succulent Zen Garden

Ta da!


Succulent Zen Garden Step (6)

Much like coloring, I find drawing simple designs in the sand to be quite a calming activity and I can now look forward to enjoying my miniature succulent zen garden every day!


Make a calming succulent zen garden

See more modern indoor plant projects you can make all year!


Indoor Garden Projects for Modern Day Decor

Save


Original article and pictures take gardentherapy.ca site

Friday, January 15, 2016

Featured Collections

Featured Collections

About Conde Nast


In many ways, a time capsule of the twentieth century, the Condé Nast Store offers a gateway into collecting images that are at once timeless yet modern. Prints from legends of the photographic medium, including Edward Steichen, Cecil Beaton and Horst P. Horst, are available along with an ever-expanding list of contemporary photographers working right now and offering prints for the very first time exclusively through this collection.


If you are interested in obtaining the rights to use any of the Condé Nast images featured on the site for your own projects, please email image_licensing@condenast.com or call 212-286-4408 and a member of the Condé Nast team will help you find the perfect image from its vast archive of nearly 8 million photos, cartoons, and illustrations.


Original article and pictures take condenaststore.com site

Thursday, January 14, 2016

Faux Vintage Crate Signs

Faux Vintage Crate Signs

Faux Vintage Crate Signs


I love vintage seed packet art work.

Just Google ‘vintage seed packet art’ and you will get an eyeful of colorful and fun images.

I can’t really explain why I enjoy it so much…

but it just might be because it combines two of my favorite activities…

Gardening and Painting so building these Faux Vintage Crate signs was pure joy.


Vintage Crate Seed Packet Sign Art, FlowerPatchFarmhouse.com

It took me a while to get these done, much longer than I really wanted…..

not because they were hard, not at all, it is just that life happens.


First I am going to share how I built the faux crate type surface.

I am not sure what to call them.

They are supposed to mimic the ends of a wood crate.

So here goes.

First cut your lumber to size.

I used 1 x 6’s and 1 x 4’s in pine.

I cut them to 18 1/4 inches.

I chose that number as I thought that was what the dimension of the boards stacked together would equal but once I got them all attached it only came to a wee bit under 18″, I was going for a square but since this is not rocket science or brain surgery a bit off is just fine by me.

I started the top with a 1 x 4 then used 2 -1 x 6’s , then the last is a 1 x 4.

clear as mud?— thank goodness for photos

I used 1 x 2 furring strips to make the frame and cut 2 the same dimension as the boards combined height which ended up being just a hair shorter than 18 inches.


Vintage seed packet crate sign art, FlowerPatchFarmhouse.com (1 of 10)

I applied a good amount of wood glue to the unstained back side of the furring strips.

Oh, did I fail to mention I stained the wood?

I stained the boards with MinWax Dark Walnut stain before I cut them.


Vintage seed packet crate sign art, FlowerPatchFarmhouse.com (3 of 10)

I used a well worn old paint brush to apply the glue.

Be careful not to get too much on it, you really don’t want the glue squishing out when you screw the furring strip to the boards.

Once you get the furring strip all lined up on the edge of your boards, then screw it down.

I used 1 1/4″ screws in black so they would be dark like the wood.

I spaced them so they would fall close to the center of the boards underneath.


Vintage seed packet crate sign art, FlowerPatchFarmhouse.com (4 of 10)

Do this on both sides of the sign.

Now measure the distance between the 1 x 2 strips already screwed on.

Do this at both the top and the bottom.

The dimension can be different and since it is a snug fit you need to get it right.

The top of mine was just a 1/16 of an inch narrower than the bottom.

Cut the next two top furring strips to fit your dimensions.


Vintage seed packet crate sign art, FlowerPatchFarmhouse.com (8 of 10)

Once you have applied the glue as before then screw them on.

Keep checking that you are lined up with the edges of the boards beneath.

One thing I failed to do was stain the ends of the cut boards before assembling the crate sign.

I will be sure to do so the next time around.

But they were easy enough to do later.


Vintage seed packet crate sign art, FlowerPatchFarmhouse.com (9 of 10)

Clean up any glue that oozes out before it dries.

And before you know it you have one of these..


Vintage seed packet crate sign art, FlowerPatchFarmhouse.com (10 of 10)

It is all ready to paint on your design.

I will post that next time so come on back!

Just in case you want to Pin this project, here is a nice sized image.


Vintage Crate Seed Packet Signs, FlowerPatchFarmhouse.com

click here to see how to paint the radish and carrot


Faux vintage crate art DIY instructions, pattern to paint them in link, FlowerPatchFarmhouse.com

You May Also Like


Learn to Paint Sunflowers @ FlowerPatchFarmhouse.com
Learn to Paint Sunflowers

DIY Potting Bench
DIY Potting Bench

Original article and pictures take www.flowerpatchfarmhouse.com site