Video Tutorials on making Decorative Trugs from Pallet Wood
I’m especially pleased to let you know that I have not one but two new videos up on my YouTube Channel today! The first video shows you how to make the trugs and the second one details how to convert one into a planter.
Last week I shared a blog tutorial on how to create wooden trugs using pallet wood. I think that with these types of diy projects, it’s sometimes easier to see how it’s made rather than following still images and descriptions. Hopefully the video instructions are helpful to those who prefer seeing the trugs made in ‘real life’. Plus you get to see and hear me! Wave hello
The tutorial shows you how to reclaim the wood from a single wooden pallet and use it to create not one, but two trugs. I’m using one of mine as a planter and the other has a home on my table at the farmers market. It’s perfect for displaying my handmade and natural soaps.
You can view the videos by clicking the images above or the links below. Please also subscribe to my YouTube channel to get the latest on my future videos!
Original article and pictures take lovelygreens.com site
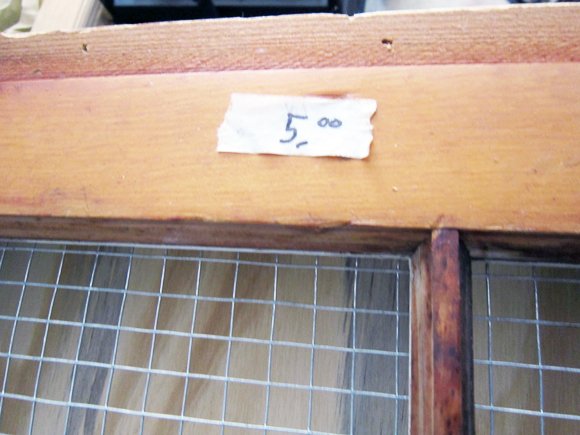
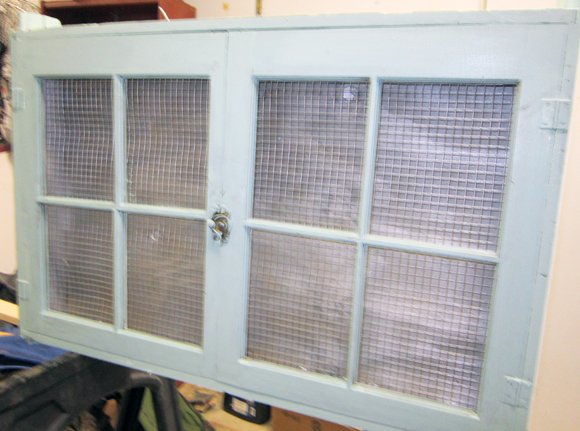
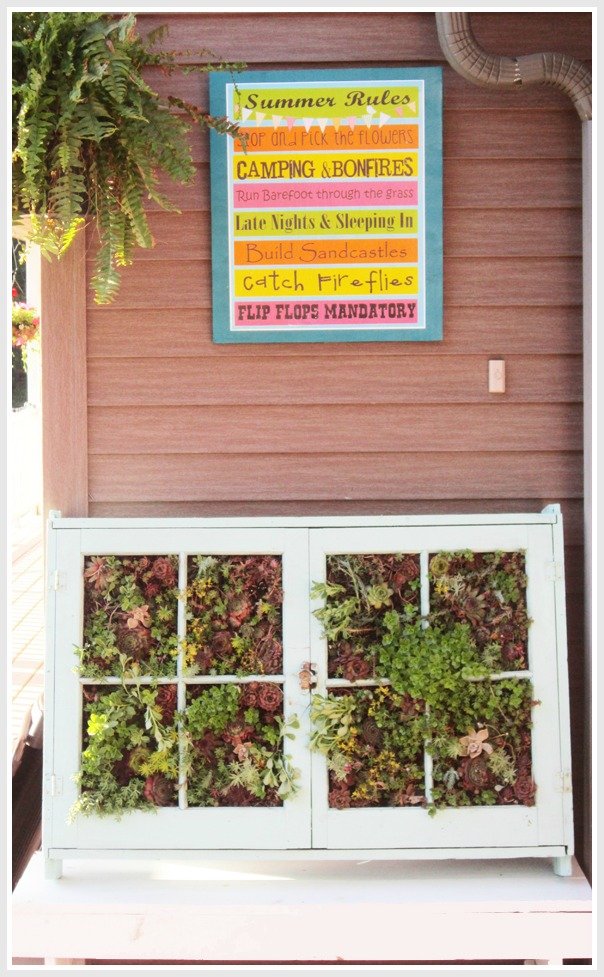
All over Pinterest are examples of vertical succulent gardening. Check out my Gardening/Outdoor board for some really unique ideas. I saw one that used an old window frame. Most of them used picture frames, but I had had this window frame in my garage for a couple years that I bought for 5.00 and I knew it would be perfect for this project.
I bought some hardware cloth at Home Depot. I know Lowe’s sells it as well. It comes packaged like this and is found in the fencing department. It is a 3’x5′ piece for $12.00. I have more than half of it left if I want to do any other ones. They did sell it in smaller amounts.
source
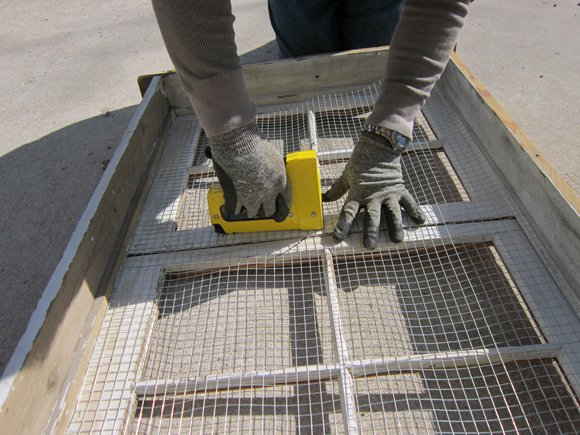
We laid it on the window frame and stapled one side down and then cut the other side.
We then used a staple gun to staple the cloth (not sure why they call it cloth when it’s clearly wire) to the inside of the window frame.
We took a leftover piece of wainscoting from our banquette seating project and cut it to fit the window frame and then nailed it to the frame.
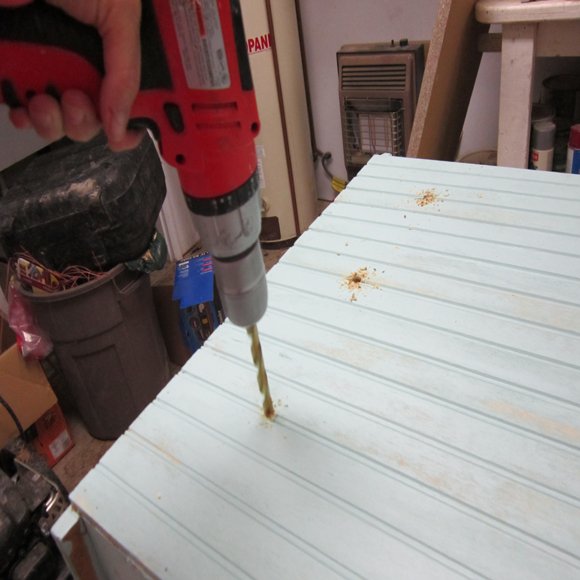
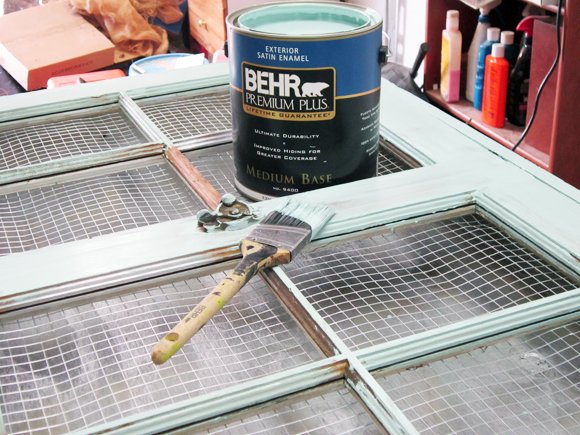
We drilled some holes in the back for drainage. Next, I took it to the barn to paint. I wanted it shabby so put a light coat of paint on it.
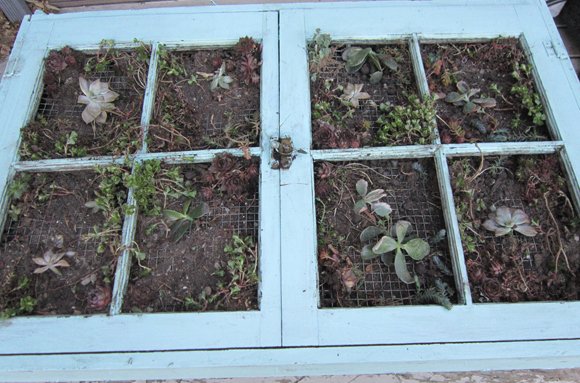
Add the dirt. Caution, don’t pour too much dirt on the hardware cloth at one time or it will pull the staples out. This happened to me and I had to get a pair of scissors to slip in a hole and hold it up while smoothing the dirt in the holes. It will save you a lot of work doing it slowly. The size of my window frame took almost 2 bags of compost.
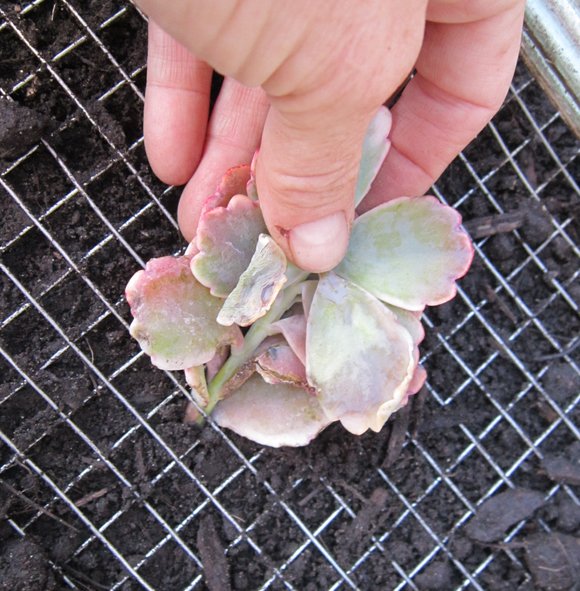
Next, I went on a succulent hunt around my yard. To do this project at this size would cost a lot if you had to buy your succulents. One succulent at Home Depot was $2.86. We have 8 large rock garden walls that have lots of different varieties of succulents that I pulled some plants from. My mother also sent me home with some starts of hers on our recent trip to Florida. My suggestion to get succulents for free or inexpensively is to post an ad on your local freecycle asking for some. I did this last year for perennial starts and received several responses. You could also hit up your local library plant sales or plant swaps. Or even post an ad on Craig’s list. Anyway, you start placing your succulents into the small squares. I used a pair of scissors to poke the plants into the hole if they were too big to add using my fingers.
The window frame has to lay flat approximately 4 weeks for the succulents to root. Once they have rooted you can stand it up. By Memorial Day weekend I should be able to show a picture of it up and hopefully spreading. One great thing about succulents are they grow in any kind of dirt, they spread pretty quickly and don’t require a lot of water. Happy Planting!!
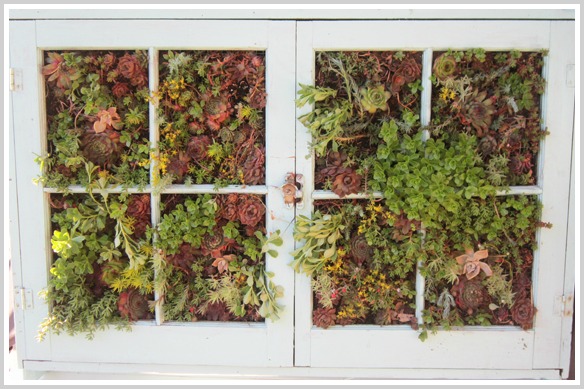
Here is my garden after 8 weeks:
For a tutorial on the simple DIY bench that holds my vertical garden, you can go
[clickToTweet tweet=”Use old shutters to add interest to your garden – hang them from your fence and plant with clematis or climbing roses” quote=”Use old shutters to add interest to your garden.”] Old shutters can be seen being used both indoors and out right now. We have a bunch of old shutters from our rental property that weren’t being used.
shutter privacy screen
To create a privacy screen, I secured the shutters together with old hinges that I found in my stash. And I hung a bottle secured with wire from each panel. In the photo above, I quickly placed some tulips from the garden. It worked really well to give us some privacy from our neighbours as are yards are only divided by a chain link fence. But over time, they started to wear out and the hinges became unhinged (sorry for the pun).
butterfly bush, heliopsis
The new fence bordering the back of the property is one long line of boring wood. We took the three sets of shutters that were originally the privacy screen and attached them individually to the fence panels. This adds a bit of whimsy to my secret garden.
old shutters in the garden
If you wanted, you could repaint the shutters to add some extra colour – I see a bright blue inspired by Greek roofs. We left ours the original green to set off the plants growing in front like the Tiger Eye sumac….
shutters in the garden Original article and pictures take www.newhousenewhomenewlife.com site
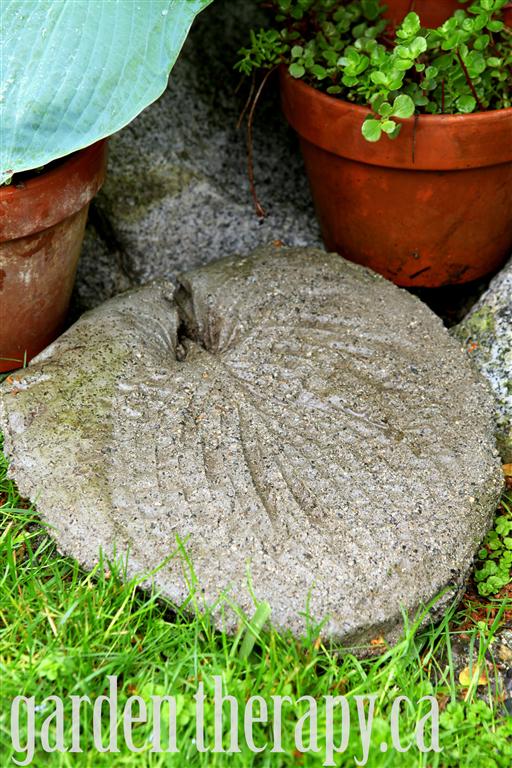
Using Large Leaves to Cast Concrete Stepping Stones
Using large leaves from your garden to cast concrete is a fun and simple project that will inexpensively create lots of stepping stones. Imagine all the secret pathways you could create!
Hosta Leaf Concrete Stepping Stone DIY (via Garden Therapy) #garden
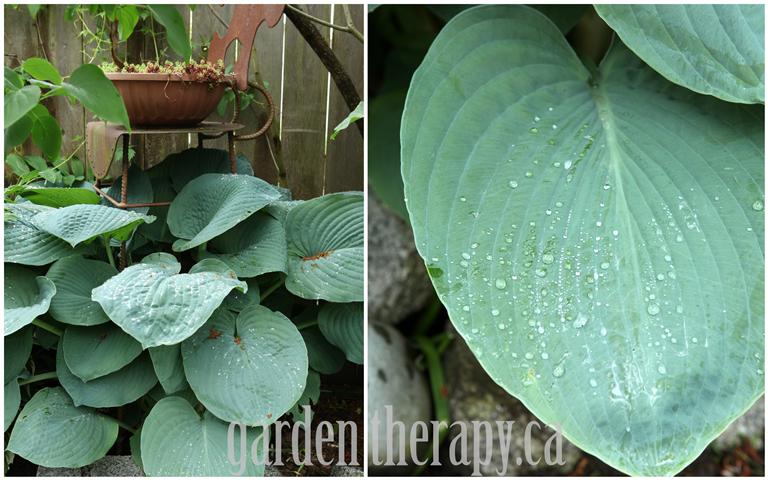
Gorgeous blue big leaf hosta and a rusty puzzle stool (via Garden Therapy)
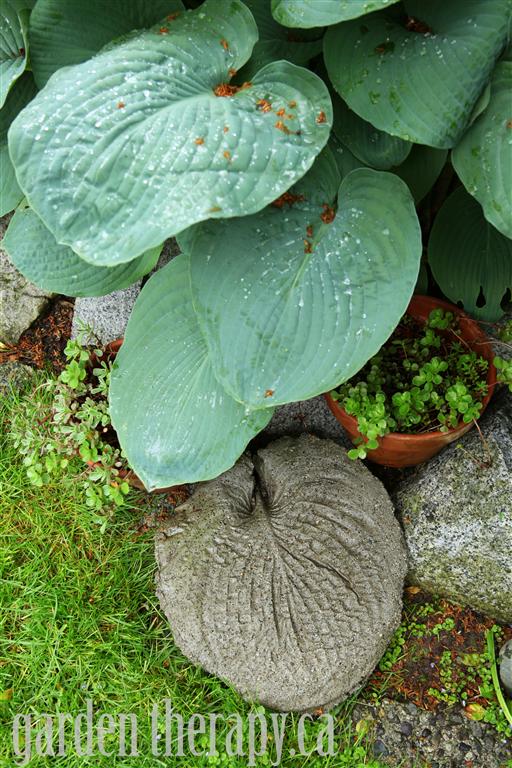
The Hosta is back in full glory and the lone stepping stone surely need a few companions. I’m really happy with how they turned out.
Garden Stepping Stones Molded from Hosta Leaf (Tutorial via Garden Therapy) #garden
Materials:
dry concrete
wheelbarrow or large bucket
water source (hose, watering can)
tarp
vegetable oil or cooking spray
large leaves (hosta, rhubarb, gunnera, etc)
rubber gloves
Directions:
1. Begin by gathering large leaves from around the garden. Choose firm leaves without tears or holes.
2. Protect hands with rubber gloves and mix concrete according to instructions. Choose a lightweight concrete mix (less gravel) for a smoother finished product; choose a heavier-weight concrete mix (more gravel) if the stones will be in high traffic areas. Consistency should be on the drier, firmer side. Add more dry mix if it is too runny.
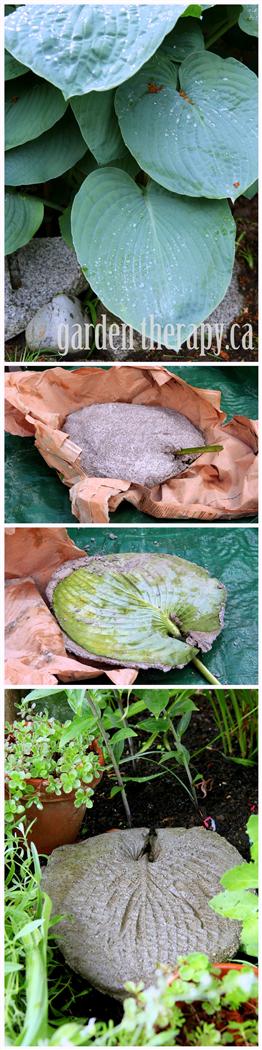
3. Working on the tarp or some plastic bags, spray the front of the leaf thoroughly with cooking spray or brush with oil.
How to Make a Large Leaf Imprint Garden Stepping Stone (full instructions via Garden Therapy)
4. Mound concrete onto the leaf and pat it all around to compress the concrete and remove air bubbles.
5. Allow to dry/cure according to concrete instructions.
6. When completely hardened, peel off the leaf and use a chisel / hammer to remove any wonky bits from the edges.
Garden Path Stepping Stones made from Large Hosta Leaf (via Garden Therapy) #garden
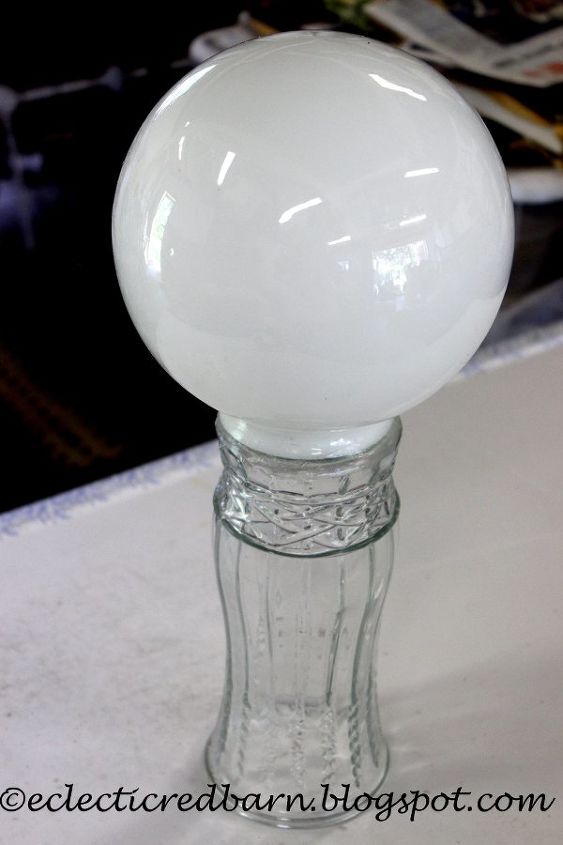
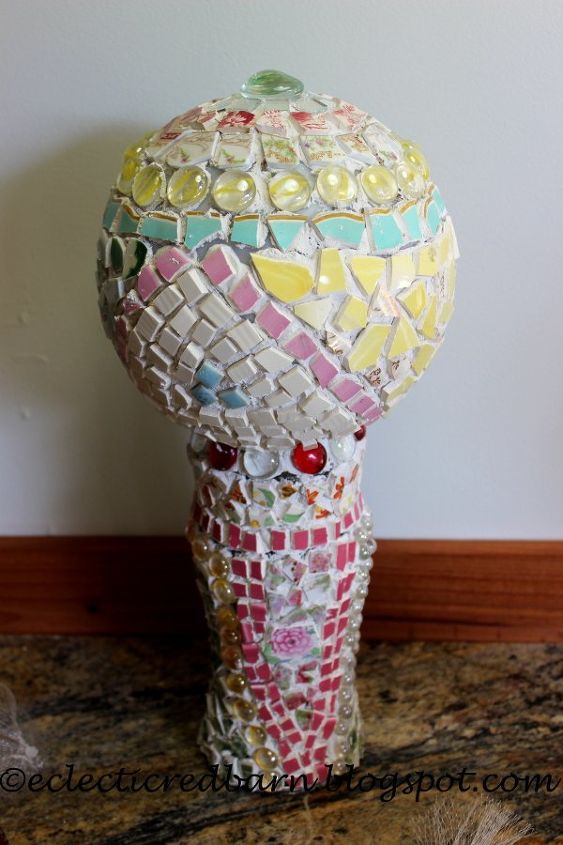
Using a Vase and a Globe for Decorative Garden Art
What to do with all of those vases that seem to multiple under the sink? You can't get rid of them, no one wants them. So why not make something using them?
Step 1: Glue vase to a globe. Use a weather proof glue since it will be outside. If you don't have any vases, you can usually find them for around 25 cents at yard sales. Globes are a little harder to find, but you can get them for around $1. You might even find something else that would work as a top if you can't find a globe.
Step 2: I tried many products to use on my piece. When I made my globe shades, I had problems with the stones sliding down with the glue I used. This glue need to be clear so light would shine through. You can see this project here. ( http://eclecticredbarn.blogspot.com/2015/06/globe-light-as-solar-light-cover.html)
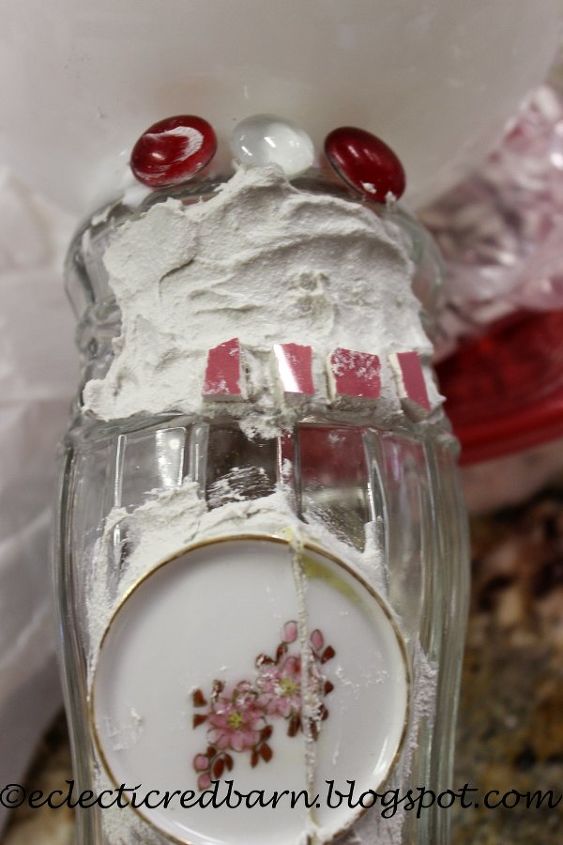
The product I decided to use was Thin set Mortar. You can mix the amount you need and it holds your stones or glass almost immediately. Also, if you have some thinner pieces, you can make them all the same height by adding more thin set.
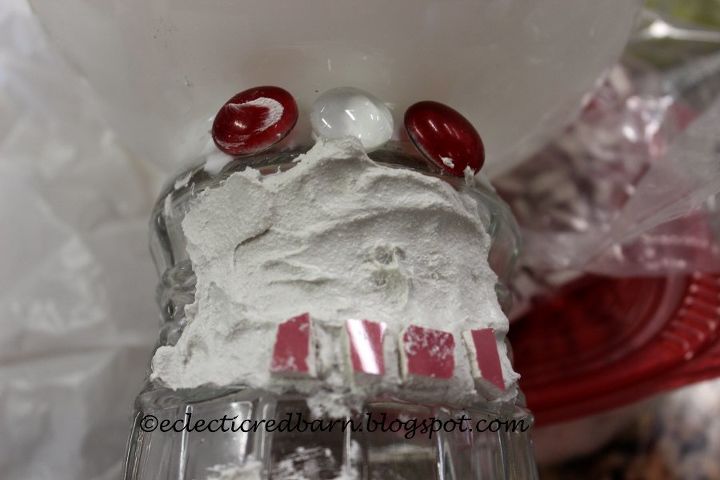
Step 3: In the picture, I am adding pieces to the Thin set and it holds so I can keep adding. In the picture above, I added a small broken dish to the vase. Grooves on the vase don't affect the outcome.
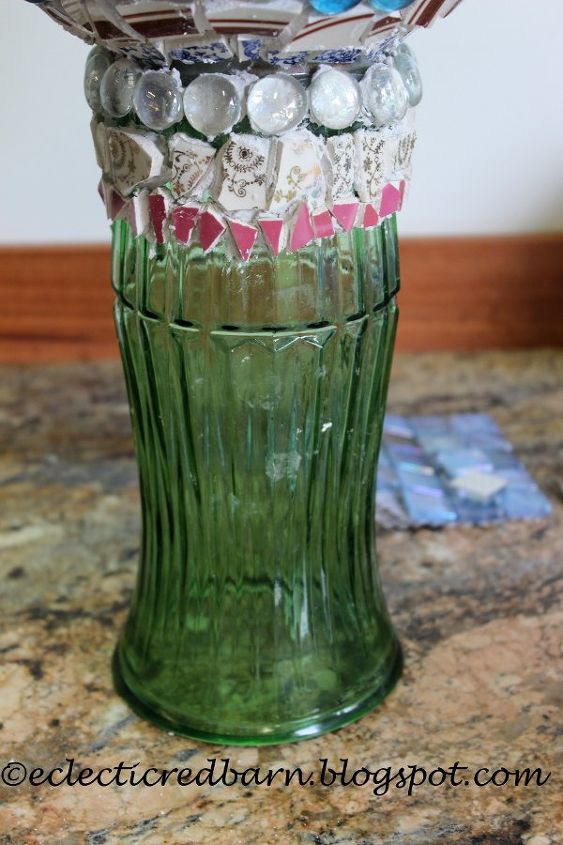
Step 4: Here is another vase that I am working on. This one is green, but you won't see the color.
I did not complete each one at one setting, because of other commitments, but you could have.
Step 5: Once all of the pieces have been adhered, let it dry.
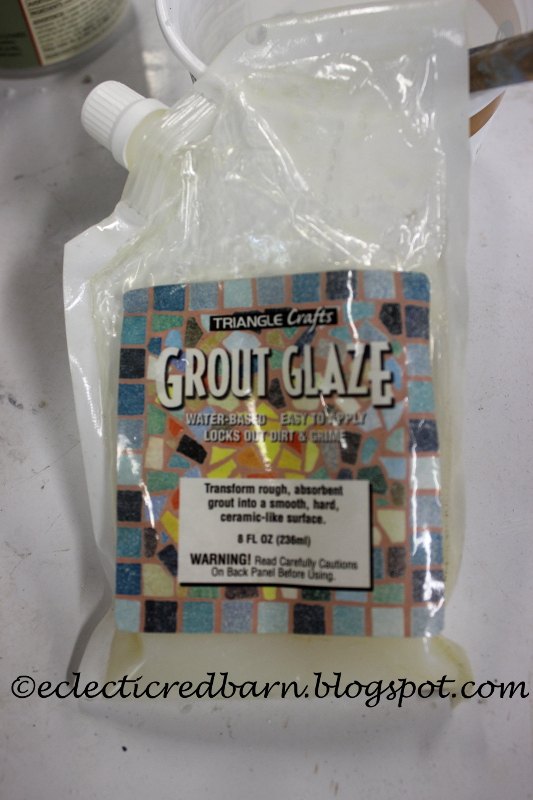
Once it is dry, you will need to grout the entire piece. You can purchase grout at any craft stores. They carry small packages. If you will be doing many projects, then you may want to purchase grout from Home Depot or Lowe's in larger boxes.
For some reason, I don't have pictures of them grouted. Here is a bowling ball I grouted however. The process is the same.
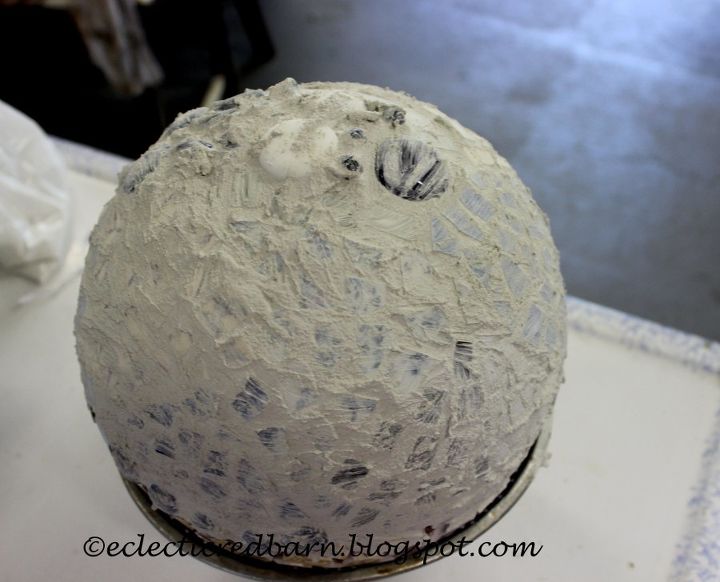
Step 6: Mix the grout according to the package directions. Smear it all over the piece. Make sure that you get into all of the crevasses. Don't worry about it getting on the stones and plate pieces, because it will wipe off.
Let it dry. Using a wet sponge, begin wiping off the grout. Keep wiping until it comes clean.
Step 7: Once it is cleaned, I usually I wait a little while and then use a towel or rag to shine it up.
Step 8: For the last step, you need to seal it since it will be outside.
I used this particular grout sealer. You can find others at your craft store.
I like to pour a small amount into a small dish and then use a small brush to allpy it all over the piece. It will dry hard and shinny.
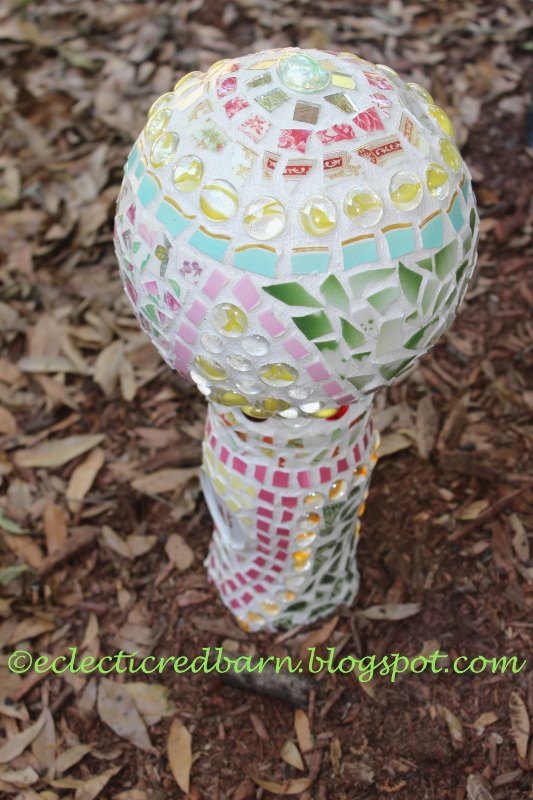
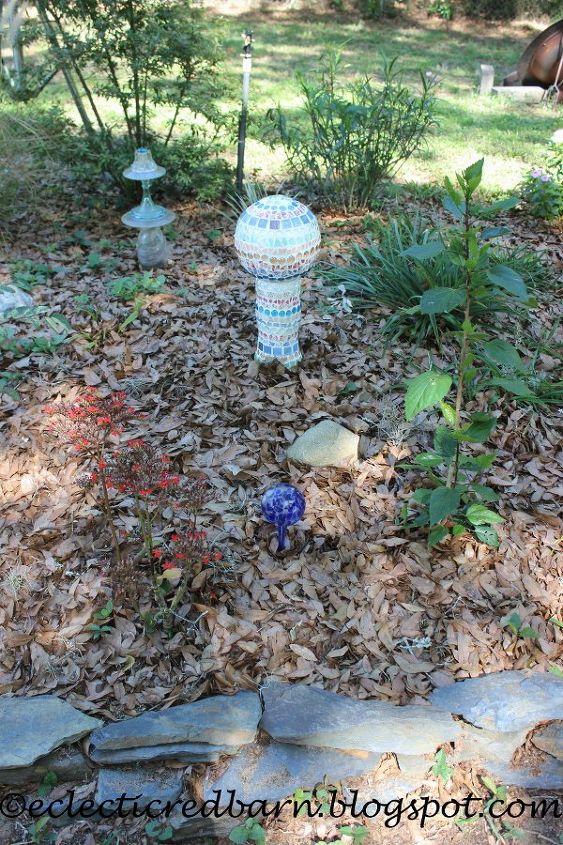
Step 9: Place it in your garden. I used an old wooden handle to hold mine. I pounded it in the ground and then placed the vase over it.
I used two patterns - one was creating circles around the piece the other is a random pattern design.
Being able to monitor our follower growth in so much detail over time has been really valuable to our Instagram strategy.
Iconosquare is great! I love the feature to be able to see who unfollowed you the most, it's the most useful for me. I also really love the weekly & monthly emails/exports.
This is the best analytic tool and engagement software for social media. I enjoy the creative and fun aspect of Instagram and Iconosquare support makes it even more fun!
It is a really friendly in using it and it gives so many information that we can not get from Instagram! :) Love it!
I've grown my account by 3000% in the last year and that's only with using Iconosquare about 5 minutes a day, 3 times a week!
This tool is simply the best on the market. Our favorite features are the Comment Tracker, monthly reports and the list of the biggest profiles that are following us.
Instagram is a weird little tool, and Iconosquare has found a good way to work around the edges of this app, poking in where possible to get the available data.
I use Iconosquare to manage my Instagram account and especially the comment tracker feature. By making it easier to being engaged with my followers, that in turn has helped grow my account.
This is a great tool that you can connect with followers and see your statistics. For those who are trying to get a better idea of their Instagram account, Iconosquare is great.
It's great way of tracking my contents and learning how and when to use Instagram for my business. I love it!
As seen on...
Available on your smartphone.All the power of Iconosquare in your pocket.
Original article and pictures take d2aj393r952jgv.cloudfront.net site
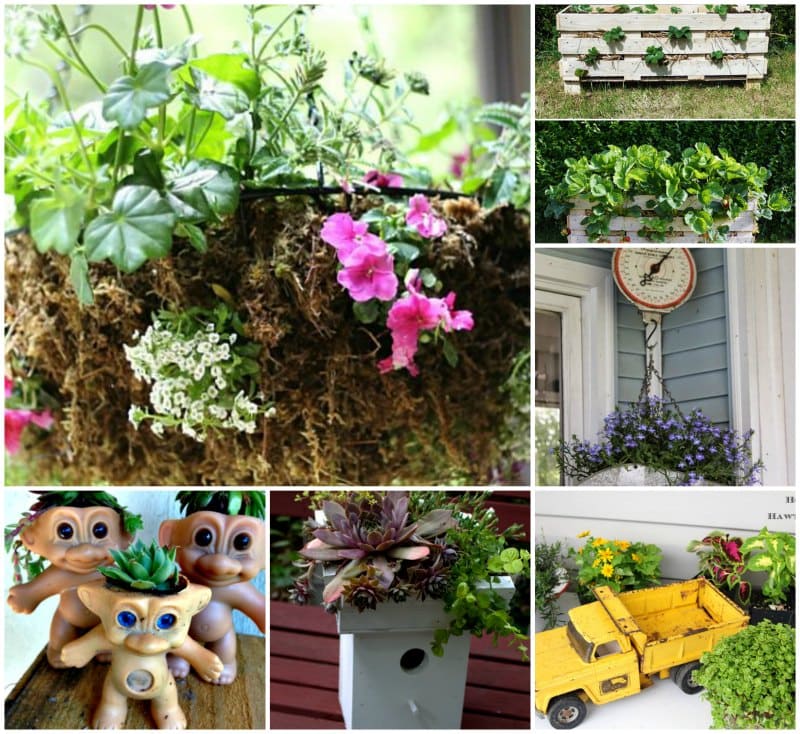
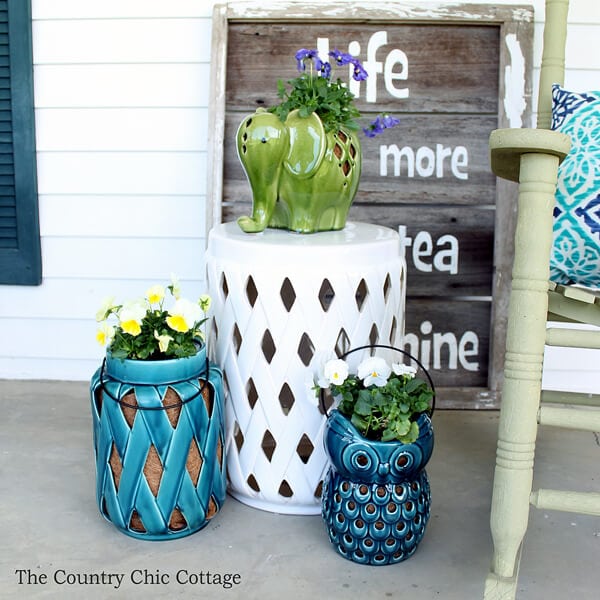
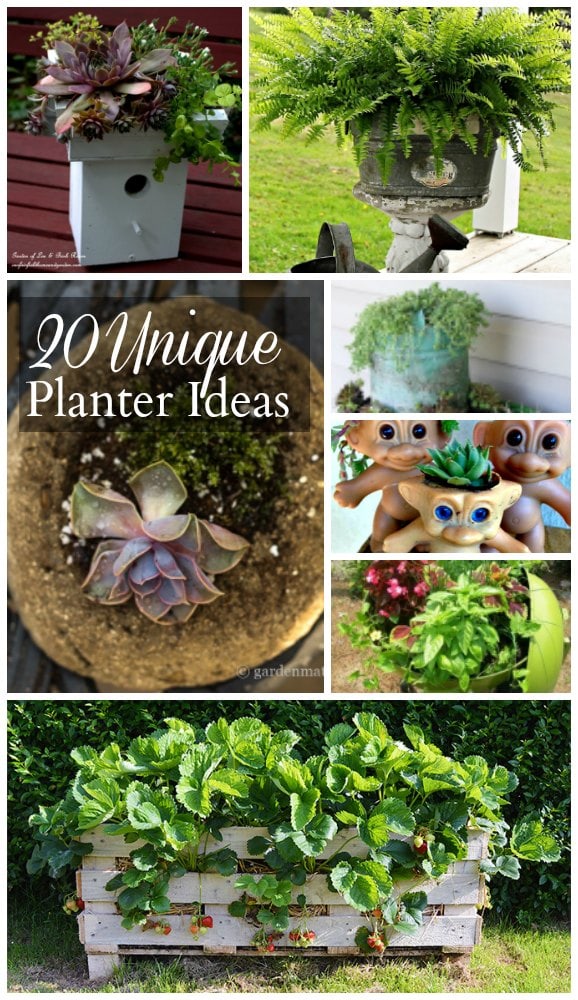
I’ve rounded up several unique planter ideas to inspire you this season. There are so many, from fun and whimsical, to fancy and practical.
Rule of thumb: If it holds soil, and you can put a hole in it, then you can plant in it.
These out of the norm planters, add tons of character and whimsy to your garden, and most are very affordable, if not free. Many are repurposed items, that you probably have in your basement, shed or garage. Others are things you can put on your list, for the next time you are out antiquing, or checking out the flea market and local garage sales.