Friday, June 30, 2017

Summer Garden Tour

Summer Garden Tour

Hi Friends! Here it is already August and I haven’t shown you much of our garden yet so I thought I’d take you on a summer garden tour today.


summer vegetable garden tour | Cottage at the Crossroads

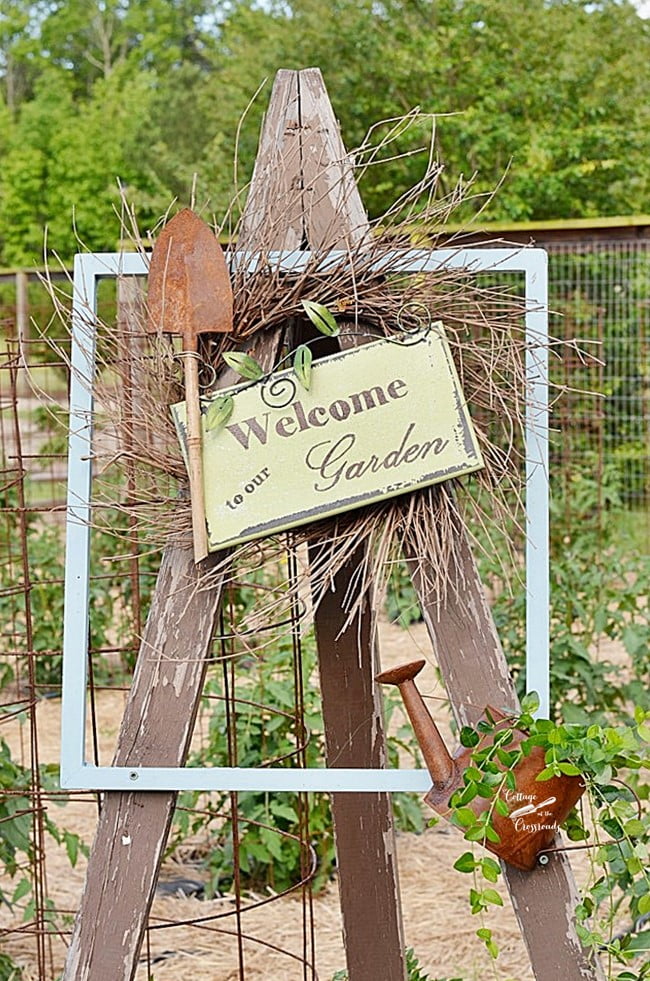
Welcome to our vegetable garden! This sign is actually near the entrance and greets anyone who wants a little look-see at what we’re growing. The old wooden easel is one that we found at the auction several years ago, and we’ve used it in our garden ever since.


Welcome to our garden sign

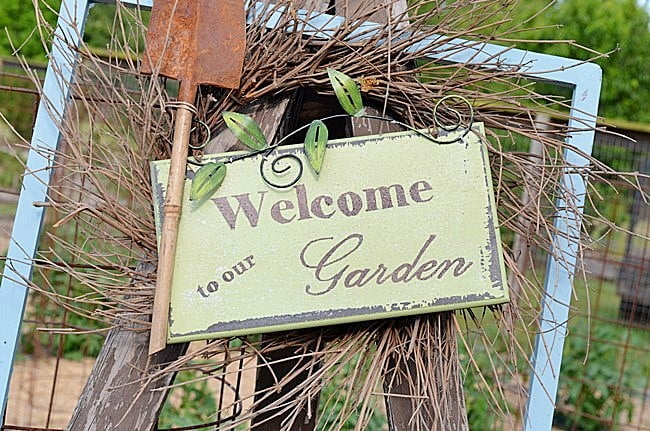
Earlier this year, I put together this little display on it using an old twig wreath, a sign that I already had but repainted, and a miniature shovel that I took off another wreath.


miniature watering can with a plant

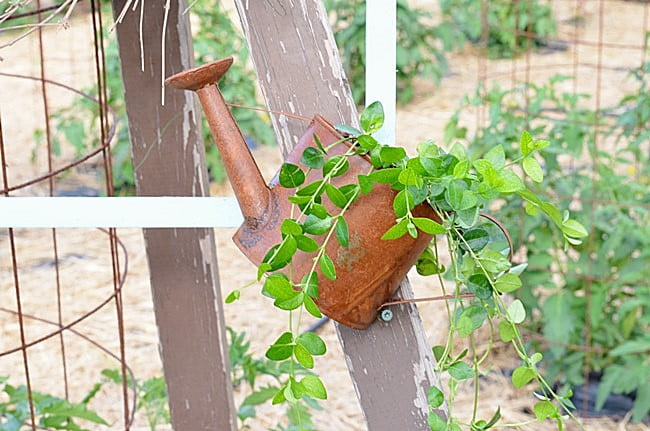
I tucked some vinca into this little watering can that came off the old wreath, too. In June, a local garden club took a real garden tour!


Lydia Garden Club

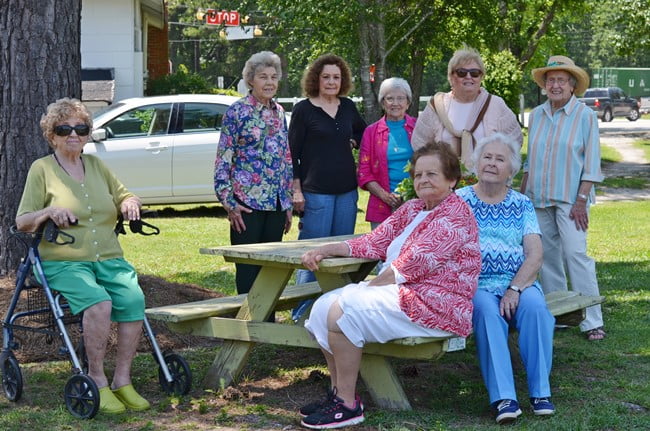
Here are some of the members of the Lydia garden club along with my mom who is seated on the left. I think they had a great time touring the garden and having a little strawberry lemonade and lemon oreos for refreshment. (Have you tried those yet? They are delicious!) Luckily, it had not turned hot yet even though it was June, but let me tell you, it has been HOT, HOT, HOT since then!


Purple Cherokee heirloom tomatoes

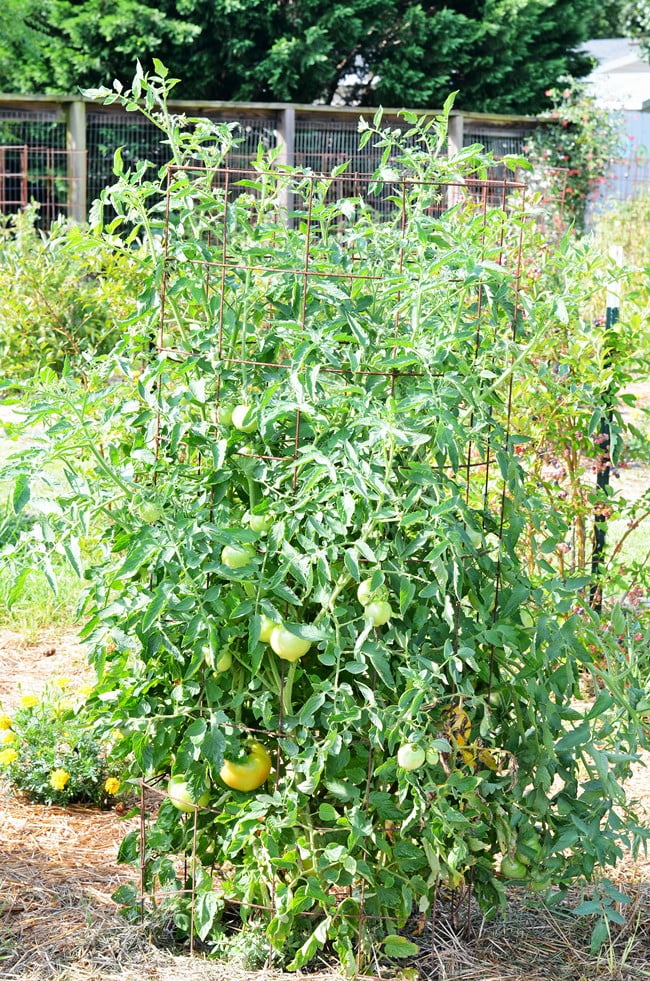
The tomatoes have loved the heat, though! Here is one of our Cherokee Purple heirloom tomato plants and it has grown much taller since I took this photo. We have had a ton of tomatoes this summer, and they have been the tastiest and the juiciest that we’ve ever had. You know what that means, don’t you? I have been in the kitchen making and canning my Homemade Spaghetti Sauce, freezing Creole Sauce, and making Tomato Jam. I’m still perfecting that recipe so I hope to have that ready to share with you very soon!


blue trellises in raised beds in the garden

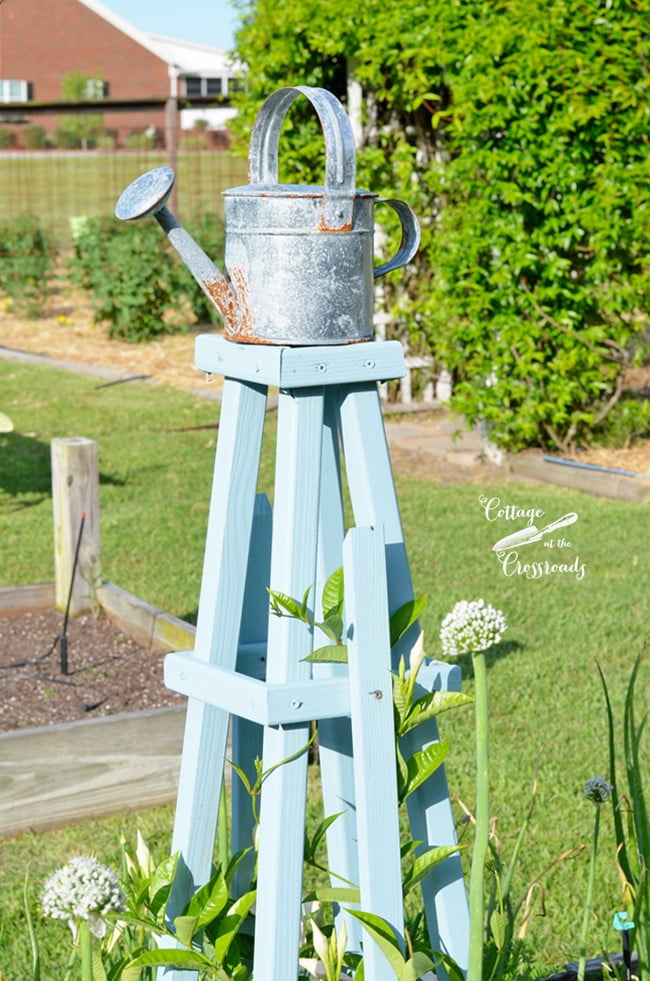
The blue trellises that we made in early spring have been a great addition to our garden this year. Underneath them we planted white mandevilla vines and they have been blooming prolifically all summer and should continue to do so up until frost. The other interesting blooms you see in this photo are onion blooms!


blue trellises in raised beds in the garden

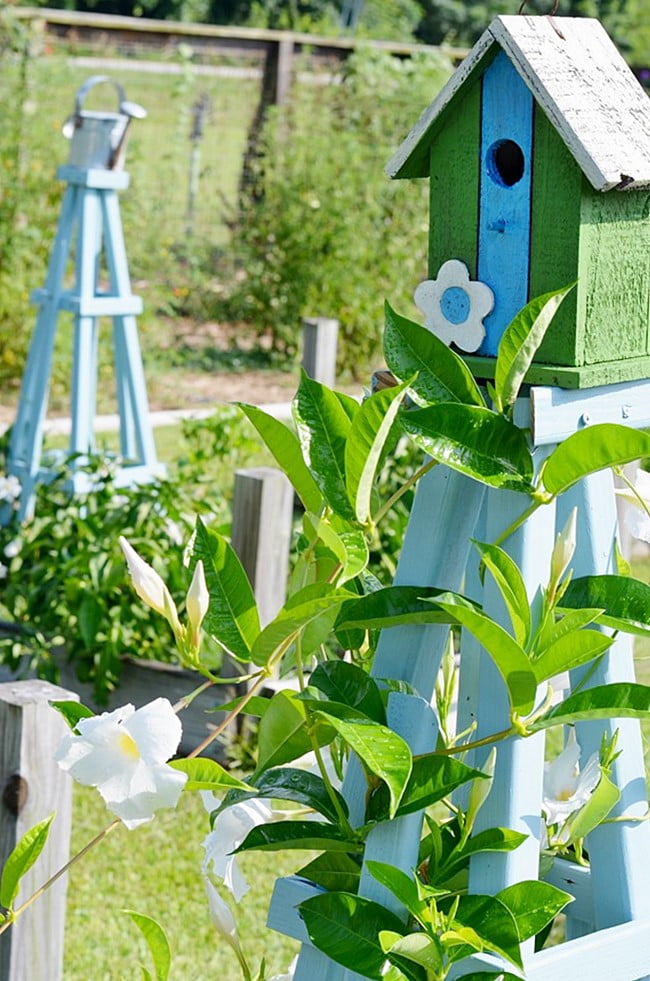
We put birdhouses on the top of some of the trellises and watering cans on others. If you’d like to see how we made these, you can read our post Wooden Pyramid Shaped Trellises.


Cucumbers growing on a wooden obelisk
wooden obelisks

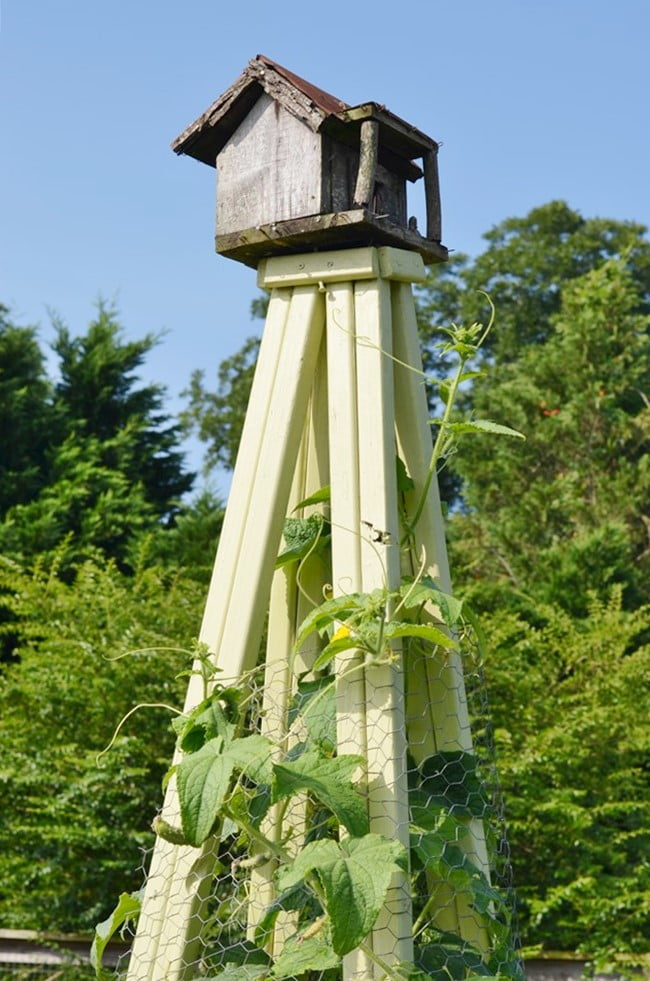
On the three tall , we attached some chicken wire and planted our cucumbers around them. We got lots of cucumbers but in hindsight, we would not use the chicken wire again. Some of the baby cucumbers grew through the wire and got large before I spotted them. When that happened, all I could do was to break off the part of the cucumber that wasn’t stuck in the wire!


sunflowers and gourds growing on the garden fence

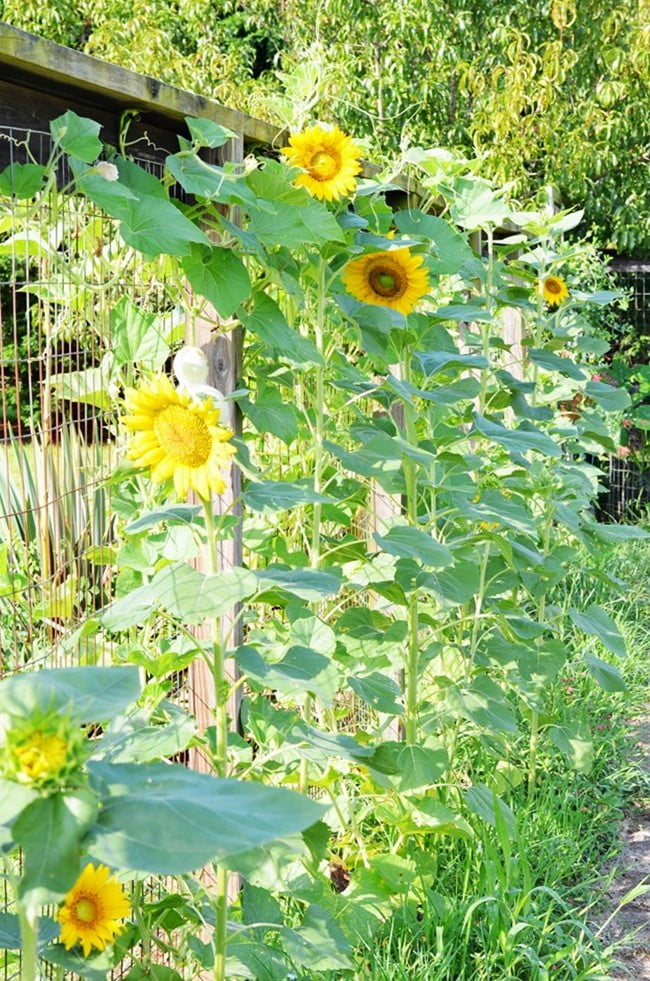
Along the back of the garden, I planted lots of sunflowers and birdhouse gourds.


birdhouse gourd

We’ve never grown birdhouse gourds before so this is a learning experience for us. I found out from our Facebook readers that they take about a year to totally dry.


sunflower in the garden

The bees have enjoyed the happy sunflower faces as much as we have!


sunflowers and zinnias in the garden

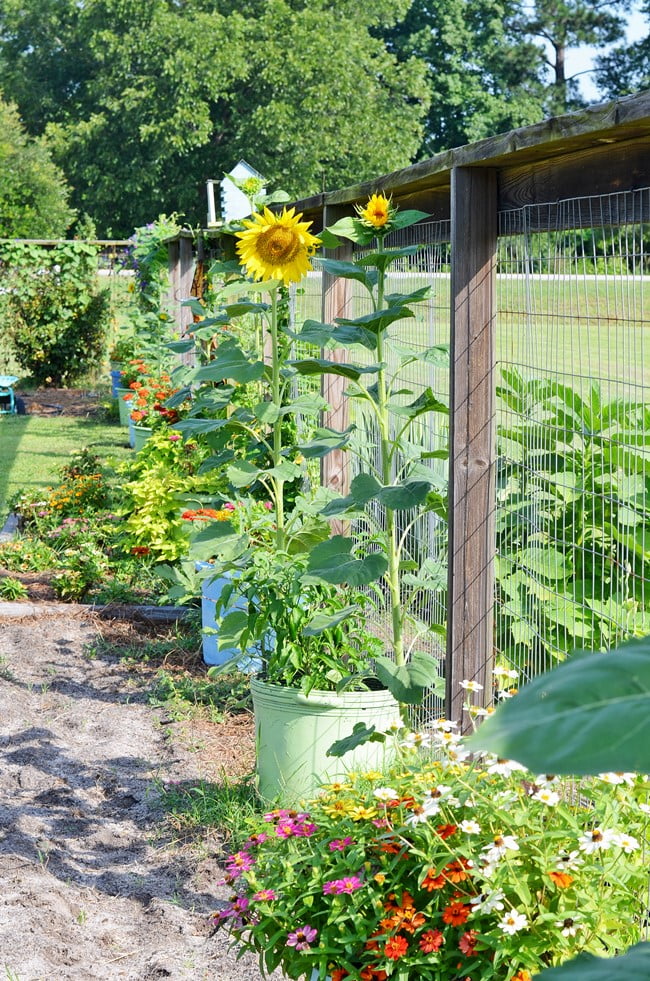
And there are even more here along the side of the garden where the painted plastic pots are holding zinnias and jalapeno pepper plants.


pumpkin vines in the garden

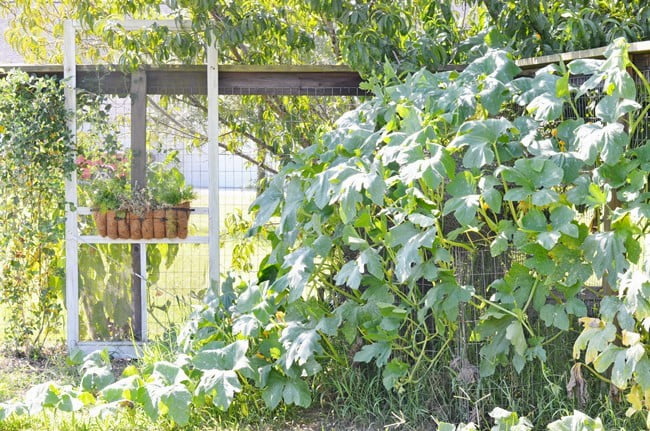
Have I told you that we’re participating in a seed trial for P. Allen Smith? Oh my word! I was so excited when I got a personal phone call from him early this spring. He was as personable and gracious as he is on TV! Well anyway, here is one of the pumpkin vines growing in the back corner of the garden.


baby pumpkin in the garden

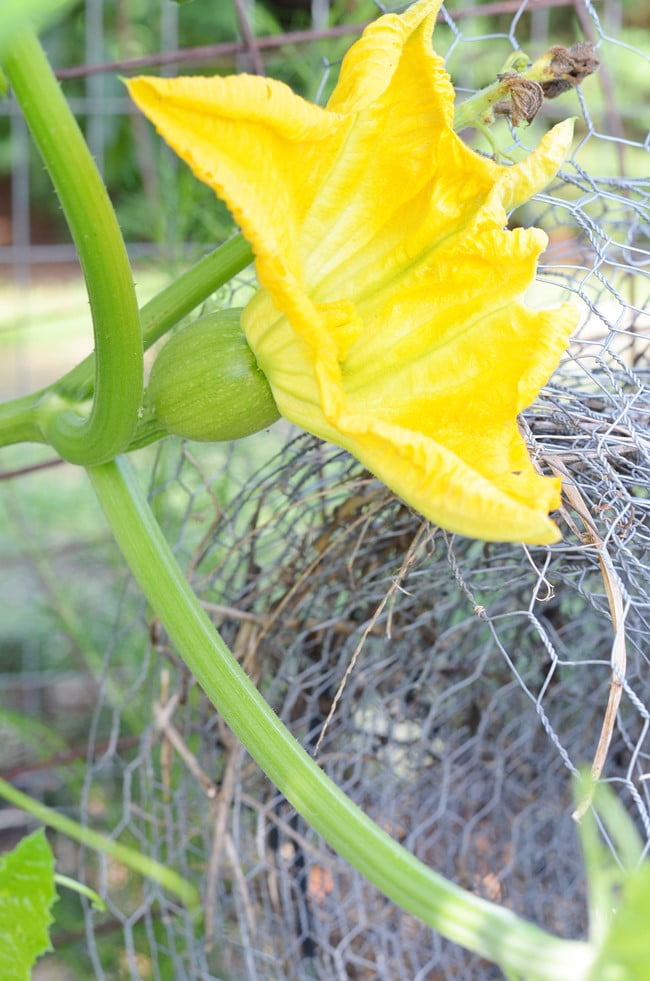
This variety is supposed to grow 200 pound pumpkins so you can imagine my excitement at seeing the first baby pumpkin.


garden tour-pumpkin vines

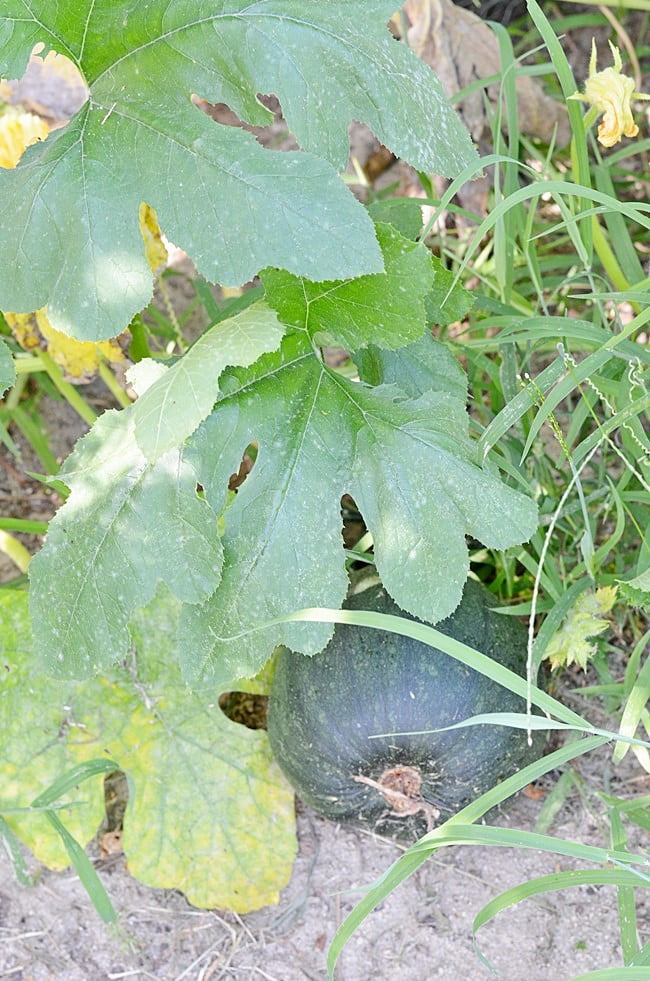
The vines have grown very well but right now, there are only 2 pumpkins forming and growing. Did you realize that pumpkins are green before they ever turn orange?


giant zinnias

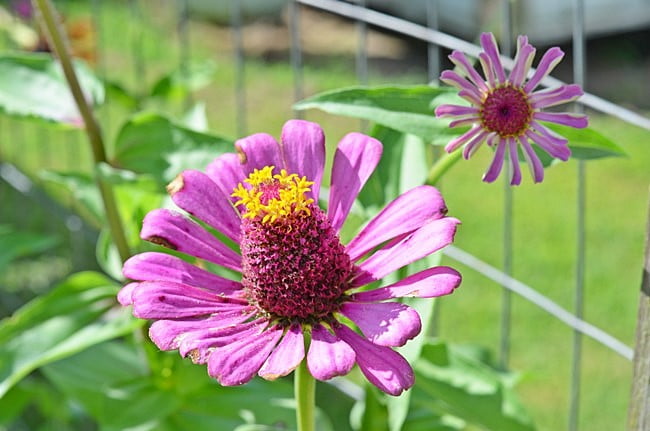
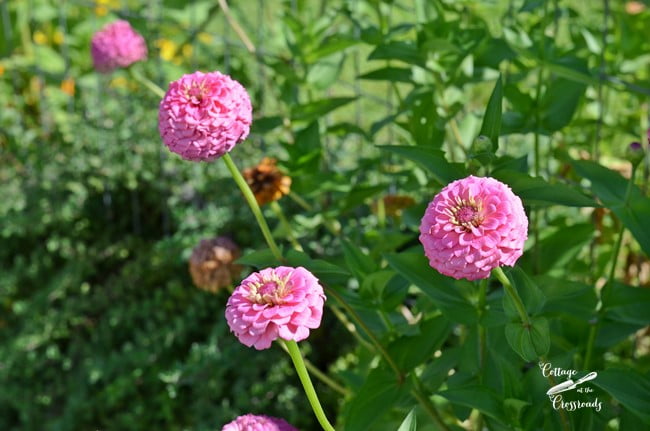
We purposefully plant a lot of flowers in our garden to attract the beneficial insects. These giant zinnias are now over 5 feet tall!


summer garden tour-fountain

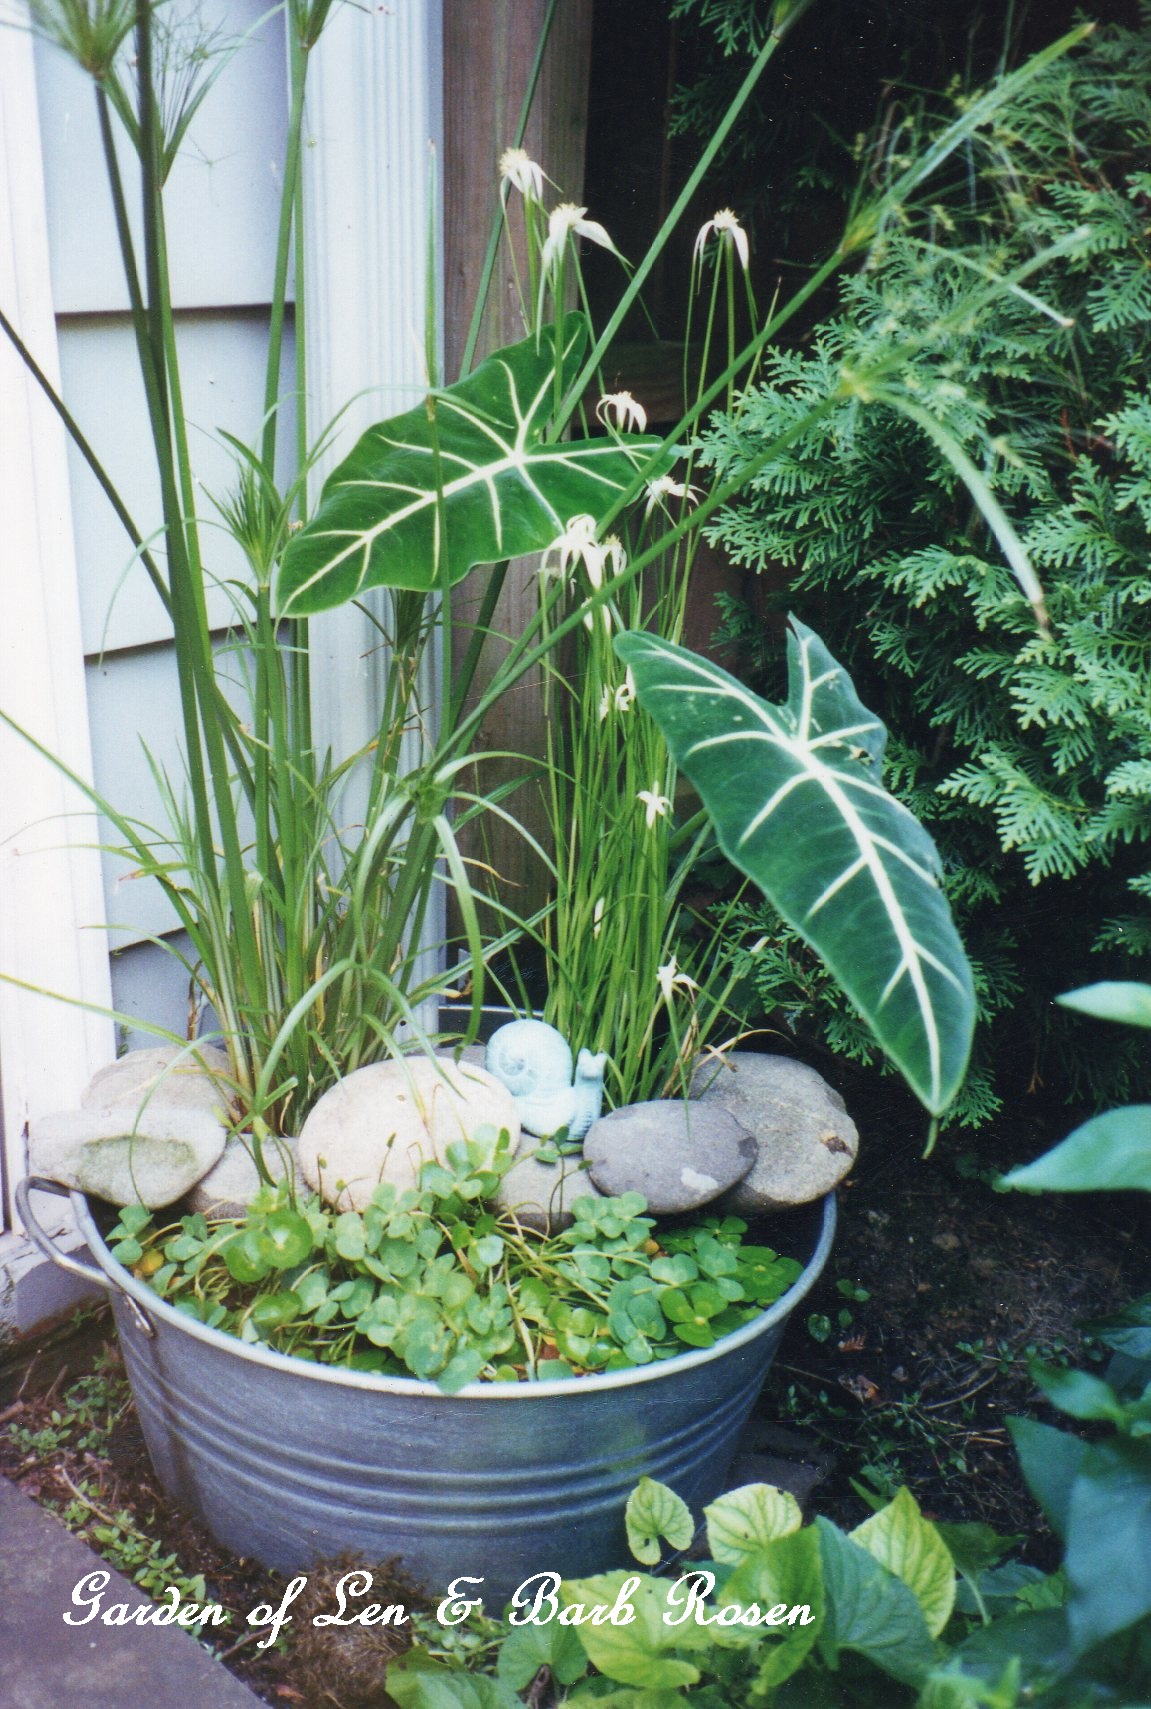
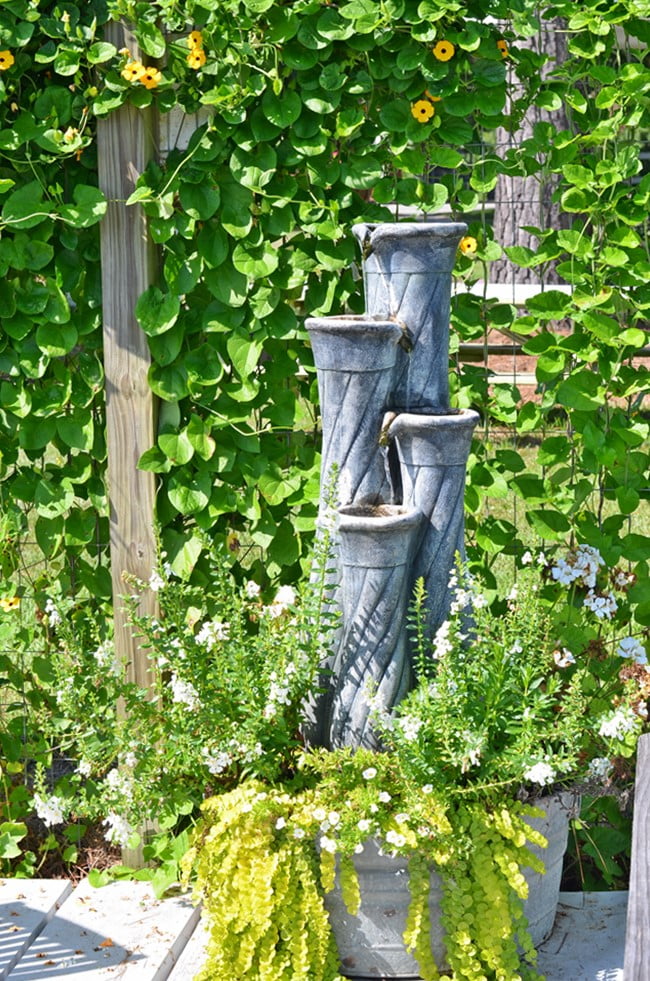
Remember the fountain that we put in a galvanized tub earlier this year?


Lucy, our dog, in the garden

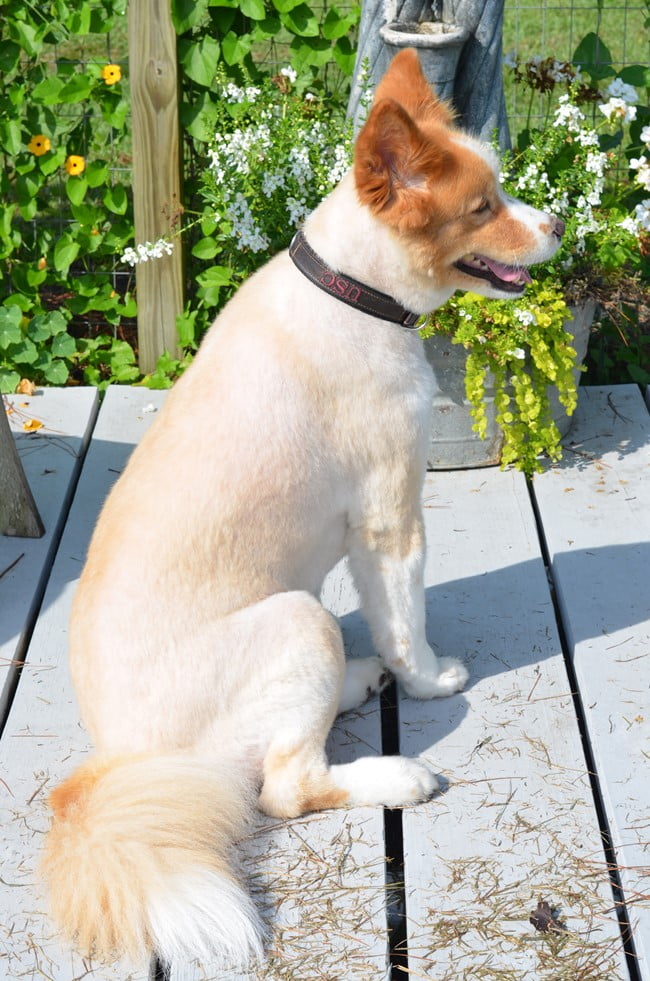
Lucy uses it as her personal water fountain! Here she is sporting her summer buzz cut!


garden tour

Looks quite different, doesn’t she? Her coat is already growing back in since I took this photo.


summer garden tour

I hope you’ve enjoyed going on our summer garden tour today. But as for us, “a gardener’s work is never done!” We’re making plans and preparing for our fall garden.


Sharing at: Wow Us Wednesday@Savvy Southern Style


Jane from Cottage at the Crossroads
Share

Original article and pictures take cottageatthecrossroads.com site

Thursday, June 29, 2017

Summer Burlap DIY Wreath

Summer Burlap DIY Wreath

Burlap is huge in home decor right now – we see it on banners, on pillows, as window coverings and in wedding decor. So this burlap diy wreath makes a great addition to your summer decor – hang it inside or out, on your front door or back gate like we did. They can be expensive to buy, so we made our own and you can too as it’s super easy once you know how. Here’s the DIY wreath instructions:


diy burlap wreath

DIY Burlap Wreath Instructions


supplies diy burlap wreath

You’ll need a Wire Wreath Frame (affiliate link)


Florist Wire, 22-Gauge, (affiliate link)


FloraCraft® Burlap Garland (affiliate link)


instructions burlap wreath

Follow Steps 1 – 4 to secure the ribbon. Getting started is probably the hardest part until you realize the simplicity of just looping the burlap.


Step 5 – the twist


diy wreath instructions

Once you’ve made those first three loops, scrunch them together in one hand. Turn over the wreath so you are looking at the back. TWIST the ribbon three or four times with your other hand. Then start looping the ribbon again beginning at the inner edge.


Step 6:


close-up burlap wreath

Continue in this manner around the wreath. Then secure with another piece of wire (as in Step 1-4).


diy wreath burlap

I’m amazed at how easy and quick this is!! By scrunching each set of loops as you twist, the ribbon makes these gorgeous intertwined loops. It’s full and textured, just like the store bought ones.


Now it’s time to decorate your new wreath!


wreath with sunflowers

Because this wreath was meant for late summer, I chose to decorate mine with things that are commonly seen during August around here – sunflowers from the garden, bullrushes growing in ditches along the highway and wheat in the fields.


back gate with wreath

Our wreath is hung on our back gate, greeting guests as they come for a bbq. I love how it gives a spot of sunshine to this shady pathway.


In less than 30 minutes, you can make your own burlap wreath with these DIY wreath instructions. Where would you hang yours?


Original article and pictures take www.newhousenewhomenewlife.com site

Wednesday, June 28, 2017

Succulent Dish Garden- hardware store re-purpose

Succulent Dish Garden- hardware store re-purpose

You can just feel it…


Succulent Dish/www.mysoulfulhome.com

…when someone is staring at you.


There I was at the hardware store in front of the shiny galvanized duct work materials contemplating a project when I felt them ~ eyes on me…


succulent dish / www.mysoulfulhome.com

I turned to see an elderly gray haired gentleman staring at me.


“Not everyday do you see a young (I liked him instantly) lady preparing to install duct work”.


I was so deep in the DIY zone, I didn’t respond right away. So he launched into exactly how I should install all those shiny pieces.


succulent dish www.mysoulfulhome.com

I didn’t have the heart to tell him I was re-purposing an ‘end cap’ into a succulent dish garden! Oh well, now I can probably install heating & AC now if the need arises.


I hope you are as impressed with my re-purpose as my pal at the HW store was with the idea of me installing my own duct work!


succulent dish / www.mysoulfulhome.com

This couldn’t be an easier project.


Buy an end cap at your local hardware store. I like the fluted ones the best. ( $6.99 )


End caps come in a variety of sizes mine is 8″ with a 2.5 lip. Perfect for small succulents.


Then pick up a bag of small pebbles, cactus soil and some succulents.


Succulent dish / www.mysoulfulhome.com

Steps:


  • Place a layer of pebbles in the bottom of the cap
  • Add a thin layer of soil, then arrange your succulents
  • Distribute more soil between the plants
  • Add a top layer of pebbles. This layer will help the plants stay in position.

Maybe not as impressive as installing HV/AC myself, but more fun!


Have you re-purposed anything from the hardware store? Do share…


** Kelly **


Original article and pictures take mysoulfulhome.com site

Monday, June 26, 2017

Stencil a Wheelbarrow and Lawnmover

Stencil a Wheelbarrow and Lawnmover
paint-stencil-lawnmower-wheelbarrow-c1b

I may receive a commission if you purchase something mentioned in a link on this post for sites including Amazon.com. Other links may go to websites where I have been paid to write a blog or article. See the entire disclosure here.


Time for a Makeover


Is it time to give your wheelbarrow a lift?

What kind of crazy person stencils their wheelbarrow? Um, me. Old faithful was getting rusty so I thought, instead of just treating it with rust paint, I would splurge for a second colour and stencil on a design. I also paint and stencil the wooden handles of my garden tools so I don’t lose them in the brambles.


Since first posting this many years ago, I’ve had plenty of messages from people saying, My husband would kill me if I did this to his lawnmower. And ya, I get it. I wouldn’t do this to someone else’s stuff. I do this with my own stuff. And only if it’s warranted. Both items were seriously rusting out. They needed some good rustproofing paint to hold them together for a few more years.


How to Do It


Give a rusty old wheelbarrow a new life with some spray paint and homemade stencils.

To get started, I spray painted everything black and let it dry overnight. You can’t really get fine details with spray paint so I created a simple design for the stencil.


I used old file folders for the stencil and cut out the shapes with an exacto knife. I held the stencil onto the wheelbarrow with duct tape and sprayed on the white paint.


You could, of course, go nuts with a whole bunch of colours or try for more intricate designs, but I prefer to keep it simple.


I bought this wheelbarrow last year for $20 including the new air-free tire. I hope to get a whole bunch more years out of my bling-barrow.


Give a rusty old wheelbarrow a new life with some spray paint and homemade stencils.

Give a rusty old wheelbarrow a new life with some spray paint and homemade stencils.

Next, I gave my lawnmower the same treatment. I didn’t get a before photo of the lawnmower but you can use your orange imagination.


I opted to spray paint the lawnmower white and add the flower stencil with black spray paint (see instructions below).


The entire paint job took ten minutes maximum. It’s a lawnmower, after all: no need to fuss. Cutting the lawn never looked so good and, as a reader pointed out, it’s too conspicuous to steal.


Supplies


  • Spray paint suitable for metal (1 black, 1 white)
  • Card stock (I used old file folders) for making the stencils
  • Exacto knife, pencil
  • Masking tape or painter’s tape
  • Big cardboard box (that your lawnmower or wheelbarrow can fit inside)
  • Protective mask, gloves, glasses

Caution
Work outside in a safe area away from animals, food growing, etc. I use a large cardboard box as my spraying area so that any excess paint is contained in the box.


Steps


  1. Clean off the lawnmower and wheelbarrow. Take a before photo!
  2. Cut the card stock/file folder to fit the areas you want to stencil. I made one long stencil (that fit the side of the wheelbarrow) and used it for everything.
  3. To prepare the stencil, draw large, simple shapes (I did a daisies and flower petals) on the card stock with pencil and cut them out with the exacto knife. You might want to do this step while your waiting for the base coat to dry.
  4. With the lawnmower/wheelbarrow in the cardboard box, spray paint the base coat colour. For my project, I painted one item white and one item black. Allow to dry (read the instructions on the can).
  5. Tape the stencil in place.
  6. Put on your protective gear.
  7. Read the spray paint label for best spraying distance. Spray your design in a contrasting colour. Remove the stencil and allow paint to dry before stencilling adjacent area. (This may only take a few minutes.)
  8. Take an after photo and share your creation.

~Melissa the Empress of Dirt ♛


Empress of Dirt TV


Original article and pictures take empressofdirt.net site

Friday, June 23, 2017

Stay in touch with us

Stay in touch with us

Wet soil gardens and small container water gardens are what I have created. Here are a few examples for you!


Pickerel Rush

Water plants in a galvanized tub

Iris Ensata, Ligularia and Pickerel Rush

Wet soil whiskey barrel garden

Decorate for Fall Na

Original article and pictures take ourfairfieldhomeandgarden.com site

Thursday, June 22, 2017

Start the Spring Garden...Indoors!

Start the Spring Garden...Indoors!
Home forcing flower bulbs is a hobby that gets the spring garden started right in your living room. You can choose vinta


The natural cycle of fall-planted bulbs is for the bulb to rest in the soil for the winter. When the soil warms and the sun begins to shine for longer periods, the bulb knows that it's time to break dormancy and sprout a flower.


The 'force' refers to artificially replicating spring conditions to encourage early blooming. The bulbs must have also gone through a "winter", or a period where they have been chilled in a dark space to mimic over-wintering in the soil.


Chill bulbs between 8-15 weeks at approximately 35-45°F (2-7°C). The exact number of weeks can change depending on the type of bulb and variety. You can buy pre-chilled bulbs for indoor forcing as well, which saves a lot of time and effort.


Some of the best bulbs for forcing indoors are:


The container you choose is just as much a part of the decorative arrangement as the blooms will be.


You can search for beautiful hyacinth forcing vases, many of which have been collected or passed on for many generations. These glass vessels have a bulb dish above a narrow neck that keeps the bulb above the water line. The roots will reach down to the water and feed the bulb as it grows leaves and flowers.


Cold season annuals work well when planted with spring bulbs in arrangements.

Cover the top of the soil with pebbles, glass, or decorative moss to finish your arrangement. Further bring a spring to bulb arrangements indoors by planting a few annuals such as primula, violas, or ranunculus that will bloom at a lower level than the bulbs reaching up towards the sky.


Cold season annuals work well when planted with spring bulbs in arrangements.


Original article and pictures take www.ebay.com site

Tuesday, June 20, 2017

Stacked Rocks

Stacked Rocks

Easy Garden Accents


Jacki Cammidge is a participant in the Amazon Services LLC Associates Program, an affiliate advertising program designed to provide a means for sites to earn advertising fees by advertising and linking to amazon.com. Other links on this site may lead to other affiliates that I'm involved with, at no extra cost to you.


When all you have are rocks, pebbles and stones, find a way to use them for garden art. I have lots of small flattish rocks that are formed by the action of frost on the bigger rocks, flaking off small pieces which then become weathered and worn.


Stacked Rocks - a really rustic garden accent
397Save

These are only about four or five inches tall - you can make them out of rugged rustic rocks like these, or smooth flat pebbles from a shoreline.


Each will give you a unique feature for your garden.


These are simple to make - first, collect your pebbles or stones, and make sure they're dry and dust free.


I used a wire brush to clean them, but you could just leave them where they'll be washed by rain.


Rocks ready to stack
Figure out which rocks go best with the base, which is much larger to prevent the finished stack from toppling over.

Stack the rocks starting with a larger one for a base

I aimed for a pyramid shape but I've seen these where they start small, and have a bulge in the middle. Smooth pebbles used this way make great rock stacks.


Permatex Clear Adhesive
Permatex 80050 Clear RTV Silicone Adhesive Sealant, 3 oz.

I used to glue the rocks together, to test it out.


It claims to be suitable for outside use, and is also quite thick, which is necessary if the stones are rough surfaced. It's held up well under my winters, which are cold and snowy.


Five Stacked Rocks
For now, these will stay on the table until they're cured - the glue says that full curing of the silicone adhesive will take 24 hours.

Stacked rocks waiting for their final homes

Next time I go to the river, I'll be looking for some smooth pebbles and make some more with those. Meanwhile, these will accent planters or garden beds or line a walkway.


Find out more about the How to be Creative Guide
Find out more about the How to be Creative Guide or sign up below - it's free!


Original article and pictures take www.bluefoxfarm.com site

Friday, June 16, 2017

Soothing Ways to Use Lavender in Crafts, Recipes and More

Soothing Ways to Use Lavender in Crafts, Recipes and More

Love lavender? Me too! And growing it in my garden means I have found plenty of ways to use lavender in my home. I grow a variety of plants and harvest them yearly. I keep the dried flower buds in a large jar in my kitchen and another in my craft room. Some of the ways to use lavender is in culinary recipes, natural beauty, and crafts; but first, you need to harvest it!


I have just a few backyard lavender plants and from that I get more craft materials than I know what to do with! I leave the flowers on the plant for as long as I can (for the bees) but then it’s harvest time!


harvesting lavender from 17 great ways to use lavender at home

Check out all of the crafts, projects, and recipes that can be done with just a few backyard lavender plants and/or lavender essential oil in the list below.


More than 20 creative ways to use lavender

Original article and pictures take gardentherapy.ca site

Wednesday, June 14, 2017

Sofia Loren at 75

Sofia Loren at 75


Original article and pictures take bizarretambourine.blogspot.com site

Friday, June 9, 2017

Snowman Gardener Style

Snowman Gardener Style

What happens when a plant geek decides to make a snowman? NOW my winter garden is complete ;) ( psst... the birds love it too! )


  • snowman gardener style, gardening, seasonal holiday d cor

#wintergarden#snowman


Suggested Project Book


s 11 things you could be doing with your empty guest room, laundry rooms

  • :)

  • Lol! That is too Cute! Yes you are a true plant geek! I love it! Merry Christmas!

  • You should have seen the birds all over it after I finished... ok, maybe it was the birdseed, but I'm pretty sure they liked the flower too :)

  • Too Kool!

  • LoL. Awesome!


Original article and pictures take cdn.hometalk.com site

Small Space Garden DIY Projects Straight from the Northwest Flower and Garden Show

Small Space Garden DIY Projects Straight from the Northwest Flower and Garden Show

My trip to the Northwest Flower and Garden Show in Seattle would not have been complete without a tour of the Small Space Showcase on the Skybridge of the Washington State Convention Center. The NWFGS is known for their impressive large-scale display gardens (and, of course, their speaker series which I was honored to participate in again this year), but I have to say that each year I am equally as taken by the smaller displays.


The lush, full gardens are drool-worthy dream spaces, something that I may never have if I continue to live in a small urban footprint. I was pleased that the artistry and whimsy did not disappoint in the small space displays and at the exhibitor booths for those of us who don’t have expansive yards to play with.


Small Space Garden DIY Project Ideas

Join me on a virtual tour of my favorite small space garden DIY projects to spice up any size garden. If you decide to tackle any of these projects, please come back and share some photos with us. I may very well dig into a few myself.


Small Space Garden DIY Projects


Edible Kokedama


You may have seen Kokedama, the Japanese art of creating a hanging moss garden, but have you seen them with edible plants? Strawberries and herbs were planted in this display that had chalkboard plant tags held on by vintage forks. These darling designs were created by Patricia Ruff of Rocky Bay Garden Creations.


mint kokedama

Her small space design was my favorite of the day with gorgeous moss art, vertical planting, and hypertufa that takes that cake.


Rocky Bay Garden Creations

Sculpted Hypertufa


Have you ever seen hypertufa planters that look so refined? Patricia Ruff from Rocky Bay Garden Creations (who made the kokedamas) created these gorgeous organic planters that look like nothing I’ve seen before. I must learn her secrets!


refined hypertufa planters

Hanging Hypertufa


Patricia also made hanging hypertufa planted with inset marine rope. This is one talented lady.


hanging hupertufa

Stylish Bug Hotels


I love a good bug hotel, and these did not disappoint. You can see how to make one here.


bug hotels

Vertical Succulent Gardens


I think just about anything can be turned into a succulent wall planter now. From frames to purple pumps, this display gets your DIY mind spinning.


shoe succulent planters

vertical succulent planters

Floating Iron Trellis


I love the idea of using an iron garden gate or trellis above a container garden. This one is floating above the container, making it just that much more interesting in the space.


floating container trellis

Wine Box Planter


It’s a simple idea, but one that I love. A wood box, a little vintage-style graphic, and some plants. This is perfect in a small space like a deck or balcony.


wine box planter

Wall Mounted Strawberries


While I’m not a fan of a pallet garden, this strawberry wall planter has enough refinement to appeal to my taste. I’m not sure if it was a pallet at one time, but now it makes a lovely space to grow berries.


vertical strawberry planter

Something Unexpected


Hey, those aren’t tomatoes. But they are brightly-hued hyacinths in a vintage tomato crate. Part brain teaser and part pop of color. All in all, it works!


spring bulb planter

Save


Original article and pictures take gardentherapy.ca site