Thursday, September 29, 2016

Living Wall Cactus Garden

Living Wall Cactus Garden

Please excuse me while I gush. I’m such a huge fan of the work that Shawna Coronado does as a writer, speaker, and eco-activist. She really IS making a difference every day. Some days it’s through front yard food gardens, others it’s by showing us how to make a meal with just $10. Today, Shawna is joining us to show us how to make a stunning vertical garden with drought-tolerant cactus, a project from her book, Grow a Living Wall: Create Vertical Gardens with Purpose: Pollinators. Eeep! I can barely contain my excitement!! It’s a fantastic book by an inspirational and creative force in the gardening world. Now, go get some protective gear on and let’s see how Shawna made this:


How to Build a Vertical Cactus Garden from Shawna Coronado - this idea is so unique!

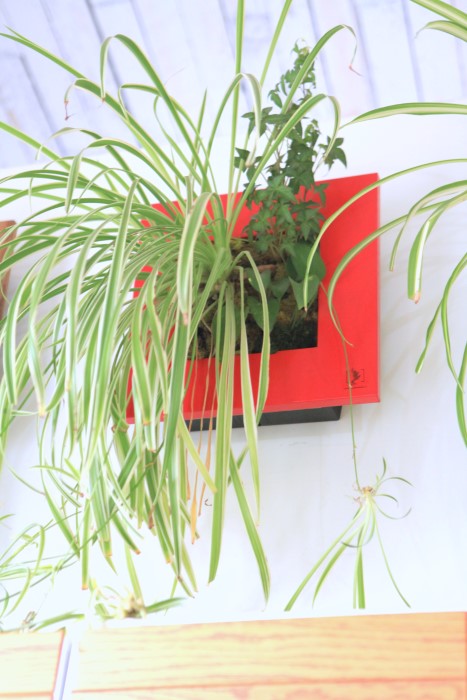
Bring interest and beauty to our outdoor living spaces by adding a cactus living wall garden. Don’t be afraid to add your favorite colors so that the piece is a unique living artwork to you. Your friends will absolutely love it! Have garden party creating living walls and invite friends over to make these designs together.


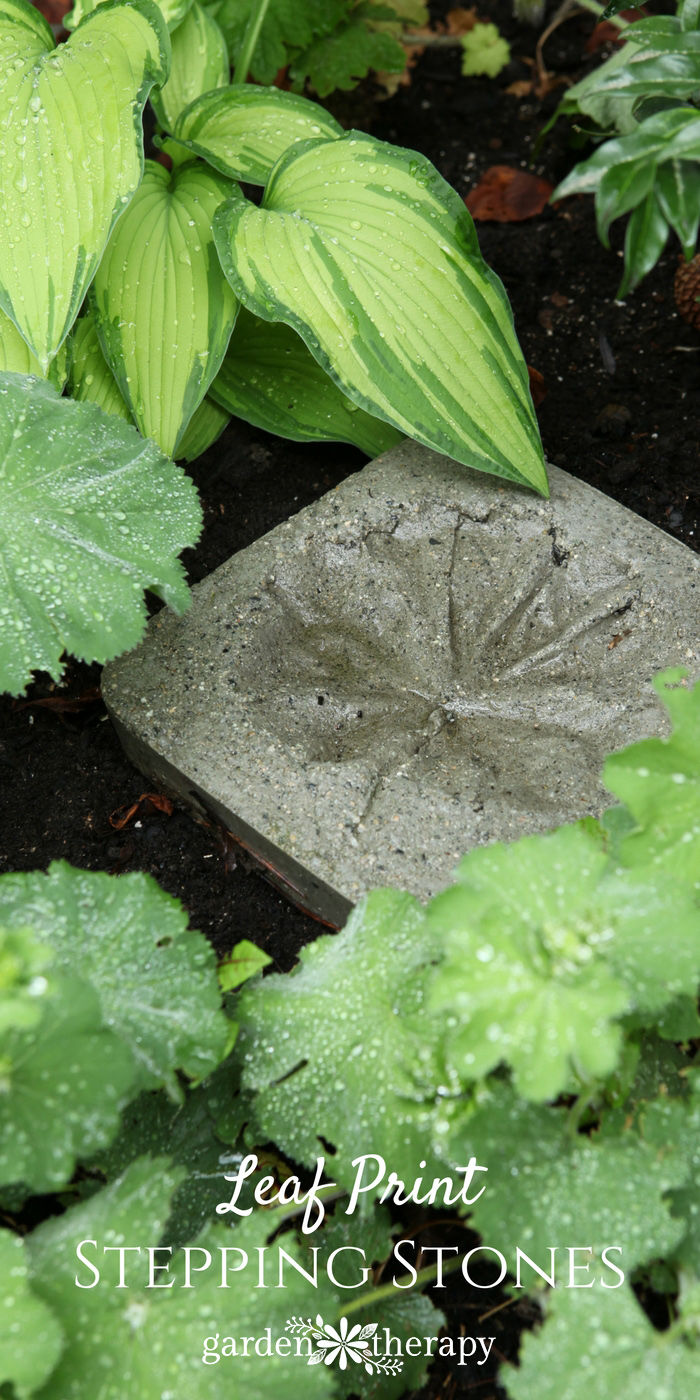
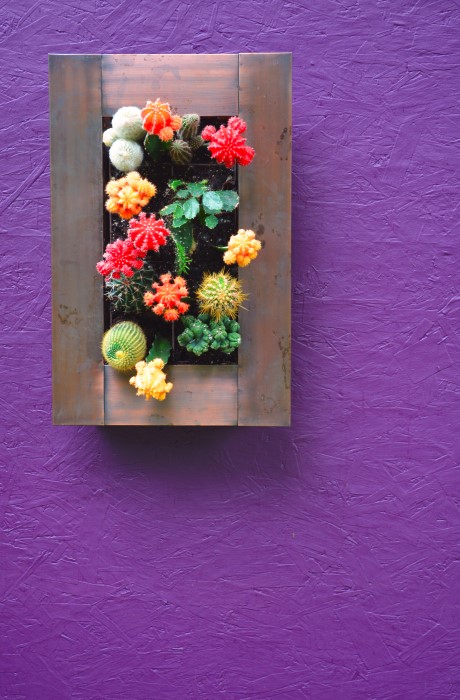
HOW TO BUILD A CACTUS LIVING WALL GARDEN


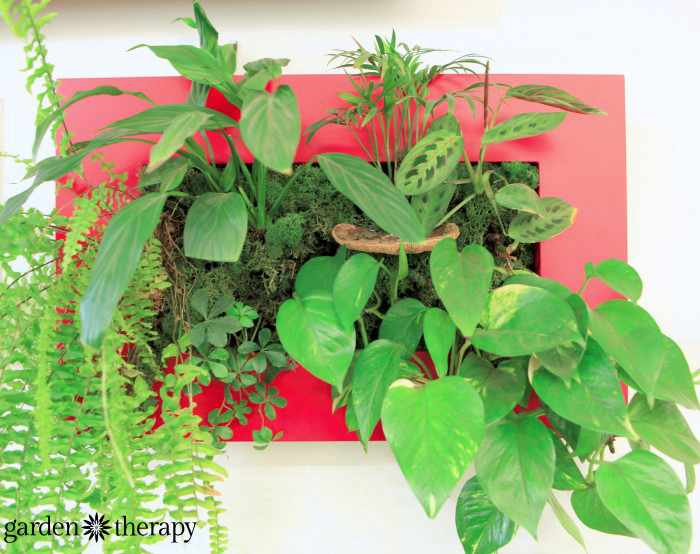
Want to save water? Then choosing a cactus living wall garden is an excellent choice. Since they need such little water it makes them tough to kill and very pleasing to the eye. Cacti are shockingly colorful and add a level of architecture to even the dullest spaces. Why a living wall made out of cacti? Why not? Designs made from cactus are like living works of art. They create visual interest and focus your eyes immediately to them.


How to Build a Vertical Cactus Garden

This bold, living artwork will be the center of conversation at all gatherings whether your guests are gardeners or not. Having a cactus living wall garden won’t only be a conversation starter, but will also provide your indoor décor with punch of chic style that will cause hours of study and appreciation.


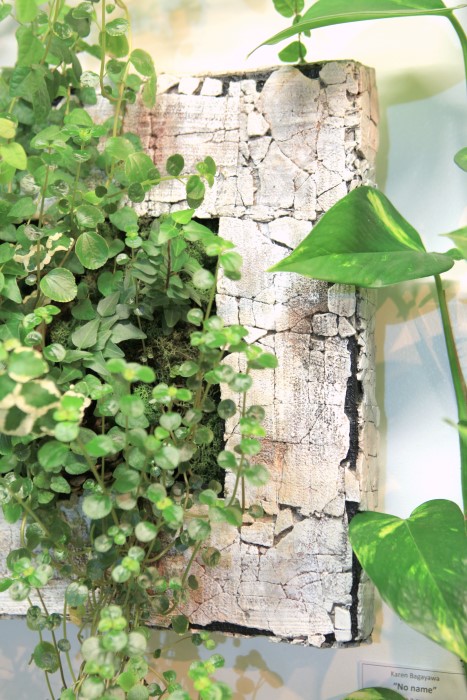
Succulents and cactus require stronger drainage than other plant life; making them more suitable for living walls that is “soil-based” instead of hydroponic. If you live in the Southeast, Southwest or West Coast, a gorgeous cactus living wall will be virtually maintenance-free except for watering needs. In these climates that offer warmth and drought conditions, this type of living artwork thrives and does extremely well.


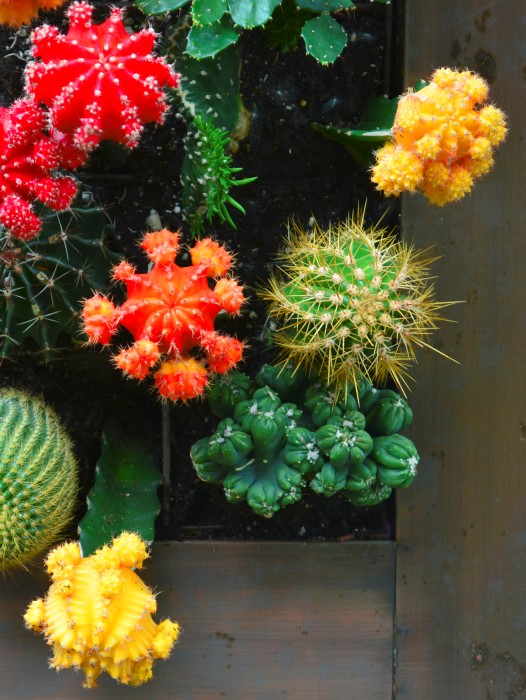
An excerpt from Grow a Living Wall written by Shawna Coronado details some amazing facts about cacti; “There are over 2,000 species of cactus, which is a sub-species to the succulent family, and many of the plants have unique and beautiful shapes with very distinct growing features. They rarely have traditional looking leaves and collect light through their stem to use for photosynthesis. Most stems or bodies of cactus look swollen and fleshy. Cactus often have spines which are produced from unique structures on the stem called areoles, which are considered an identifying feature of a cactus. There are many varieties of spines that develop along the stem of the cactus. There can be pointy spines, stiff bristles, or fuzzy hairs and nearly all of them can prickle handlers, so care must be used when handling the plants. Flowers are produced from the areoles and they are typically multi-petaled and tubular in order to attract pollinators.”


“Wonderful as a houseplant, cacti also make superb design plants for outdoor living wall gardens because of their unusual structure; they come in rounded, columnar, short, tall, and flat shapes which are delightful for eye-catching interest on a balcony or along a wall. Cactus plants do flower and can make gorgeous floral displays, however, some cactus take many years to develop flowers. Therefore, growing cacti is more centered on their amazing structure and less on their ability to display flowers. When the plants do flower, expect a lot of attention from pollinators, but until then it is best to enjoy your cactus garden for its attractive display. “


Try growing your own cactus living wall garden, the experience is simply wonderful as there are no weeds to pull, hardly any water to use and low-maintenance make it a top choice in my book for any patio, balcony or outdoor living space. It is important to remember when working with cacti to use extra thick gardening gloves along with kitchen tongs that have been wrapped in tape or padding to prevent injury to the cacti and yourself.


Cactus Garden Components


Cactus Garden Components

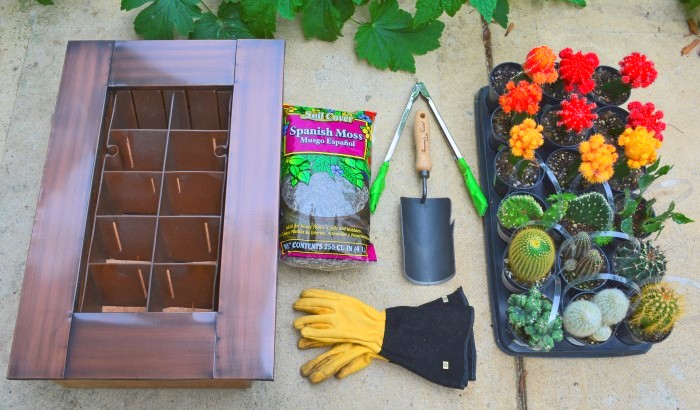
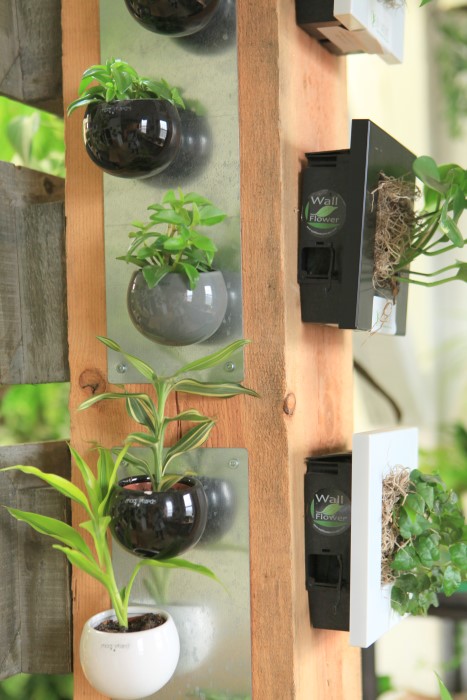
Here are the components you will need to make your living cactus design, living wall system, cactus soil, cacti, protective gear (thick garden gloves and padded tongs), and a spoon or hand trowel. That is all you need to make this stunning design!


Cactus Garden Tongs


To Plant a Cactus Garden use must use tongs!

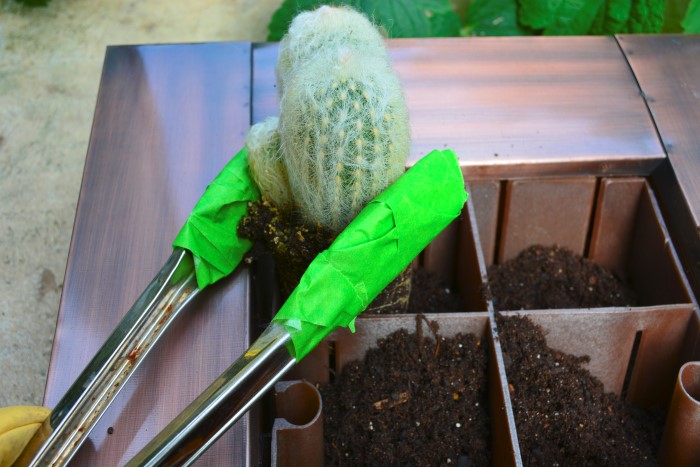
As you know, cacti have thorns and needles that can hurt, but by simply preparing upfront will result in no Band-Aids needed. Talk with your local garden center for recommendations on thick gardening gloves (perhaps those that are used by rosarians) and create your own tongs by wrapping in tape or padding to provide a gentle and secure way to hold onto the cactus.


Shawna Coronado - Author of Grow a Living Wall shares How to Build a Vertical Garden

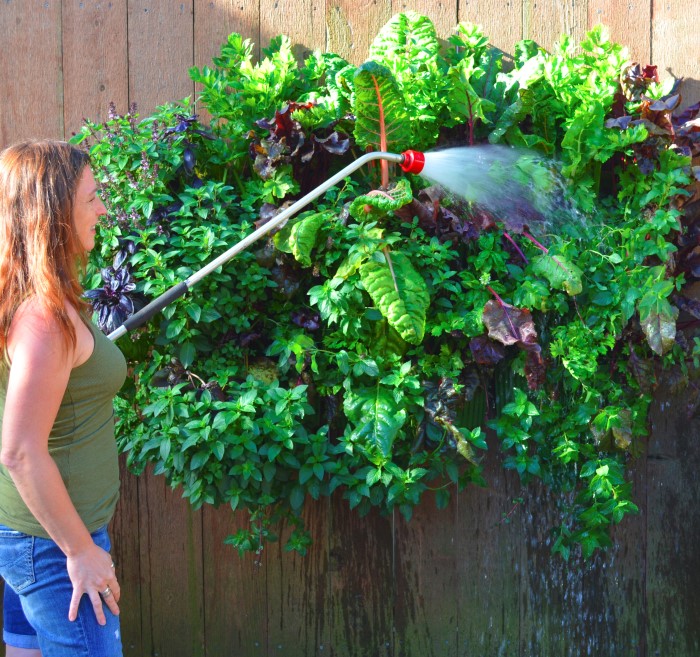
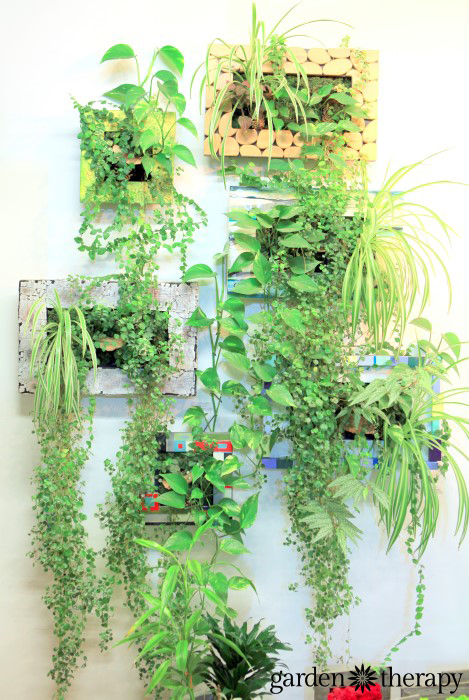
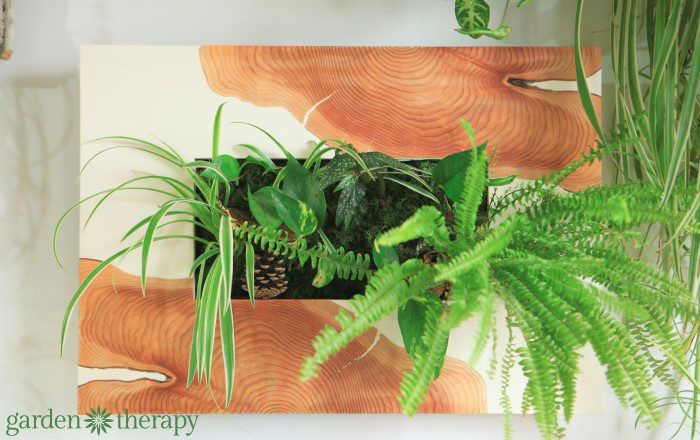
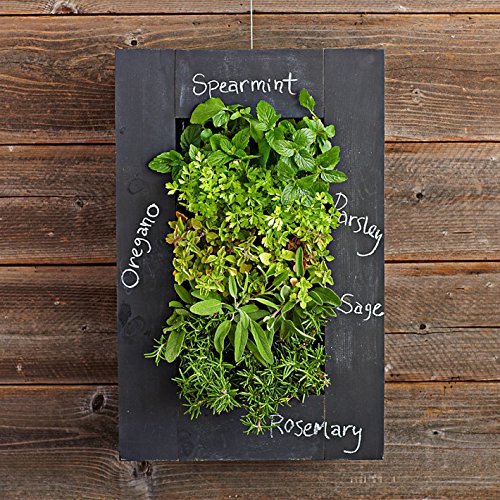
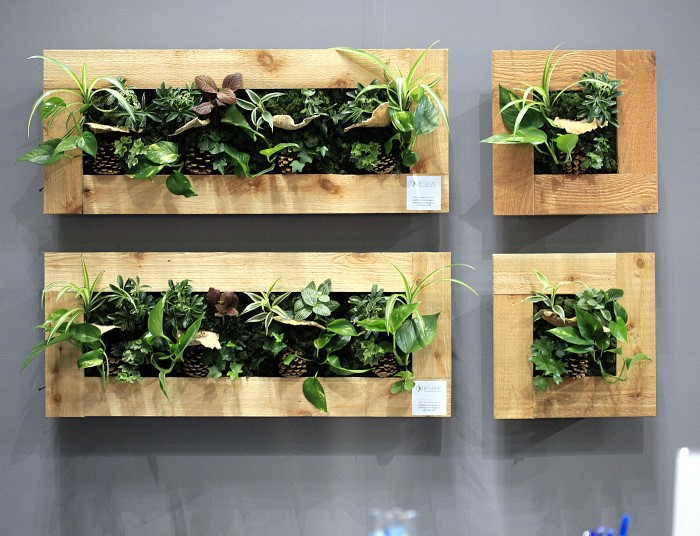
There are all kinds of different living wall gardens you can design from this cactus garden to herb gardens, vegetable gardens and even a cocktail garden. To learn more about growing multiple types of living walls check out Shawna Coronado’s new how-to book on building and growing living walls – Grow a Living Wall: Create Vertical Gardens with Purpose.


Grow a Living Wall

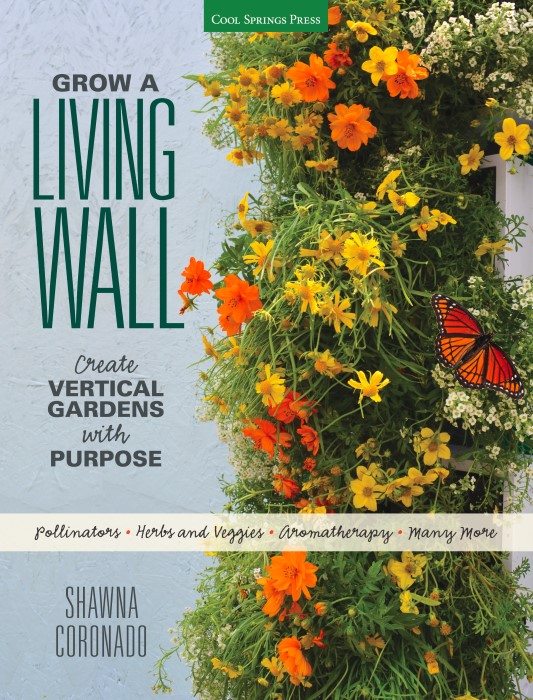
Shawna Coronado is author of “Grow a Living Wall; Create Vertical Gardens with Purpose”. She is also a columnist, blogger, photographer, radio show host and online media personality with green lifestyle living, organic gardening, and culinary who campaigns for social good. Shawna’s successful books, organic living photographs, and stories have been shown both online and off in many international home and garden magazines and multiple books. You can learn more about her at http://www.shawnacoronado.com.


Save


Original article and pictures take gardentherapy.ca site

Liven Up Your Home with Indoor Vertical Wall Planters

Liven Up Your Home with Indoor Vertical Wall Planters

Small-space dwellers take note: there are plenty of new and unique ways to bring plants into your home! From wall frames to upside-down pots to magnetic containers for your fridge, indoor gardening has turned over a whole new leaf. Have a look at these gorgeous examples of indoor vertical wall planters!


Custom artist-designed vertical planters from ByNature Studio Tour

Remember Part 1 of the ByNature studio tour where I shared my photos of the coolest moss art creations?


This gorgeous moss art doesn't need a drop or water or maintenace - and it's real! from the ByNature Studio Tour

This is Part 2 of the tour, where we will look at all of the gorgeous living planters that decorate the walls at ByNature.


magnetic plant pots

Inspired by the belief that any space can be transformed into a healthy living environment, ByNature brings interiors to life with living art.


A thriving living wall planter from ByNature Studio Tour

These Wallflower frames are built like a shadow-box, but inside is a bag of specially-formulated soil that is wrapped in a thick landscape-fabric-type cloth. To plant the frame, you cut into the bag to make a hole and dig the plant root ball into the soil. Plant a number of tropical plants, then cover any remaining fabric with moss to hide it as the plants grow in. Decorate with natural items like pinecones, bracket mushrooms and bark. Then you are ready to hang!


WallFlower planter from ByNature Studio Tour

The standard wallflower frames can be seen here with plants that have grown like crazy! Clearly this is a system that works very well. These plants are happy campers.


A living wall planter after growing for a year

I fell in love with the one-of-a-kind frames hanging in the studio. Each frame was designed by a different artist in the building that houses ByNature and the hundreds of other artists in the industrial studios contained in 1000 Parker Street. It is hard to see all of the details in the photos as they are hidden behind huge plants, but in person the overall effect is truly impressive.


Artist-designed vertical planter

This one with the wood veneer was impressive and a perfect match for the art contained within.


One-of-a-kind wood veneer wall planter from ByNature Studio Tour

I also love the idea of using a WallFlower frame as an indoor herb garden like this one. You can buy, or this one you can DIY.


Indoor Herb Garden with Chalkboard Frame

Wallflower frames were also in various locations around the BC Home + Garden show, like this set of 4 that was behind the bar.


Living Wall Art

For those of you who want to grow plants indoors but can’t even spare the wall space, there were even these adorable magnetic pots for your fridge!


Magnetic Plant Pots from ByNature Studio Tour

Growing plants indoors is not only garden therapy, but they also remove harmful toxins, dust, mold, and bacteria from the air.


Now there is really no excuse not to start an indoor garden!


Original article and pictures take gardentherapy.ca site

Monday, September 26, 2016

Thursday, September 22, 2016

Learn How to Prune like a Pro! Pruning 101

Learn How to Prune like a Pro! Pruning 101

Pruning is a fun garden task but it can be daunting to get started with. For some people it is the gardening version of public speaking – terrifying! Fear the secateurs no more, my friends. We are breaking down pruning to the basics so that you have the skills to prune like a pro.


How to Prune like a Pro - demystifying pruning by starting with the basics

This is the first in a series of articles I’m writing to help your plants thrive with supportive pruning. Be sure to sign up for blog updates or our weekly newsletter to get updates on the latest posts in this series.


Reasons for Pruning


First, let’s start with reasons why you should prune and one big reason not to.


Good Reasons to Prune


  • To improve the health and vigor of plants
  • To encourage fruit and flower production
  • To modify shape, or direct growth
  • For safety reasons, for instance removing branches that could cause damage to structures and buildings and to avoid conflict with powerlines

Bad Reasons to Prune


To control the size or height of a plant. A better option is to thin a tree and help to shape it rather than topping a tree or fighting a plant when it’s trying to reach its mature size. See more in Supporting the Structure below.


Beautiful tree form (Pruning 101)

The Four Ds


The first rule of pruning is to follow the Four Ds. This means that you can safely prune anything on a plant that is dead, diseased, dying, or damaged. Even more, you SHOULD prune for the following reasons. Branches that fall into these categories are causing more stress to the plant left attached than if they are pruned off. Removing the Four Ds helps with the overall health of the plant. Even if removing those branches will look unsightly or unappealing, it’s better to prune them and allow the plant to repair without having to spend energy on healing.


Branch structure (Pruning 101)

Supporting the Structure


Despite what many people do in their own gardens, trees never need to be topped. If you have a tree that is growing too large for the space it was allocated, then you have the wrong tree! The best course of action is to either consider replacing it or living with it. Topping a tree damages the overall shape of the tree, while encouraging the tree to send out a new leader to continue reaching its mature height. It also creates weak points in the tree which make it more susceptible to breakage.


Please don't ever do this to a tree (pruning 101)

If you have a tree that is too large for the area that is planted you can always thin out the tree by removing some of the larger branches on the inside, creating a more airy and spacious look that may solve your problem. While this won’t affect the overall height of the tree, it could remove enough density that the tree fits into the allocated space better.


Follow the Lines


The most unappealing (and often pitiful) pruning is when a branch is cut to create a stub. Following the lines of the branches means noticing the natural flow and structure of the plant as it grows from the base or trunk and following that line out towards the end.


Say no to stubs and more tips on pruning 101

There are two types of pruning cuts: heading cuts and thinning cuts. Heading involves cutting off part of branch to create a stronger branch and a larger number of smaller offshoots coming from that branch. Thinning removes a branch at its point of origin, which can be at the main trunk, a side branch, or even right to the ground.


thinning vs heading cuts

Heading cuts stimulate new growth and thinning cuts prevent new growth.


If you’re looking to remove the branch but would like another branch to grow in its place, then cut the branch just above a bud. This bud will produce a new branch. If you want to remove the branch and not have regrowth, then cut the branch at the branch collar and do not leave any visible buds.


Golden Fall Foliage (Pruning 101)

Exceptions


Obviously there are some exceptions to this rule like decorative, espalier, or fruit-tree pruning. Creating unnatural shapes in these circumstances can be done for aesthetics or to increase fruit production. A tree that has been pruned to take on an unnatural shape requires much more ongoing care and maintenance which I will write about in a subsequent article. For the majority of your home garden pruning needs, stick to the 4 Ds and aim for a natural shape and you have the tools to get started!


Garden Therapy Back Yard Play Garden Tour Espalier apple

Save the Trees


If you still aren’t convinced that supportive pruning is best for your garden and your trees, please head over to Plant Amnesty and read a host of brilliant and informative articles on pruning. I had the pleasure of meeting Cass Turnbull, Plant Amnesty President and Founder, at the Northwest Flower and Garden Show. I ended up giggling and fawning like a crazed fan because I whole-heartedly support their efforts to “end the senseless torture and mutilation of trees and shrubs.” Visit Plant Amnesty here.


For even more information on pruning, check out these posts:


Save


Original article and pictures take gardentherapy.ca site

Wednesday, September 21, 2016

Learn How to Braid Your Hair Easy But With Style

Learn How to Braid Your Hair Easy But With Style

Braids are back and are a huge part of 2013. Whether you stick with a traditional French braid or you want to try something crazy and inventive, braids are the new curl. Learn how to braid your hair from the followings:


1.The Braided Bun


braid-hair-1
2. The Maiden Braid

braid-hair-2

braid-hair-3

braid-hair-4

braid-hair-5

Original article and pictures take www.prakticideas.com site

Tuesday, September 20, 2016

Leaf Imprint Stepping Stones

Leaf Imprint Stepping Stones

This Weekend Project is a decorative way to preserve the garden by capturing the beauty of leaves all year round as stepping stones. You don’t have to work hard for a whole weekend to do it, though! It’s a simple project that is quick and fun to do, but the concrete needs some time to cure after the stones are poured. These stepping stones are an economical way to make a personalized pathway that protects your garden, or simply add them here and there as a decorative feature.


leaf imprint stepping stones project

As pretty as they are, let’s not ignore their practical importance: these concrete beauties allow a person to walk through their garden easily without worrying about hurting precious plants. Stepping stones are laid to prevent the soil compaction that results from tromping through the garden beds. Walking directly on wet garden soil can destroy the structure of your soil, reducing plant root’s ability to retrieve water and nutrients.


Leaf Imprint Stepping Stones DIY Project

Unless your garden is all within arm’s length, stepping stones are a functional way to reduce the stress on soil structure, and they are pretty darn, well, pretty!


Materials


  • Square or round plastic containers
  • Vegetable oil
  • Dry repair concrete
  • Wheelbarrow or bucket for mixing concrete
  • Rubber gloves
  • Leaves
  • Small rocks

Make it!


Choose containers that will make a good size for a stepping stone. For round stones, use plastic plant trays. For square or rectangular stones, use plastic food storage containers. The ones I choose had relatively straight sides, resulting in straight-sided stepping stones.


leaf imprint stepping stones project

Choose leaves with interesting shapes, strong veins, and defined edges. Shown here (clockwise from top) are Lady’s Mantle, Hosta, and Japanese maple leaves. The maple leaves’ pointed edges made their shape less successful than the other two (see final photos), which will influence my choice of leaves in the future.


Use the foam brush to spread the vegetable oil around the inside of the container and on the vein side of the leaf.


leaf imprint stepping stones project

Mix repair concrete (concrete without large pieces of gravel) as per the instructions on the bag using the wheelbarrow, trowel, and rubber gloves. Pour the concrete into the molds and press the leaves, vein-side down, onto the concrete. Be sure to press each leaf evenly with the flat part of your fingers so that the whole leaf imprints (not just where you touched with your fingertips!).


leaf imprint stepping stones project

Weigh the leaves down with rocks or stones and allow to set for 24 hours. Cure as per the instructions on the concrete package and then unmold your stepping stones and place around the garden.


leaf imprint stepping stones project

I weighed the leaves down with river stones removed them from the molds after 24 hours and, voila!


leaf imprint stepping stones project

I was also lucky enough to have worked with a creative friend that day, which is a good thing because concrete can get heavy! My friend made some stepping stones with leaves and foam letters we bought at the craft store. Isn’t it fun to work with others? You get so many great ideas! Her letter/leaf stepping stones turned out perfectly!


stepping stones with letters and leaves

Please have a look at all of the creative Weekend Projects, Garden Projects, Craft Projects and even Recipes to be found on this blog. Perhaps you will find something to work on with your brilliant pals.


Original article and pictures take gardentherapy.ca site

Friday, September 16, 2016

Lavender Gift Giving

Lavender Gift Giving

Hopefully you remembered to harvest some of your lavender this summer for future projects. There are many different projects to do with lavender such as sachets, soap making, lavender cookies and so many more.


Crafting with Lavender at Sensible Gardening

Each year I try to seek out something different to do with my lavender and this year I plan to try the following. All make great gifts and are very easy to do.


dried-flowers2-sensible-gardening.jpg

Lavender Syrup You will need 2 cups of water, 2 cups of sugar and 2 tablespoons of fresh or dried lavender. Combine all the ingredients together and heat until the sugar is dissolved. Pour into decorative jars for gift giving. Your syrup can be poured over berries, plums or figs. For variety you can add ginger, lemon or orange zest.


Lavender Vinegar Take a mild white vinegar and add a few sprigs of lavender and let it steep for several weeks. Great on salads and used as a marinade.


Lavender Dream Pillow Use scraps of pretty cotton fabrics to sew up small sacs and fill with dried lavender. You don’t need a sewing machine for this.


dream-pillow-sensible-gatdening.jpg

Lavender Jelly 1 1/2 cups of lavender flowers 3 1/4 cups of water 1 box of powdered ‘Certo’ 4 cups of white sugar 1TB of white wine vinegar Bring water to a boil and add lavender. Cover pot, reduce heat and simmer for 5 minutes. Remove pot from heat and let stand for at lest 20 minutes. Keep lid on at all times. Strain and measure 3 cups of your brew into another pot. Stir in pectin powder and vinegar, bring to a boil and add the sugar. Boil until the syrup is at a rolling boil, about 1 minute. Remove from heat and let stand for 5 minutes. Skim any foam off of the top. Pour into sterilized, decorative jars, add seals and rings then process in a hot water bath for 10 minutes. Allow the jelly to age for a few weeks before gift giving.


Lavender Sachets Using scraps of fabric, lace, ribbon and anything else you might have, make small sacs of any shape and fill with dried lavender. Attach velevet or satin ribbon for hanging and make as decorative and fancy as you wish.


lavender-sachet-sensible-gardening.jpg

Lavender Wands These are great for closets and drawers. For each wand you need about 15 stems of lavender, each about 12 inches long and about 3 feet of narrow ribbon. Use an uneven number of stems and tie together tightly just below the flower heads with the ribbon. Turn the bunch upside down and bend the stems back over the flower heads, one at a time. Weave the long end of the ribbon in and out of the stems creating a basket effect. Keep your ribbon pulled tight all the way to the bottom of the flower heads. Wind the ribbon around the stems and tie tightly. Use the remaining ribbon to tie a bow and trim off at stem level.


Sharing with Cottage Garden Party and From the Farm Blog Hop


Share with Pinterest:


Crafting with Lavender at Sensible Gardening

Tagged lavender, lavender flowers, lavender gifts, lavender jelly, lavender projects, lavender syrup, lavender vinegar, lavender wands


Original article and pictures take sensiblegardening.com site

Thursday, September 15, 2016

Ladybug Bowling Ball – Garden Ornament

Ladybug Bowling Ball – Garden Ornament

I’ve had this old bowling ball since BEFORE we moved into our house. My sister actually bought it for me (it was like 75 cents at a garage sale) and when we were moving in my mom asked my why I had a bowling ball engraved with RJS. I told her my plans to turn it into a ladybug for the garden so she rolled it into the flowerbed. And there it has remained; for almost 3 summers.This summer was all about turning the front bed around, I shared some of the plants in my Gurney’s Plants review. Now that the flowers are starting to look a little more intentional, I figured it was time to fix up the bowling ball.


DIY Garden Ornament

Supplies:


  • bowling ball (black or paint it black)
  • contact paper and/or painters tape
  • scissors and red spray paint (I went with Krylon Cherry Red Gloss).

This is only slightly trickier than the Ladybug Vs. Bumble Bee Tic-Tac-Toe game.


Garden-Ladybug-Bowling-Ball

I set up my insectary outside to make spray painting easy. I covered an old flower pot with a plastic bag and carefully set the bowling ball on top.


Bowling-Ball-Close-Up

My bowling ball had a birthmark, you can still see the white spots if you look for them. I marked out a center line with the painters tape and added rough hand-cut circles for spots and a half circle for the face. You could use vinyl and a fancy cutter but I didn’t see the need.


1st-coat-of-Cherry-Paint

Then I got to spraying. And spraying.


Final-Coat-of-Krylon-Cherry

And spraying. It took 5 coats of spray paint to cover the black to my liking. Let me just say, when they say high gloss they really mean it! You can even see my reflection in the center of the ball. I removed the stickers off while the paint was still slightly tacky.


Garden Ornament Upcycle

The part on the bottom remained black, I dug a little divot in the garden for the the ball to sit in so it doesn’t roll and you can’t see the bottom anyway. I left my lady simple and faceless but my husband thinks it’d be cute with black and white eyes and antennae.


Fun story, my brother-in-law came over to help Mike process deer and he thought it was a kick ball for the dog and tried to kick it. I was about 1/2 a second to late to stop him. luckily he wasn’t trying to kick it too hard because we were by the road. Everyone (including the bowling ball) survived the event and I learend to keep my Ladybug Bowling Ball secure in the garden.


Find more outdoor crafts and DIY projects on my Garden Accents page


Original article and pictures take chickenscratchny.com site

Tuesday, September 13, 2016

kristinandcory.com

kristinandcory.com

This webpage was generated by the domain owner using Sedo Domain Parking. Disclaimer: Sedo maintains no relationship with third party advertisers. Reference to any specific service or trade mark is not controlled by Sedo nor does it constitute or imply its association, endorsement or recommendation.


Original article and pictures take kristinandcory.com site

Monday, September 12, 2016

Know Your Tree! How to Choose the Right Fresh Christmas Tree for Your Family

Know Your Tree! How to Choose the Right Fresh Christmas Tree for Your Family

What makes the “best” Christmas tree? Having sold fresh cut Christmas trees for many years, I can attest to the old adage that beauty is in the eye of the beholder. In truth, your best fresh Christmas tree may look vastly different than someone else’s. Size, shape, branch density, needle length, color, and fragrance are some of the personal preferences that will play into the final decision. For many of us, there is a specific tree species that just “smells like Christmas” because we grew up with that type.


Choosing the best christmas tree for your home is a cinch with this detailed guide

Pick the Right Christmas Tree for your Home

Popular Types of Christmas Trees


Each tree species has certain characteristics that have made it popular. Whether it’s the rigidity of the branch tips, how well it retains its needles, or a striking fragrance, each variety has something special to offer. Within a single species, the pruning affects overall shape and branch density: natural growth tends to be more open, frequent shearing leads to dense branches.


List of Popular Christmas Trees and Their Pros and Cons

  • Fraser fir is the most popular fresh Christmas tree in North America. Its needles are ½ to 1 inch long, dark green above and blue-green beneath. Needle retention is excellent and the scent is pleasantly sweet and slightly pungent.
  • Noble fir, with its rigid branches, is a fantastic choice for heavy ornaments. Its branches grow in whorls around the trunk, giving it a “tiered” effect. The upturned needles show both the medium-green surface color and blue-green underside.
  • Douglas fir is grown and shipped all over North America. The 1-1.5 inch dark green, soft needles radiate in all directions from the stem, giving it a full appearance. The needle retention is less than other trees but it is also usually a less costly tree.
  • Balsam fir needles are dark green, ¾ to 1.5 inches long, and last a long time. The scent of the crushed needles is very pleasant, lasting throughout the holiday season.
  • Grand fir is darker green with flat needles. It’s softer to the touch than other trees so it’s pleasant to decorate!
  • Nordman fir has longer needles than the Noble or Fraser firs, giving it a softer look. The needles are deep, glossy green and have a needle retention similar to that of both the Noble and Fraser firs.
  • Colorado blue spruce is a great choice for a living Christmas tree. In addition to the unique blue-green or gray-green foliage, it features a good shape and dense branches when young.
  • Scotch pine is the most heavily planted fresh Christmas tree variety. Its needles are 1-3 inches long and medium green. Needle retention is excellent, even when it dries out.
  • Eastern white pine has some of the longest needles in this listing, giving it a soft appearance. Needle retention is good. Because of its faint scent, this is a good choice for anyone sensitive to heavy fragrances.

Living Christmas trees, or potted trees, have become very popular because they can be planted in the landscape after serving their ornamental purpose indoors. Go for the type that fits your garden style.


How to choose a perfect Christmas tree

The most important thing to keep in mind while shopping for the best fresh Christmas tree is that all natural trees have slight physical imperfections. Some even contain bird nests or praying mantis egg sacks. Let these things serve as a reminder not to take decorating too seriously or obsess over minutia. Allow the natural beauty of the tree to take center stage for your holiday decor.


Original article and pictures take gardentherapy.ca site