Tuesday, February 28, 2017

Put Backyard Birds on a Pedestal with this Flowerpot Bird Feeder

Put Backyard Birds on a Pedestal with this Flowerpot Bird Feeder

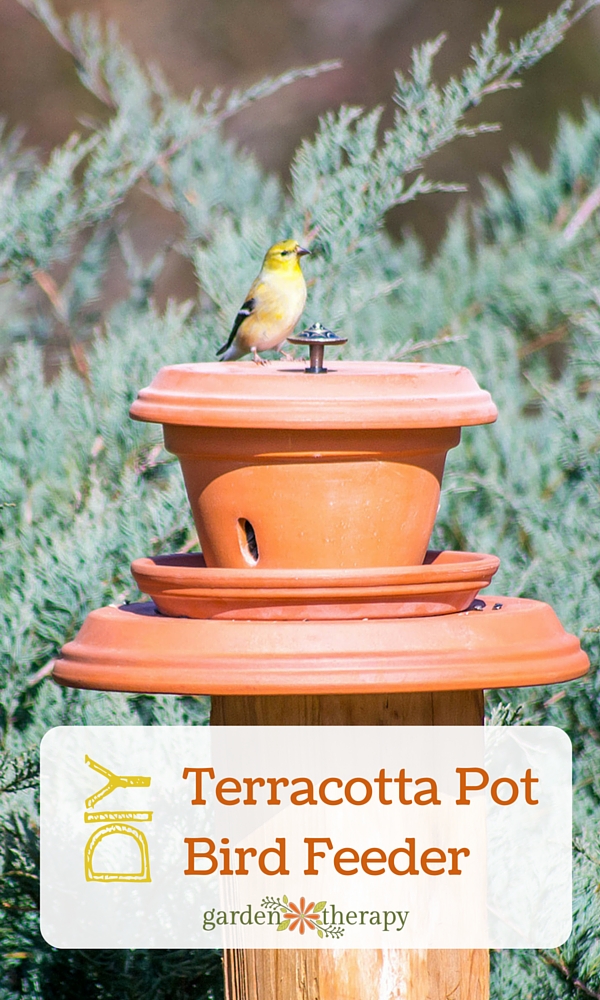
My family adores bird watching. We have multiple feeders around our yard so we can enjoy seeing the birds flit around the feeder and grab a snack. Sipping your morning coffee while watching the birds visit the feeders is both meditative and amusing. Even more so with this pretty pedestal flowerpot bird feeder I made.


Finished Terracotta Bird Feeder

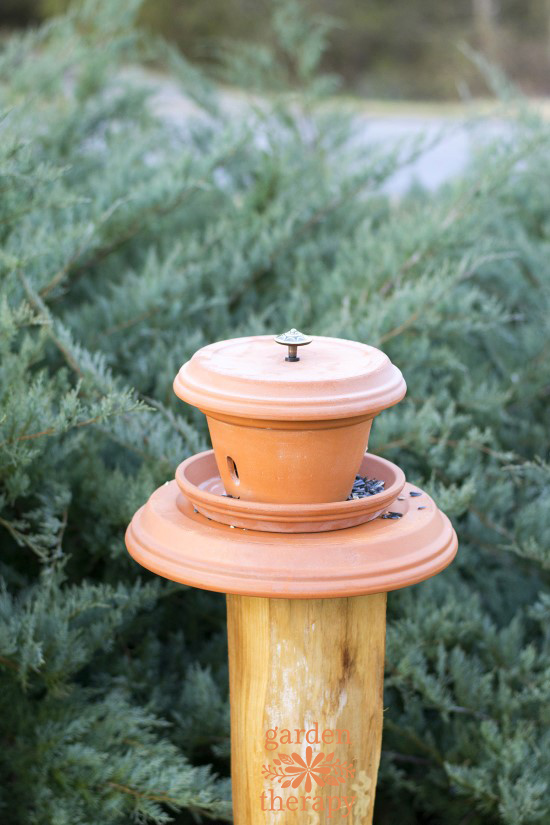
I’ve seen terracotta bird feeders on many occasions and it looked like an easy DIY to tackle. Lord knows I have enough clay pots laying around my shed. I decided to make a pedestal-type feeder instead of a hanging feeder because I wanted place it among a large juniper hedge I have in my front yard. Terracotta pots can have a bit of weight to them too. The pedestal holds the feeder much better than a tree branch could and it looks pretty fantastic if I do say so myself!


Materials


Not shown


  • Drill with masonry bit (large enough to make a hole big enough for the knob screw to pass through)
  • 3 1/2 inch rubber washers
  • 12 inch clay saucer (optional)
  • 5.5 foot cedar end fence post with one end flat and level (optional)

A Note on Supplies


I used a cedar fence post for my pedestal. You can use any weatherproof upright structure for the pedestal: stone, treated wood, or several terracotta pots stacked on top of each other. For the 12-inch saucer, you can use a heavy plate or dish that’s sturdy enough to handle the elements. I already had both, so that’s what I used.


Make it!


Flowerpot Bird Feeder DIY Step (2)

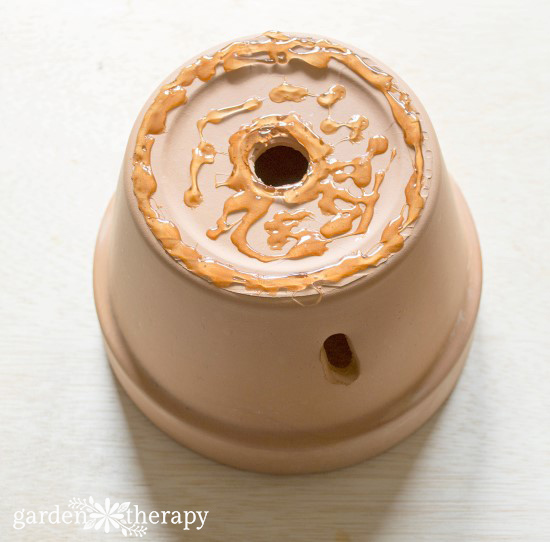
Add a generous amount of adhesive to the base of the orchid pot. Make sure you are in a well-ventilated area.


Flowerpot Bird Feeder DIY Step (3)

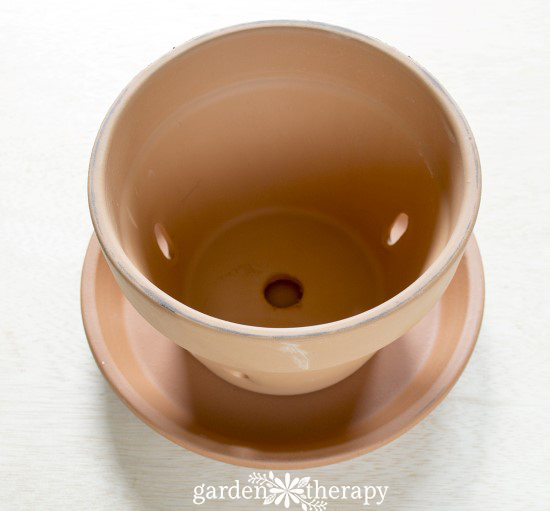
Center the orchid pot on top of one of the 8-inch saucers. Add more adhesive to the drain hole of the orchid pot so that it is filled. E-6000 will dry clear and takes at least half an hour to set. I let the glue dry for an hour before I moved the pot.


Flowerpot Bird Feeder DIY Step (4)

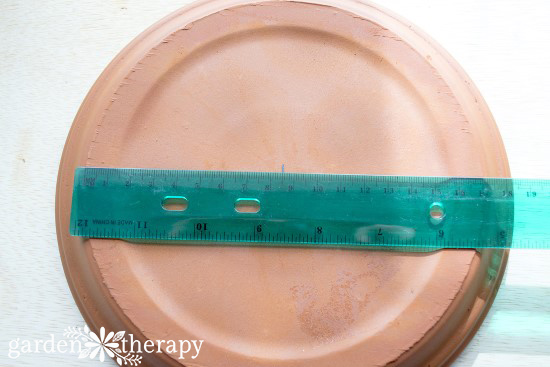
Measure and mark the center of the other 8-inch saucer. This is where the drawer knob is going to go. This will create a handle for the top of the feeder. With a drill fitted with a masonry bit, drill a hole in the marked spot. *For a small hole, the chances of cracking the terracotta is low. However, if this is your first time drilling through clay, you can soak the saucer in water overnight to reduce the chance of the saucer cracking.


Flowerpot Bird Feeder DIY Step (5)

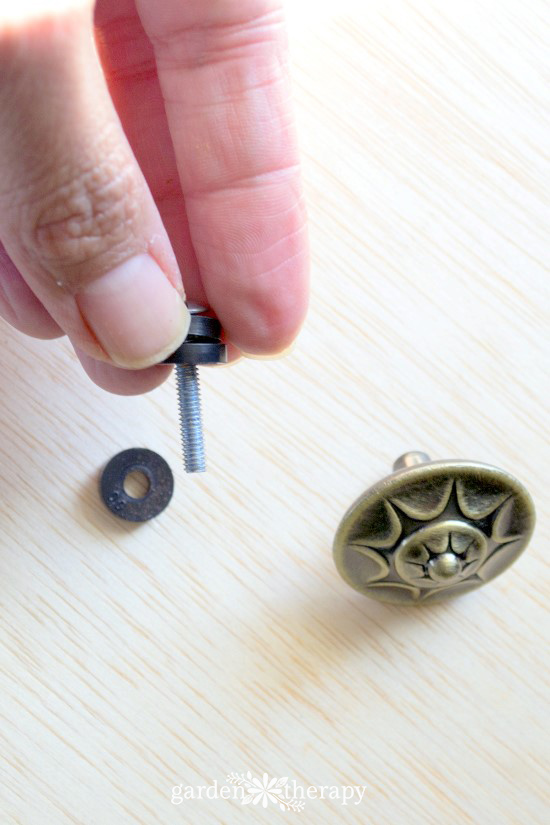
Remove the knob from its packaging and place two 1/2-inch rubber washers at the base of the screw.


Flowerpot Bird Feeder DIY Step (6)

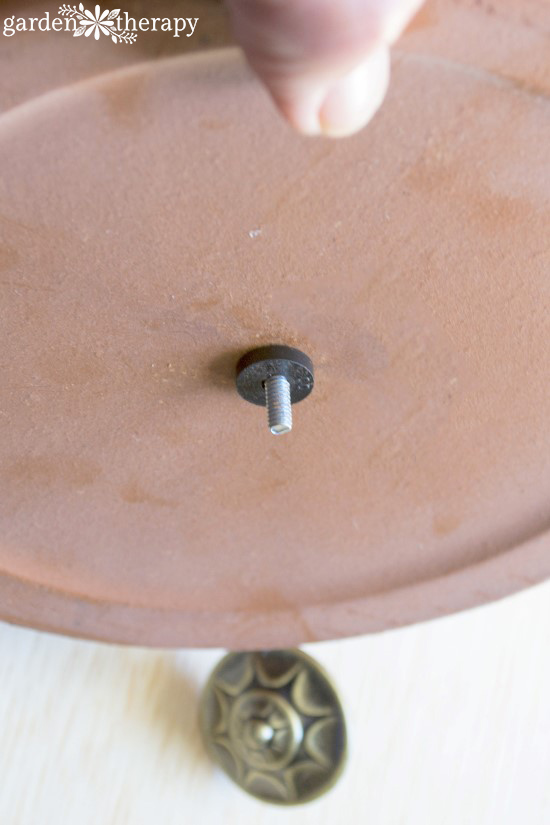
Pass the screw through the drilled hole in the saucer (make sure the lip of the saucer is facing down). Add the other 1/2-inch rubber washer and then the knob.


Flowerpot Bird Feeder DIY Step (7)

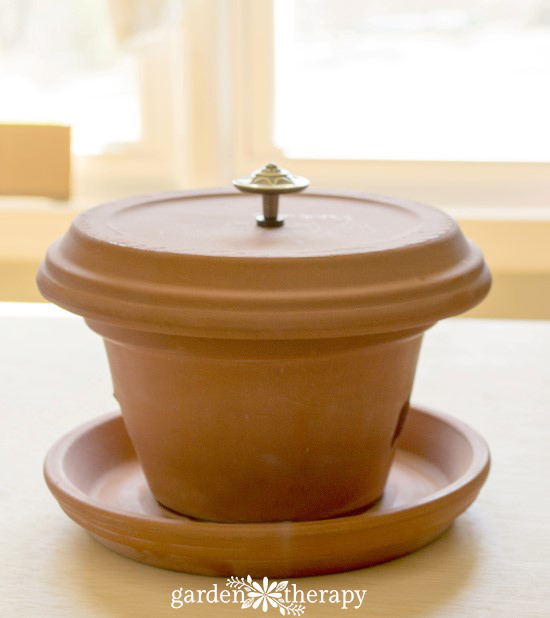
Add the lid to the feeder and this part is done. Now, let’s make the pedestal!


Create a Pedestal

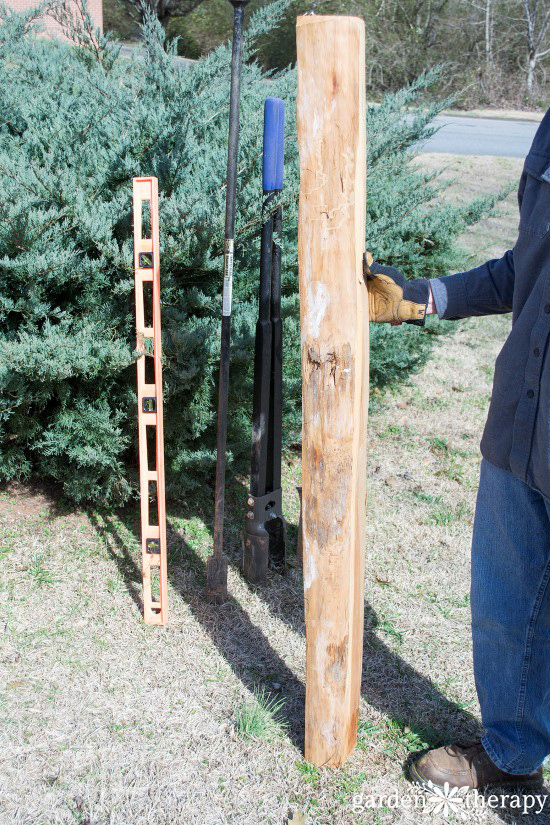
To insert the post into the ground will take a few special tools: post hole digger, lever and digging bar. I employed my husband for this task. I did pay him with cookies.


Dig the Hole

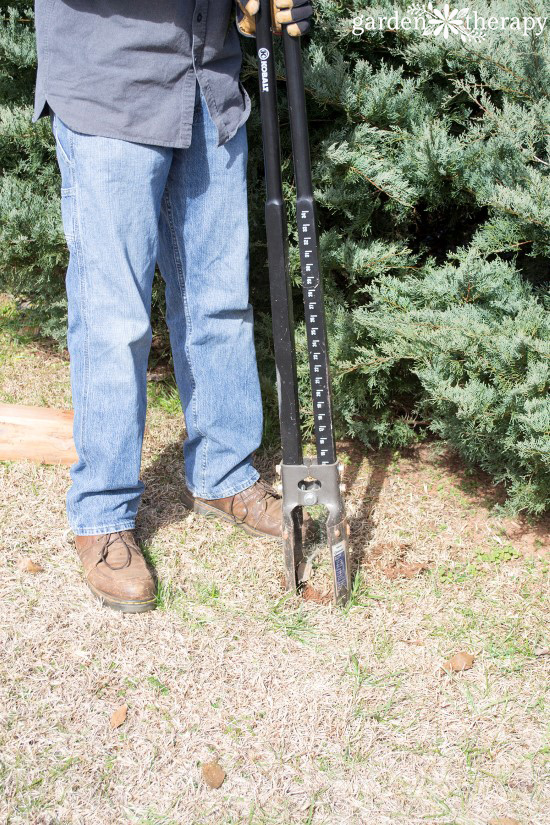
Dig a hole deep enough to sink the post about 6 inches.


Level the post

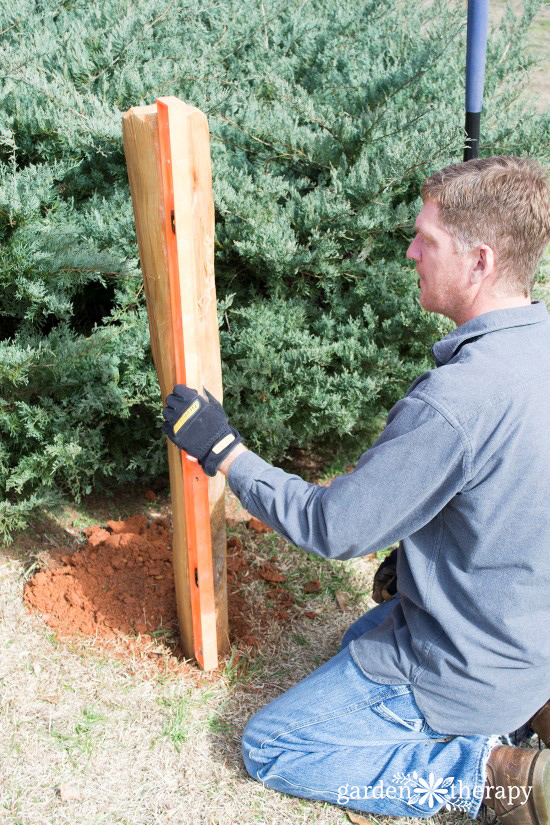
Make sure the post is level before filling in with dirt to secure it in place.


Add the 12-inch terracotta saucer on top of the post, lip facing down, making sure it’s centered. Fill the feeder with bird seed and place it on top. Ta-da!


DIY Pedestal Flowerpot Bird Feeder

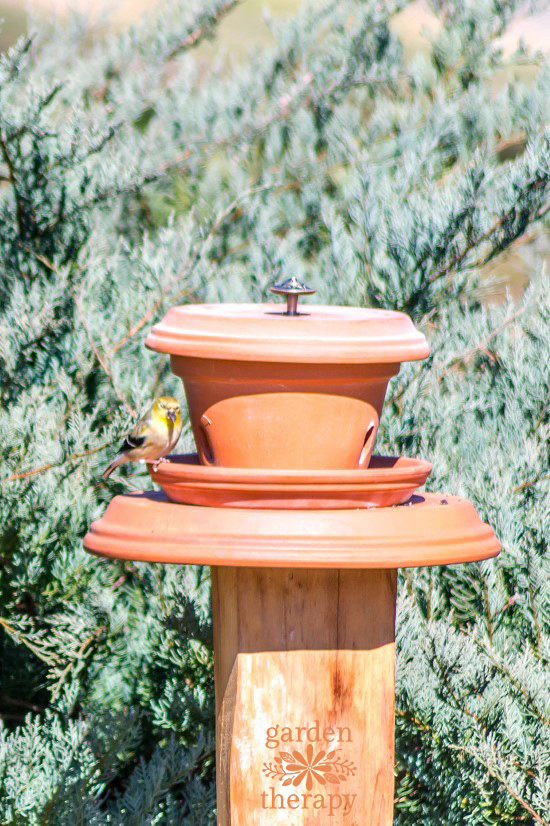
I chose not to adhere the 12-inch saucer to the post as these unglazed pots may break over winter in cold weather. I can keep it out for most of the year where I live, but if you live where there are cold winter freezes, then choose glazed pots for your garden. The weight of the feeder keeps it secure in place so I don’t feel the need to worry about it falling over. Smaller birds like finches and chickadees (and even a cardinal) did not shift the feeder at all, but again, if your weather conditions tend to have more wind than mine, then you may want to secure it to the post permanently.


Want to know more about backyard birding? Check out Why Backyard Birding is Back.


How to make a pedestal bird feeder out of a terracotta flowerpot

Original article and pictures take gardentherapy.ca site

Friday, February 24, 2017

Punctuate your Garden with a Succulent Sphere

Punctuate your Garden with a Succulent Sphere

Make your own three dimensional garden art with this diy tutorial


Jacki Cammidge is a participant in the Amazon Services LLC Associates Program, an affiliate advertising program designed to provide a means for sites to earn advertising fees by advertising and linking to amazon.com. Other links on this site may lead to other affiliates that I'm associated with.


I get asked a lot how to make a succulent sphere for displaying in the garden. There is something about the shape that appeals to us.


Whether they're made from metal, hypertufa or wire, garden spheres add definition, like a punctuation mark in the garden.


Your visitors will come to a complete stop to gaze at them!


Coir Lined Hanging Baskets, Joined to Make a Sphere
Save

I usually use the cheaper Garden Hanging Baskets with the shaped coir liner, as these are easier to plant into than the better quality coco fiber type. This one is in a package of 10, so you can make several spheres. Any size will work, from 10 inches in diameter to 16 - keep in mind, the bigger the sphere, the heavier it will be!


Sometimes, cheaper is better.


I found these at a dollar store, but I've also seen them priced economically at larger box stores, in their seasonal department during the summer, or wait until they sell them at a deep discount in the fall.


Make spheres in the autumn, and the plants will overwinter in them rooting happily (hardy succulents, anyway).


See More About Globes, Spheres and Balls here;


Jovibarba Globe
Jovibarba Globe

Rejuvenating the Sempervivum Sphere

Sempervivum Globe
Sempervivum Globe

Succulent Crafts
Succulent Crafts

Succulent Balls
Succulent Balls

Succulent Hanging Basket

For this project, buy two wire hanging baskets the same size. The ones shown here are just under 30cm (12 inches) across - there are many sizes available, and many shapes.


Find the dome shaped ones - any other shape won't make a globe.


I have used bigger ones, but they are accordingly heavier to display and move once they're filled with soil and plants, so they can only be placed on a sturdy frame or on top of a large and heavy terracotta, cement or hypertufa pot to show them off.


Hanging them requires extremely strong wire or chain, as well as a sturdy hook to hang them on, and a safe place to hang them.


As these get so heavy when wet I sometimes choose to display them in a large planter or pot so they look like a topiary.


Succulent Sphere hanging with strong chains
The smaller sized ones can be hung from chains, or wired to support the weight of the filled sphere from underneath.

I’ve also seen smaller ones yet with a pole stuck into the bottom of them which look like topiary trees.


How to Make a Succulent Sphere: A Tutorial:


Choose two identical wire hanging baskets...

Fill both hanging baskets with potting soil...

Place a board on one, and turn it upside down onto the other one...

Pull the board out from between the hanging baskets...

Wire the two hanging baskets together...

And pin or insert small cuttings or chicks into the sphere...

Mist for a week or two until they're rooted...

And a few months later, they'll be growing happily...

Until the whole sphere is covered with succulents!

So, you have your two wire baskets. I fill them with Sunshine mix #4, which has extra aggregate in it for drainage.


Keep in mind that this will eventually break down, and hold too much water, but for a season or two, your succulent sphere will be gorgeous.


Pack the soilless potting mix tightly, so it fills the space entirely - leaving pockets of air makes the liner sag eventually as the coir fiber softens.


Place a piece of plywood or a thin metal plate over top of one of the baskets, then flip it over onto the top of the other one.


Carefully draw out the plywood or metal, so the soil stays in place.


Wire the two baskets together at their rims in at least four places.


Collect enough Sempervivum chicks with a short piece of stolon still attached to hold the chick in place until it roots.


Make a small hole in the center between where the wire basket pieces cross over. Squeeze the Sempervivum chick stolon into the small hole.


Eventually, you will have to replace chicks or guide new chicks to take root in any blank spots.


Use many different kinds of Sempervivum for a mosaic appearance, or only two or three for more impact.


The chicks can be tucked into the coir fiber, and held in place with floral pins until they root.


Late July is the best time to make your Sempervivum sphere, as there are lots of chicks forming at that time of year; as well, there is time for the chicks to root before winter.


How to Make a Succulent Sphere
To over winter your succulent sphere, if you’ve used Sempervivum as I recommend, the winter care is easy.

Take the sphere down if it’s hanging and place it in a corner of the garden where it won’t get disturbed, and cover it with leaves; if you get some snow, even better.


This protects the plants from temperature swings - to prevent damage to the plants, it's important to eliminate the possibility of freezing and thawing.


Overwintering Succulent Spheres
Overwintering Sempervivum spheres in a perennial bed

Once the coldest part of the season is passed, inspect the succulents and replace as needed, fertilize with water soluble fertilizer or compost tea a couple of times per growing season.


Your three dimensional succulent sphere will only get better with age, and eventually you won’t be able to see the wire baskets as they become covered completely by the happy Sempervivum.


Just so you know: Sempervivum are a hardy perennial, and MUST have a dormant period. Therefore, they won't survive inside your house.


Types of Succulents
See more about the many Types of Succulents...

Other tender succulents that will work just as well are Echeveria, Graptopetalum, some of the smaller Crassula, Senecio rowleyanus and many more miscellaneous succulent plants.


The best types of succulents to use for crafts are low growing species and those that form clustering rosettes.


This way, they can cover the surface of the mosaic, sphere or topiary and hide the moss or coir that contains the soil.


More pictures of the Sempervivum Spheres here (yes, you can use other succulents!)


They are looking good, just coming out of dormancy; just wait...
A group of Sempervivum Spheres just coming out of dormancy; just wait a while...

Sempervivum Sphere in May 2013
The glorious result in May 2013

The sphere in the fall - almost time for bed...
The colors are always changing - here they are in the fall


Original article and pictures take www.drought-smart-plants.com site

Wednesday, February 22, 2017

Pumpkins from scrubbing pads – a repurpose

Pumpkins from scrubbing pads – a repurpose

While at the grocery store yet again the other day…


Pumpkins from Scrubbing pads a repurpose http://mysoulfulhome.com

I spotted packages of 3 ‘would be’ pumpkins.


Pumpkin from a scrubbing pad - a repurpose http://mysoulfulhome.com

Would be” because they weren’t pumpkins yet, they were copper scrubbing pads for pots & pans.


Pumpkin from a scrubbing pad - a repurpose http://mysoulfulhome.com

They had a higher purpose…Fall decor at MSH.


Pumpkin from a scrubbing pad - a repurpose http://mysoulfulhome.com

I resisted buying 10 packs & settled on 2.


How to make Pumpkins from Scrubbing Pads


Less then an hour after being struck with the idea, I had 6 shiny little pumpkins lined up in a row.


Pumpkin from a scrubbing pad - a repurpose http://mysoulfulhome.com

Darling sitting in a tiny urn, with some vintage books or anywhere you need a sparkly touch of fall.


Pumpkin from a scrubbing pad - a repurpose http://mysoulfulhome.com

Would be cute on top of a present or tucked in with a loaf of pumpkin bread too.


Pumpkin from a scrubbing pad - a repurpose http://mysoulfulhome.com

If your pots & pans can wait too, here is how to make pumpkins from scrubbing pads:


Materials


  • a package or more of copper scrubbing pads – get yours here.

  • bits of thin sticks

  • scraps of felt

  • twine

  • wire

  • glue

  • a thin paint brush

Pumpkin from a scrubbing pad - a repurpose http://mysoulfulhome.com

Steps


  • open & fluff up the pads

  • glue a stick to the center of the pad

  • glue twine around base of the stick ( optional )

  • wrap site around the end of the think paint brush to create a curly vine

  • remove curled wire from the brush end

  • bend in half, put around the stick/stem and twist

  • cut 2 felt leaves with pinking shears

  • glue leaves to pumpkin

  • let dry

Pumpkin from a scrubbing pad - a repurpose http://mysoulfulhome.com

I love a repurpose, up cycle or recycle, don’t you?


If you like this fall repurpose project you will like this one and this one too! Have a look…


What is your favorite repurpose, up cycle or recycle that you have made or seen?


** Kelly **


linking up at Rustic & Refined


Original article and pictures take mysoulfulhome.com site

Tuesday, February 21, 2017

Prom Hair Styles for Medium Hair

Prom Hair Styles for Medium Hair

Do you have medium length hair and are looking for the perfect prom hair style? StyleBistro has prom hair styles for medium hair ideas!


Taylor+Swift in 2011 Vanity Fair Oscar Party Hosted By Graydon Carter - Arrivals
Singer Taylor Swift arrives at the Vanity Fair Oscar party hosted by Graydon Carter held at Sunset Tower on February 27, 2011 in West Hollywood, California. (Getty Images)

more pics »A perfect way to style medium hair for prom is simply by curling it or adding a retro wave. Taylor Swift perfected this look for the Oscars.


Dianna+Agron in Premiere Of DreamWorks Pictures'
Actress Dianna Agron arrives at the premiere of DreamWorks Pictures' "I Am Number Four" at the Village Theater on February 9, 2011 in Los Angeles, California. (Getty Images)

more pics »Dianna Agron was the epitome of elegance at her movie premiere with a low chignon. The delicate twisted bun looks intricate but is easy to recreate.


Natalie+Portman in 68th Annual Golden Globe Awards - Arrivals
Actress Natalie Portman arrives at the 68th Annual Golden Globe Awards held at The Beverly Hilton hotel on January 16, 2011 in Beverly Hills, California. (Getty Images)

more pics »Another perfectly gorgeous style is Natalie Portman's from the Golden Globes. The simple french twist is elegant and easy to acheive with a multitude of hair lengths.


For more hair inpsiration, check out StyleBistro's extensive collection of prom hair styles for medium hair:


Original article and pictures take www.livingly.com site

Thursday, February 16, 2017

PROJECTS DIY Vertical Succulent Garden

PROJECTS DIY Vertical Succulent Garden

disclosure: This post is sponsored by The Home Depot.


If you’ve ever wanted to become fluent in teenager-speak….


….I have a new vocabulary word for you.


Legit.


It’s super versatile and can be used as a noun, an adverb, an adjective and an interjection (and sometimes more than one in the same sentence.


Legit as a noun: That vertical succulent garden you built is legit.


Legit as an adverb: You are legit planting succulents on the wall?


Legit as an adjective: Are you serious? That is one legit succulent garden.


Legit as an interjection: You built a garden on the wall where you planted succulents? LEGIT!


And sometimes all of the above: Legit? You planted that legit succulent garden? Really? You are legit DIY’ing and that is legit.


You’re welcome.


Legit.


Want to plant your own?


Here’s a few legit directions:


How to Plant a Vertical Succulent Garden


materials:


Step 1: Measure and mark cuts

Attach chicken wire, landscaping cloth and fill with soil

Step 7: Attach eye hooks

Want to make one yourself?

Original article and pictures take thistlewoodfarms.com site

Wednesday, February 15, 2017

Preserve the Beauty of the Garden with Cyanotype Sun-Print Cards

Preserve the Beauty of the Garden with Cyanotype Sun-Print Cards

There are many ways to collect beauty from the garden and preserve it but one of my favorites is to create greeting cards using a historic photographic method, cyanotype printing. I first used this method to create sun print napkins and was thrilled with the results. I was hooked on the possibilities of the interesting shapes in the garden that just needed to be immortalized. Using some of the leftover cyanotype solution from the project, I made a bunch of sun-print cards showcasing the various leaves in my garden


How to make sun prints

How to Make Sun Print Cards


To make sun print cards, follow the instructions over at the napkin tutorial, or on the instructions of the cyanotype kit to mix the chemicals. Then, use a small foam roller to make a rough rectangle on the cards. I like the edges uneven and natural looking, like torn paper.


Pick out a few interesting-shaped flat things from the garden, a park, or forest. Flat leaves with plenty of detail seem to work best. Those that are rounded will leave shadows and not give a crisp sun print.


Making sun prints

Arrange the leaves on prepared cards once the solution has dried. Note: be sure to allow the solution to dry completely in the dark as per the package instructions as any light will begin the exposure process. Place a piece of glass over cards and leaves and set it out in direct sun for 20 minutes undisturbed.


You can also buy sun print paper if you don’t want to deal with applying the chemicals. That’s on my list to try next.


When the exposure time is up, run the print under water until it starts to develop.


The instructions say wash for 5 minutes but I found this lightened too much of the print. I also tried floating the whole card in a tub of water and didn’t like these results that were, again, too washed out. There was a warning in the instructions that if you don’t wash the chemicals off well enough, your print will continue to expose. I did these cards a few weeks ago and they are still just perfect, so I suppose I found the right balance. My experimentation led me to feel satisfied with the running water system.


Cyanotype sun printing

You don’t need to wash them until the unexposed area under the leaf is completely white, which will happen as it finishes developing and dries. Set out to dry until damp, then press between sheets of parchment in a phone book so that the card flattens out again.


Botanical sun prints

I did a bunch of different types of organic materials I found in the garden, but the most successful were flat leaves or flowers. I did some poppy seed heads that cast a shadow and made the print look distorted. I’m sure you will have plenty to choose from as I did, as nature is abundant.


If you love crafting with plants as much as I do, here are some other projects you might enjoy as well:


Original article and pictures take gardentherapy.ca site

Tuesday, February 14, 2017

Ponytail with Volume

Ponytail with Volume


Ponytail with volume and dark roots


Hairstyles

Hairstyles

Hairstyles

Hairstyles

Hairstyles

Hairstyles

Hairstyles

Hairstyles

Original article and pictures take longhairstyleshowto.com site