The Sponsored Listings displayed above are served automatically by a third party. Neither the service provider nor the domain owner maintain any relationship with the advertisers. In case of trademark issues please contact the domain owner directly (contact information can be found in whois).
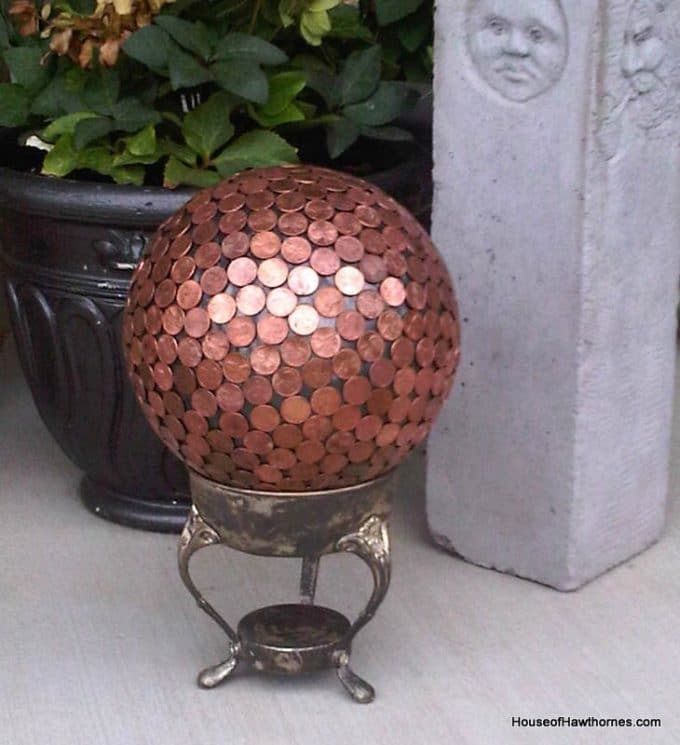
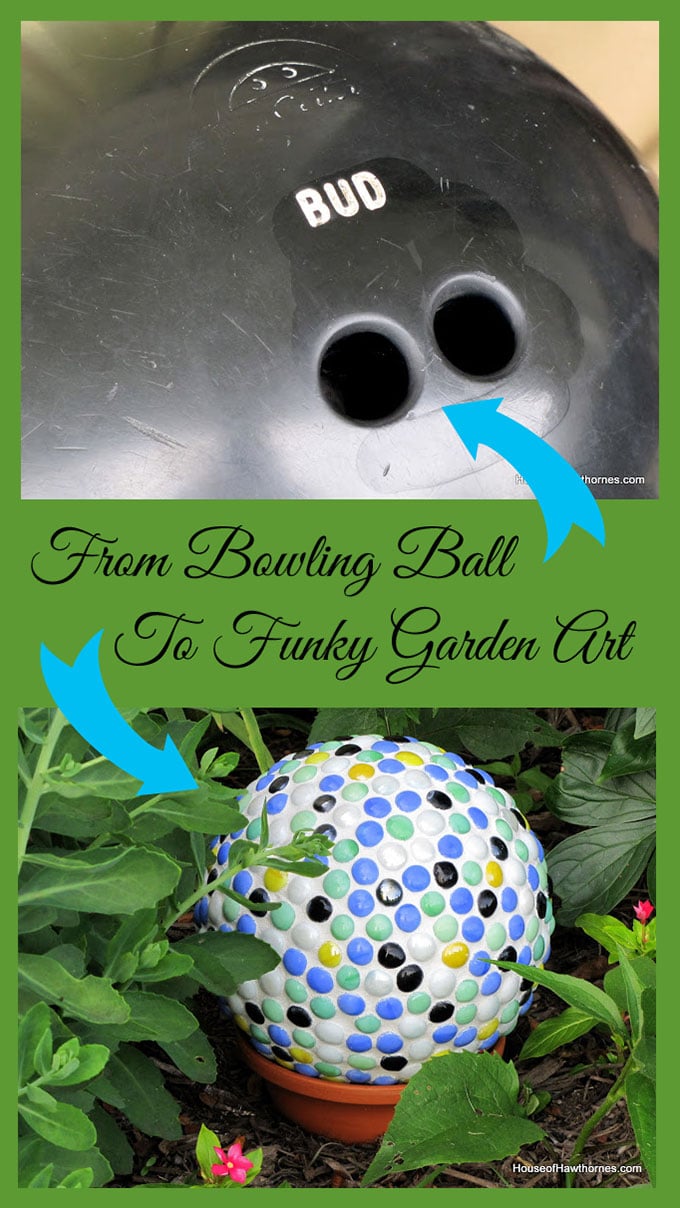
Way back when I first started blogging, I showed you how to turn a garage sale bowling ball into a piece of yard art. In that case, a penny bowling ball.
Penny bowling ball yard art - Place in the garden for repelling slugs and making hydrangeas blue - plus it's just cool looking! via houseofhawthornes.com
I think bowling ball yard art has a sort of cult following, because that post is by far the most Googled of my posts and brings quite a few people to my blog.
This summer I decided to make a slightly different version of bowling ball yard art.
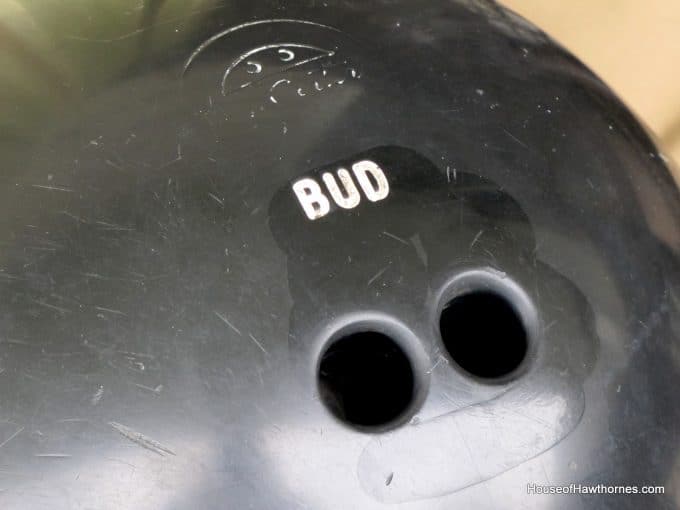
I picked up a bowling ball at my local thrift store. Bud’s ball, to be exact.
DIY fun yard art for your garden made from a bowling ball from houseofhawthornes.com
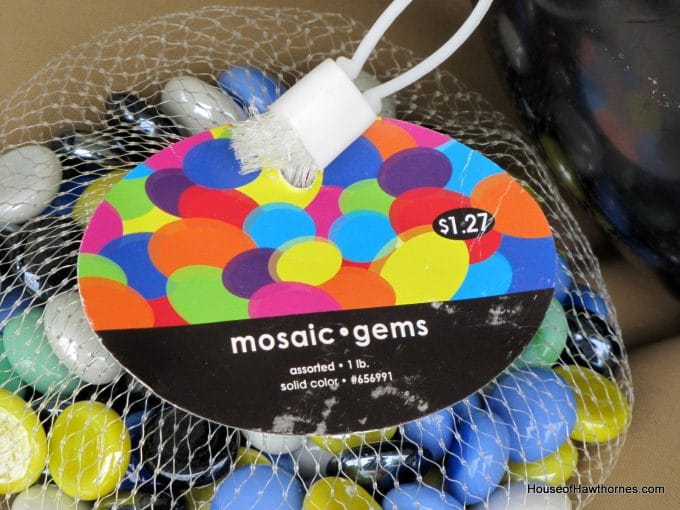
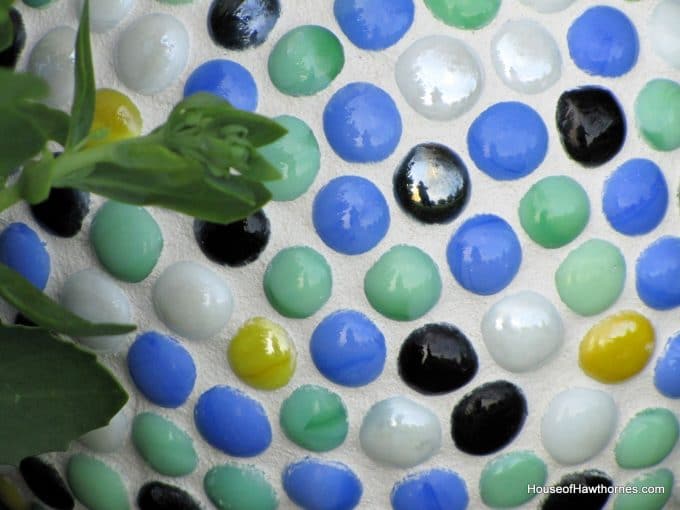
Some “gem” stones from the mosaic and glass tile aisle at my local craft store. I used approximately 6 bags of these.
DIY fun yard art for your garden made from a bowling ball from houseofhawthornes.com
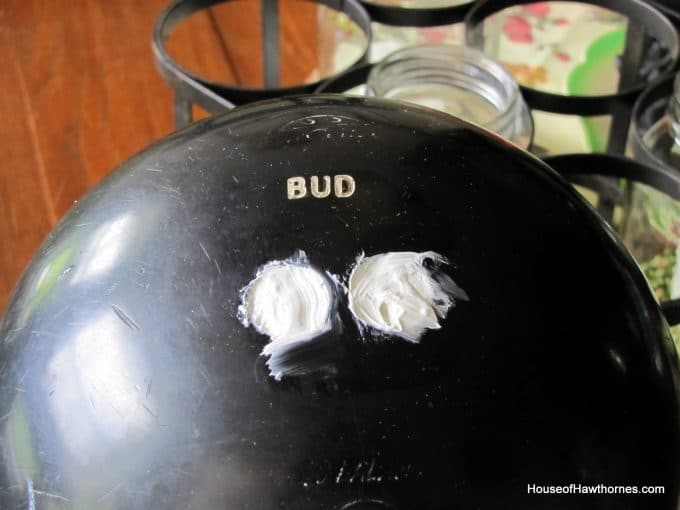
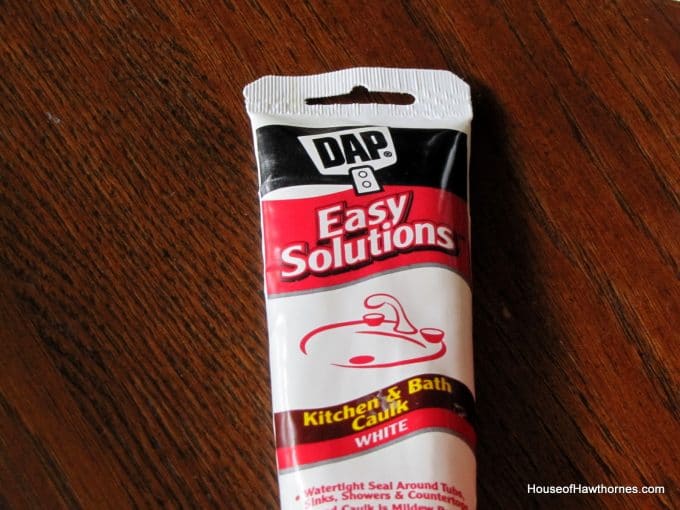
I started off by filling in Bud’s finger holes with some wads of paper towels until there was about 1/2 inch still open and then I topped that off with regular old caulking.
Bud had some huge fingers and I didn’t want to use up a whole tube of caulking, so that is the reason for the paper towels.
DIY fun yard art for your garden made from a bowling ball from houseofhawthornes.com
I just used the stuff you would use in a bathroom to caulk around a sink or tub or baseboard molding.
DIY fun yard art for your garden made from a bowling ball from houseofhawthornes.com
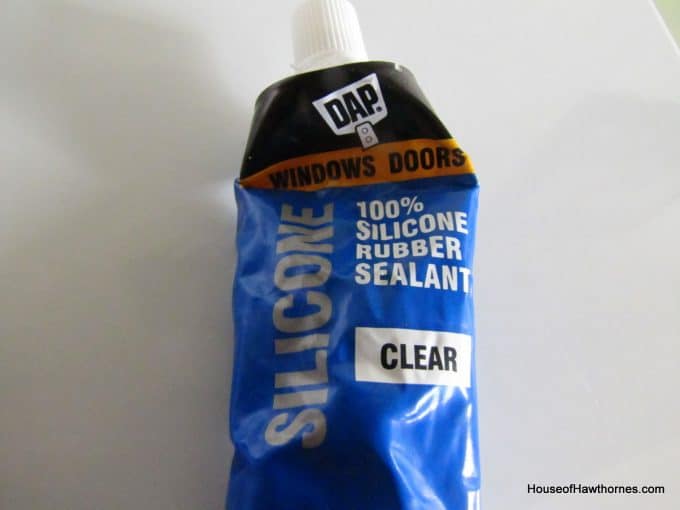
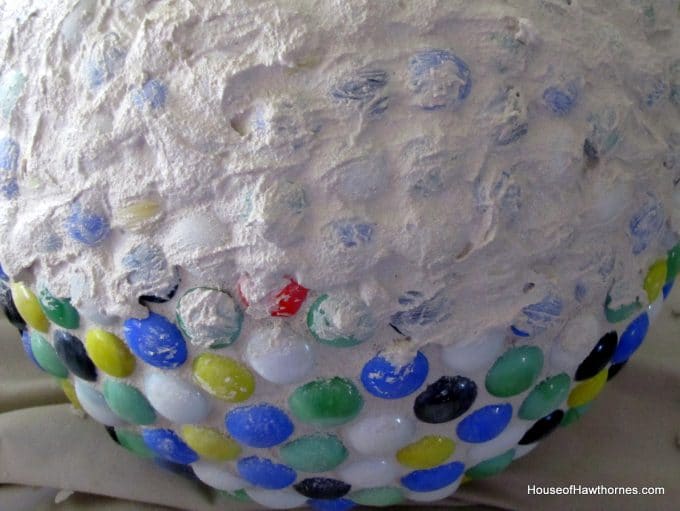
I roughed the ball up with sandpaper a little just to give it a better tooth to grab the glue. I used DAP’s Clear Silicone Rubber Sealant for Doors and Windows as my adhesive. Since this was going to be placed outside I wanted something that was waterproof, plus would set up quickly.
Then I glued my gems on to the ball.
DIY fun yard art for your garden made from a bowling ball from houseofhawthornes.com
This took me two months.
A person with more patience and less ADD could finish the gluing in less than two hours though. And most of that time would be waiting for one section to set up before you go on to the next section.
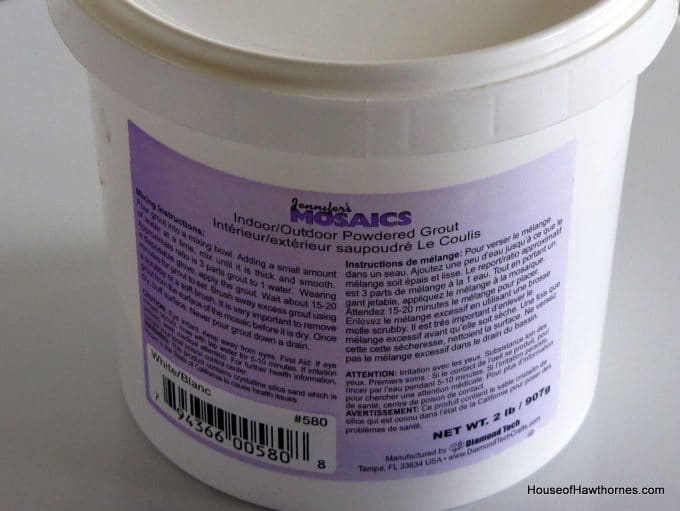
I decided to grout this ball, so I bought a small tub of powdered grout made for indoor/outdoor mosaic projects.
DIY fun yard art for your garden made from a bowling ball from houseofhawthornes.com
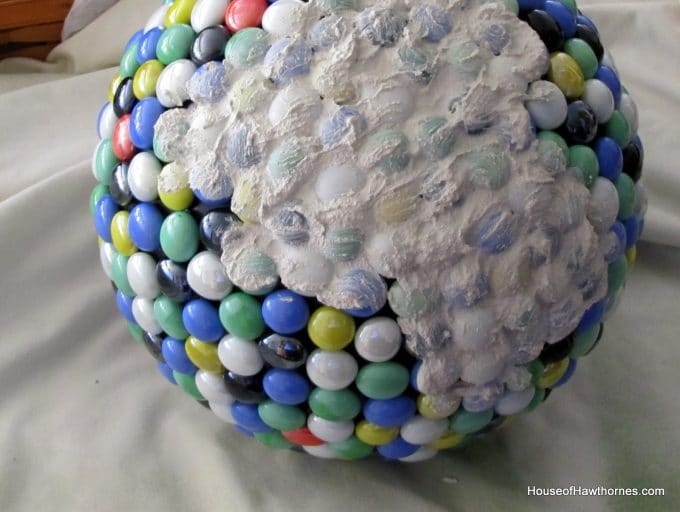
I split the grouting up into two halves.
I grouted the first half by spreading the grout over the gems and pushing it down between them. I let it dry for just a few minutes and then ran a damp sponge over the gems to get the vast majority of the grout off the TOPS of the gems (you leave it in the grooves and sides though).
If you let the grout dry completely on the tops of the gems, it will be very hard to get off later.
When the grout was completely dried, I used a clean dry cloth to polish off any haziness caused by the slight grout residue.
DIY fun yard art for your garden made from a bowling ball from houseofhawthornes.com
Then I flipped the ball over and grouted the rest using the same technique.
DIY fun yard art for your garden made from a bowling ball from houseofhawthornes.com
After it was dried, I applied some grout sealer.
And then it was good to go.
DIY fun yard art for your garden made from a bowling ball from houseofhawthornes.com
I had thought about making one with pebbles on it, since The Dollar Tree has bags of them for $1.00.
But I don’t want to become the lady with all the bowling balls in my yard. Then I’d have to change the name of my blog to House of Bowling Balls and there would be a lot of work in making that change.
DIY fun yard art for your garden made from a bowling ball from houseofhawthornes.com
Can I tell you that I had second thoughts about ever posting this project on my blog. I couldn’t decide if it was cute, weird or tacky? So be gentle with me.
BTW, The Summer Kitchen Girls mentioned my penny bowling ball in a post recently. I believe they found me in the first place through Googling images of penny bowling balls.
It used to be mason jars. “How can anyone be addicted to mason jars?”, you ask. They are so versatile and pretty I sometimes wonder how people don’t have a huge collection of new, old, vintage, clear, blue, quilted, and more mason jars. I have so many that I should be on one of those strange addiction shows!
The one day I made a mason jar into a solar light and the collection started moving its way outdoors. I made so many that my whole garden was glowing at night. Then I saw that many people started making solar light lids that you can quickly just twist on to one, clearly I’m not the only one who loves glowing outdoor jars either. (See a whole bunch of mason jar solar lids here).
But this still isn’t my new addiction.
No, it’s what happens inside the mason jar when the sun goes down: creating miniature gardens INSIDE a mason jar and adding a light to create...
Now I want All. The. Things. Well, all the things miniature, or small enough to fit into a jar. Thank goodness the world of miniature gardening is so popular that there is an endless supply of teeny-tiny garden pots, benches, birds, and of course, fairies.
Miniature gardening is the process of crafting up a living landscape in small form. Fairy gardens, like miniature gardens are also small, miniature gardens generally have more dwarf plants and fewer fairies. These mason jar solar lights are completely closed to air so when making them choose materials that give the idea of creating a garden space, but that don’t require air (like preserved moss, miniatures and figurines, rocks, and sand).
Original article and pictures take www.ebay.com site
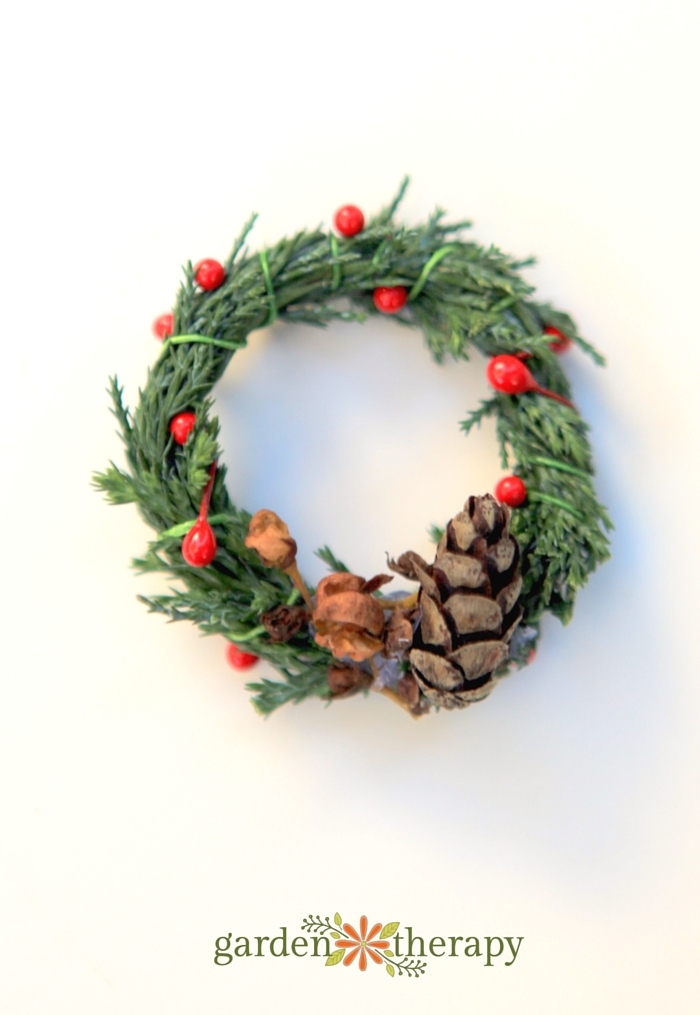
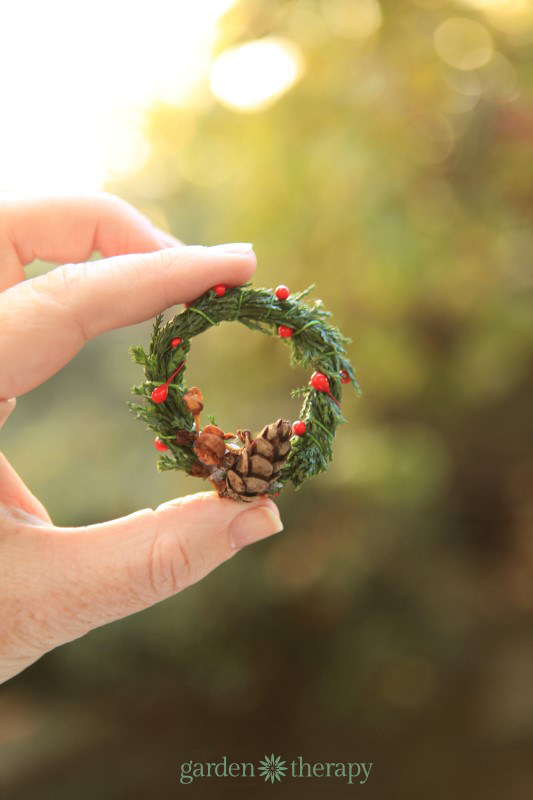
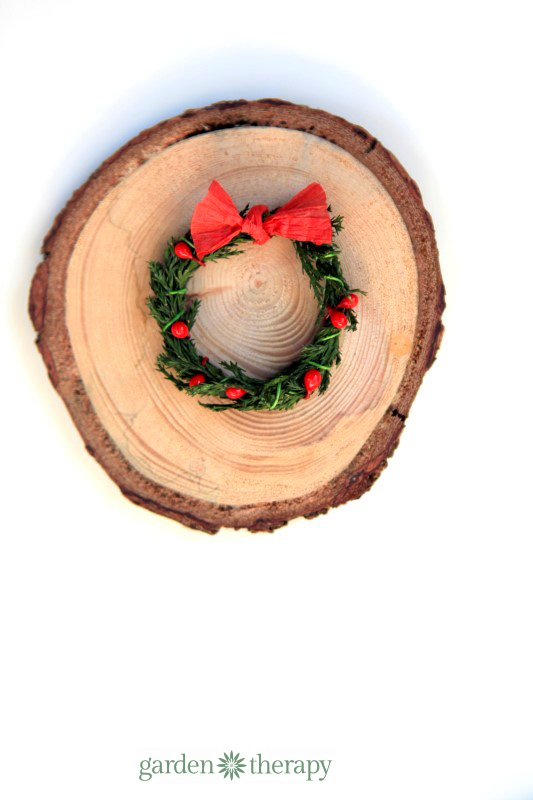
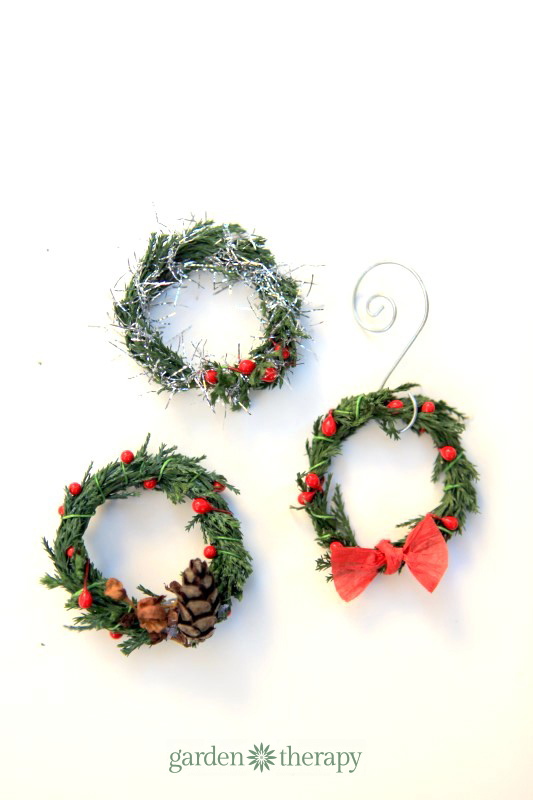
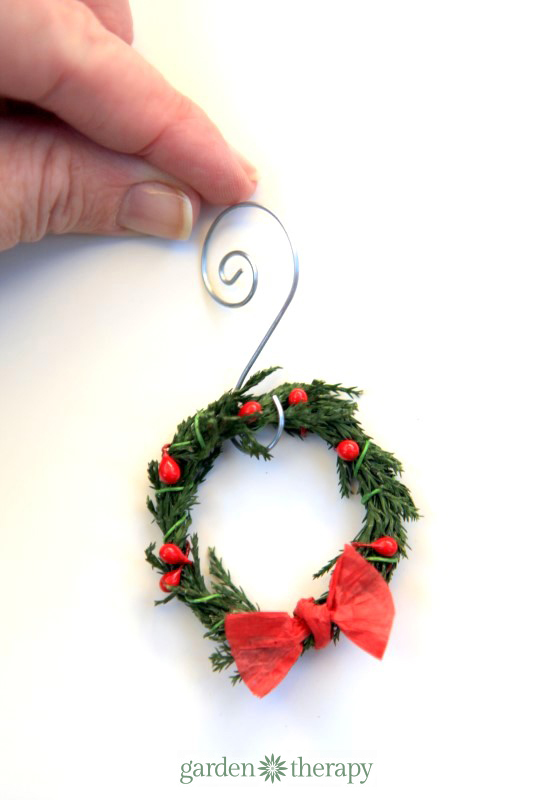
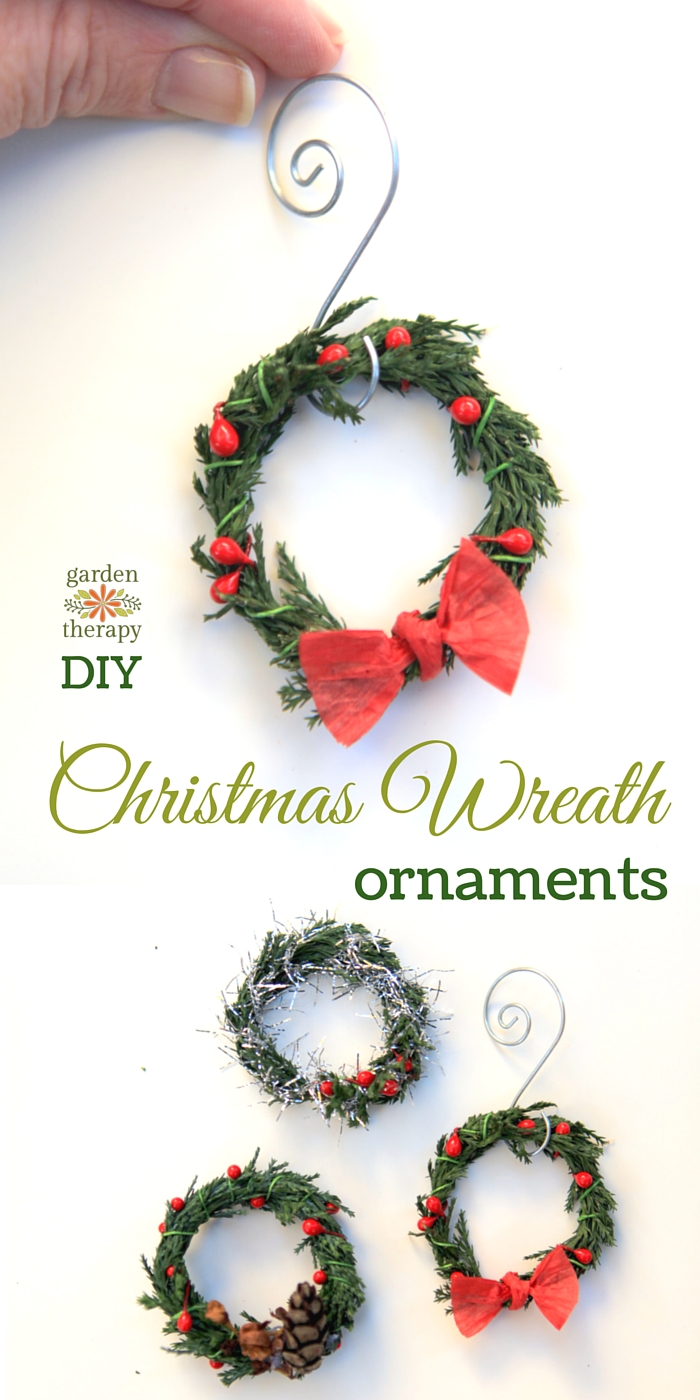
With just a snippet from an outdoor evergreen you’re well on your way to making these miniature wreath ornaments. You can hang them on the tree, use them to decorate the outdoors, add them to gifts, or even use them as napkin rings! No matter how you use them they are a fun and simple project to bring the outdoors in.
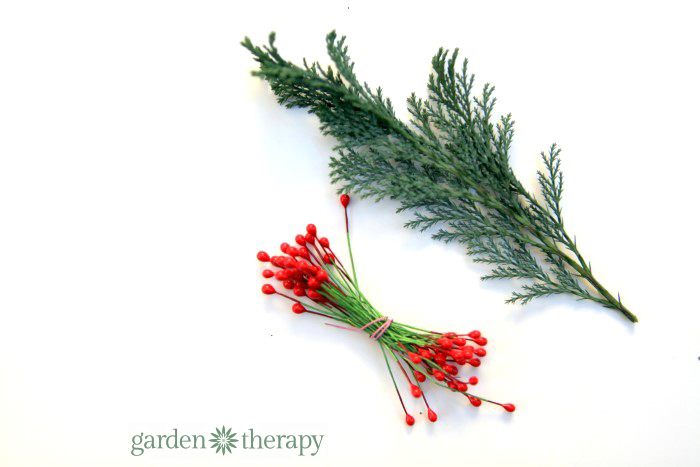
The idea for mine came from finding this floral wire with red berries on the ends. I thought it would be a quick and easy way to make plenty of decorations from garden clippings.
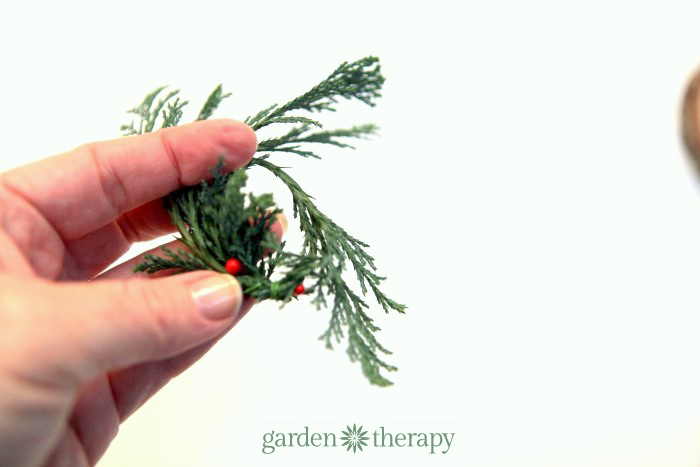
Start with a fairly pliable clipping from an evergreen. Leaves from cedar and false cypress are soft and easy to form. Bend the clipping around so that the tip overlaps the cut end. Wind floral wire tipped with red berries around the two ends to secure it.
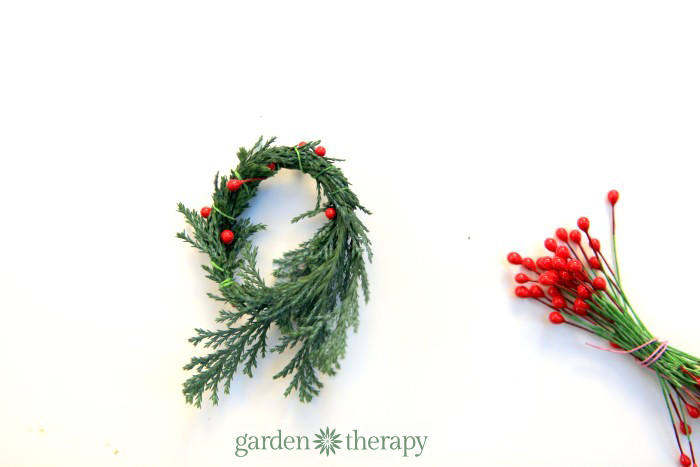
Continue wrapping wire around the wreath until you have all the little leaves tucked in.
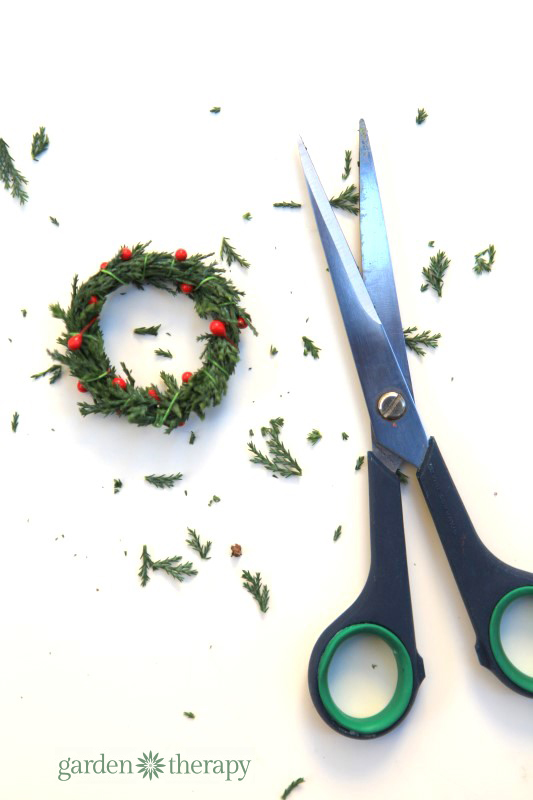
Trim the wreath with scissors to clean it up and make a nice round form.
Add decorative elements like seed heads, miniature pinecones, and other things found around the garden with a hot glue gun.
You can also use ribbon to decorate the wreath. This raffia ribbon makes an easy bow as you simply need to tie it in a knot, then unfold the ends of the ribbon.
My sister lives in Los Angeles. Her design style is mid-century modern. It's clean, uncluttered and minimal. A breath of fresh actually. I was inspired by her decorating style on a local trip to the hardware store's plumbing aisle. It all started with a handful of copper plumbing bits and pieces.
Photo by Melissa Caughey
It took me a little while to figure out how to piece together the cooper fittings, but when I was done, I had a neat way to create the arm for this planter. The total cost of this craft was around twenty dollars and it took a few days to complete if you include drying time.
Photo by Melissa Caughey
To make this hanging planter, you will need:
remnant rectangular piece of wood
copper plumbing supplies - one 90-degree elbow 1/2", two small pieces of 1/2" copper piping cut to a 2" and a 6" piece, two 90-degree fitting elbows 1/2", one tube cap 1/2", one coupling piece 1/2"
tube of permanent adhesive
drill with an 11/16th paddle bit
dremel with barrel sander
sandpaper
wood stain
fishing line
hanging glass orb
air plant, succulent clippings
moss
Photo by Melissa Caughey
Begin by laying out the pieces of copper fittings. Starting at the bottom with the 1/2" coupling, a 90-degree fitting elbow, the six-inch 1/2" pipe piece, a 90-degree elbow, the two-inch 1/2" pipe piece, the second 90-degree fitting elbow and then the 1/2" tube cap. Glue these all into place with the adhesive and allow it to dry thoroughly as per the adhesive's directions.
Photo by Melissa Caughey
Sand and stain the rectangular piece of wood you selected for the base. Allow it to dry. Next, using the paddle bit, drill a hole to fit the copper coupling. To adjust the hole's size, finish it off with the dremel's sanding barrel. Flip the wooden base over and drill a small hole for a nail for hanging. Then using the same adhesive for the piping, glue the pipe into place on the front of the wooden base.
Photo by Melissa Caughey
Next add some moss and plants to the glass orb. I used two low-maintenance plants including an air plant and a few succulent clippings. Then add a loop of fishing line to the top and hang it from the copper pipe.
Enjoy this planter for years to come. You can always add or change your plants based on the season, holiday or weather. In temperate climates, this planter can be hung in a protected area outdoors.
Original article and pictures take www.diynetwork.com site
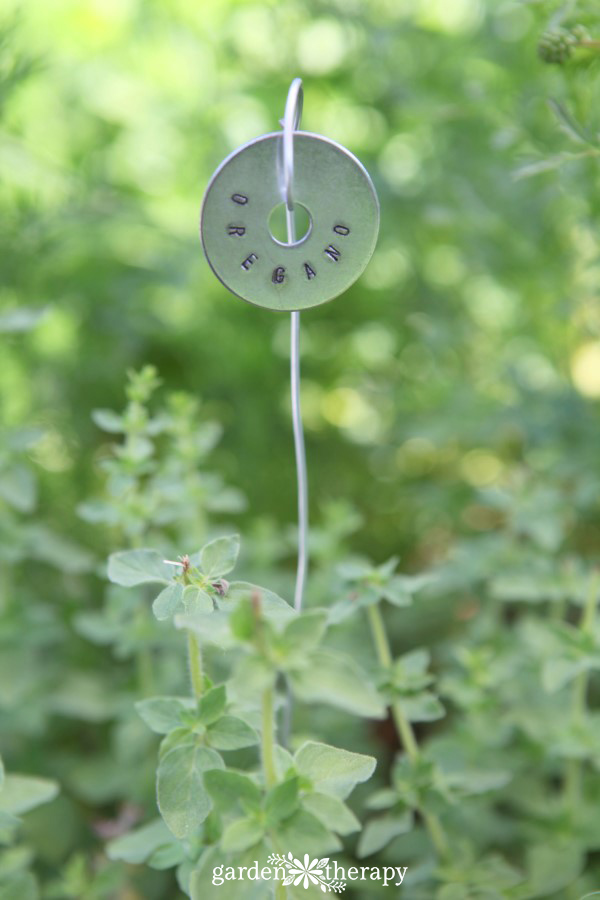
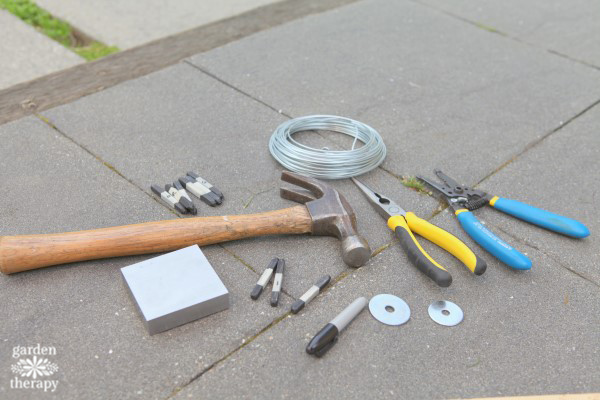
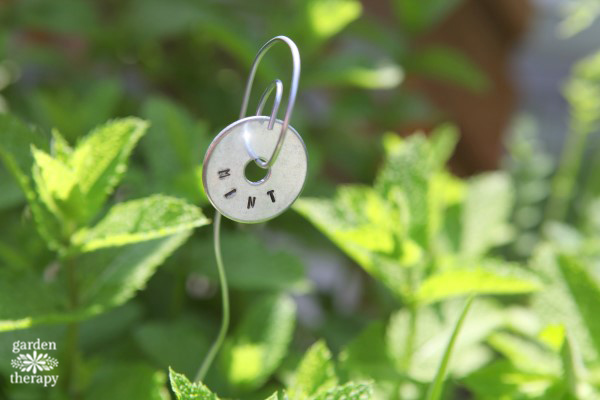
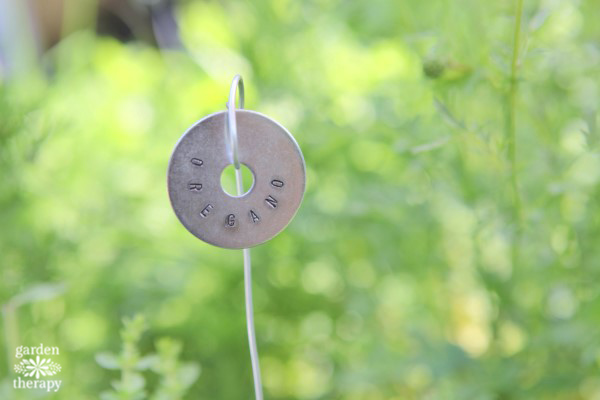
Metal Stamped Plant Tags from Hardware Store Finds
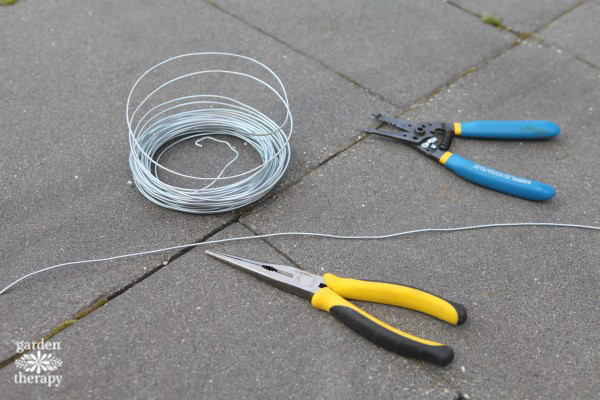
It’s important to label your plants so you know what’s what in the garden, but sometimes plant labels can be distracting, flimsy, or just plain ugly. These charming metal tags are super practical and have a clean, sleek look that compliments plants but doesn’t overshadow their natural beauty. Here is everything needed to make this modern take on metal stamped plant tags, which can also be used to label trees.
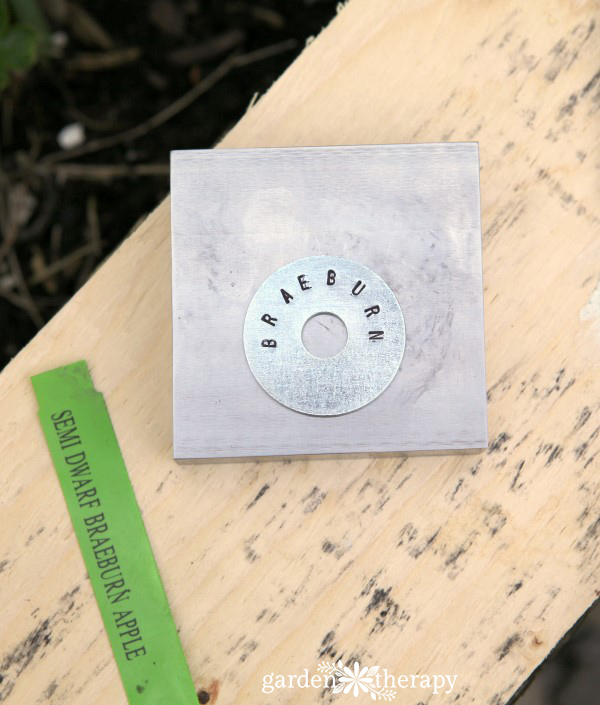
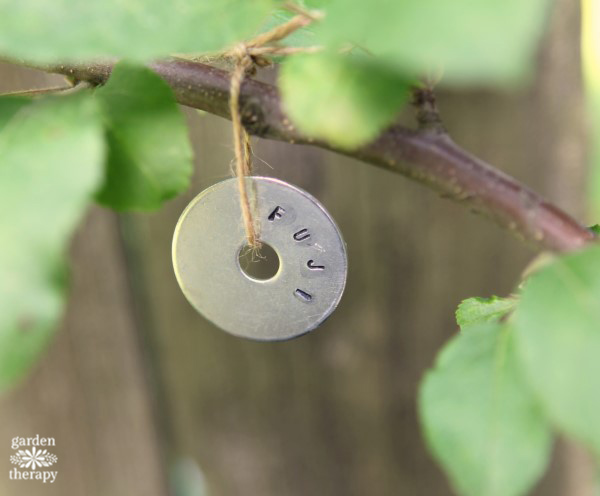
An espaliered apple tree is the perfect way to grow a number of varietals of fruit in a small space.
On my tree, there are 6 different kinds of apples on 6 different grafted branches: Fuji, Braeburn, Red McIntosh, Gala, Jonagold, and Gravenstein. In order to produce fruit, most varieties of apple require pollination by another variety that flowers at the same time. For example, McIntosh cannot set fruit by itself but it will pollinate other early-blooming varieties such as Gravenstein. So, while I may not be jazzed about Red McIntosh as an apple, I like having a branch grafted on my espalier because it serves its purpose well by helping the Gravensteins get the pollination they need.
What didn’t serve its purpose well were the brightly colored plastic tags that identified each branch. You can see them in the background of the pea trellis project. Ick! A trip to the hardware store provided the supplies and inspiration to make more modern and subtle tags with some washers, galvanized wire, and a metal stamp set.
How to Make Metal Stamped Plant Tags
Materials:
Washers
Wire cutters
Needle-nose pliers
Hammer
Black permanent marker
Steel wool
Twine
Earplugs
Make it!
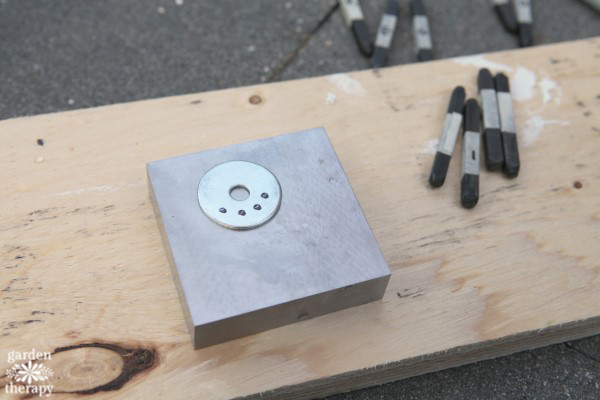
Using the permanent marker, mark small dots on the washer where you want your letters to be. If you position the letters along the bottom they will read upright when hanging.
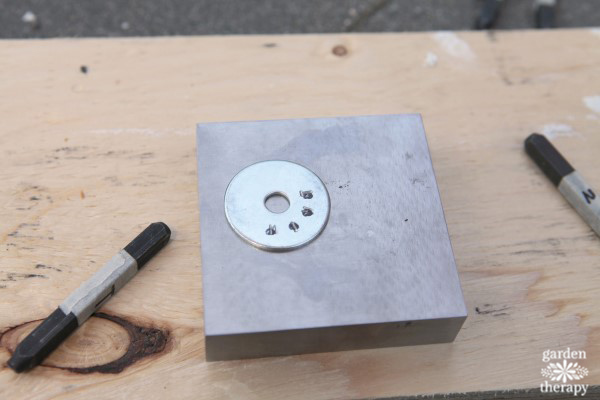
Don your earplugs (hearing safety first!) and put the washer on the steel block. Choose a letter stamp and position on the first dot. Hammer hard without moving the letters out of position for about 10 strikes. That was the magic number for me to get them deep enough.
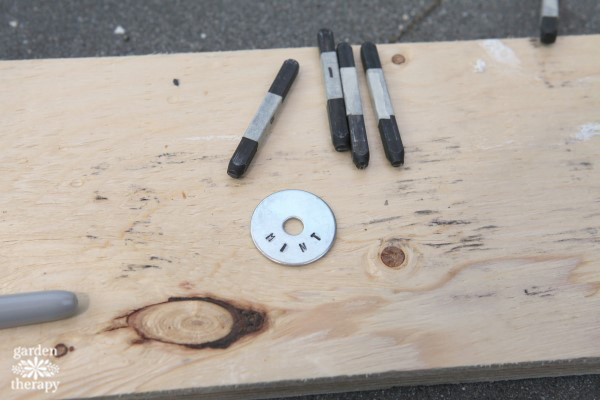
When the name is complete, color in the newly stamped letter with the marker and then scuff off the excess with the steel wool. This will darken the letter and help it to stand out.
You can either hang the washer now with some twine or make a stake from the metal wire for ground plants: cut a length of wire 6″ longer than you want it to stand above the soil. Bend the bottom of the wire with the needle-nose pliers into a v-shape. This will create stability in the soil.
Curl the top of the wire around the washer into a decorative shape, again using the needle-nose pliers.
Use your plant tags to identify fruits, herbs, or just about any plant you want to remember the name of. To use these labels on a fruit tree, simply loop some twine through the center and hang from a branch.
If you like the idea of growing your own espalier fruit tree, visit your local nursery in the winter (or when they are dormant). Since dormancy is the best time to plant a new tree, the stock levels will be more available. It will take a few years before you start getting fruit, but don’t be discouraged. When they do start to produce it’s a joy to have beautiful edibles as fences or on a trellis, to dress up a space and feed your family. Plus they are easy to pick and prune when kept low to the ground.
Growing espalier fruit trees in the home garden is a wonderful way to grow edibles in small spaces and in decorative ways. Training and pruning fruit trees to grow along walls or fences keeps the fruit at an easily accessible height, and turns an otherwise standard tree into a garden showpiece. Espaliers can be fruit … Continue reading
Original article and pictures take gardentherapy.ca site
I finally got around to doing another hair tutorial for you all! This is the style I use time to time for an instant chic look. It's a perfect look for those of you with thinner hair because the dual buns give the illusion that your hair is uber thick. It's also my go-to look on second (or third) day hair. The dirtier hair the better because it gives you better grip. Better grip and dirtier hair=better bun.
2. Part your hair horizontally, like you would do a half-up-half-down look. I take about half of my hair in the first section.
4. Tie the bun with an elastic (preferably not a lime green band like I did haha)
5. Take the second segment of hair and tie that one in a bun as well.
6. Then secure any loose pieces with a bobby pin. And then pull up on the top of your hair (after you have both buns in) to give it a looser feeling and a bit of body at the top. If wanted, pull some strands of hair out for an added messy/loose look. Hairspray if wanted.
Let me know if you try it or if you have any questions!!
Original article and pictures take egoswick.blogspot.com site