Creative Garden Decor Ideas Hiding in Your Kitchen
If you have a bunch of kitchen items sitting in your cupboards that never get used, why not give them a new life as garden art and decor?
Here’s 20 simple ideas to make your garden unique.
For more repurposed and upcycled project ideas, also see the DIY Idea Bank.
If you have a bunch of kitchen items sitting in your cupboards that you never use, why not give them a new life as garden art and decor? Here's 20 simple ideas to make your garden unique.
I may receive a commission if you purchase something mentioned in a link on this post for sites including Amazon.com. Other links may go to websites where I have been paid to write a blog or article. See the entire disclosure here.
Garden Art & Decor Ideas Made from Kitchen Stuff
Unless you’re a real minimalist, you probably have stuff lurking in your kitchen cabinets that you have not used in years. If they don’t have some special sentimental (or other) value, why not turn some of it into garden decor? And yes, donating useful items is always a good option as well.
These ideas are all simple, probably pretty obvious, and do-able in an afternoon.
Click on any image for project tutorials and details.
20+ Garden Decor Ideas from the Kitchen
Bundt Cake Pan
Bundt pans make excellent patio table planters. And muffin tins are fun for smaller succulents.
Ceiling Fan
The fan blades make perfect wings. Many other parts of the fan can be used as well.
Chandelier
This one doesn’t require any DIY. Just hang it up and add orange slices.
Creative and frugal garden art projects for your backyard
I may receive a commission if you purchase something mentioned in a link on this post for sites including Amazon.com. Other links may go to websites where I have been paid to write a blog or article. See the entire disclosure here.
All of these projects make use of recycled or repurposed household items such as plates, lamp globes, kitchen utensils, and old tools. Turn your junk into art! You can upcycle anything that can withstand the weather. Glass and metal items work very well.
And the good news is, you can make all of these items for under $20 (excluding the cost of tools).
Making garden art is easy. There are printable instructions and details on each page below or you can get them all together in my new eBook, Empress of Dirt Garden Art & Ideas.
Best garden art projects - with free instructions at www.empressofdirt.net
Free Garden Art Instructions
Stone Birdhouse | Easy project using a prefab birdhouse as the base.
Decorative Garden Balls | A classic addition to any garden for anyone who loves glass garden art. Bling!
Tipsy Pots | How the heck are these made? The secret of the tipsy pot revealed.
Garden Tool Art | Old tools take on new lives with these clever pieces. See creative uses for old rakes, hammers, shovels, rebar, and more.
Glass Garden Totems | Use old glassware to make beautiful garden totems. Materials include vases, jars, bowls, plates, cups, votive candle holders, and more.
Glassware Garden Flowers | Old dishes, a drill or adhesive and you can make all sorts of garden flowers.
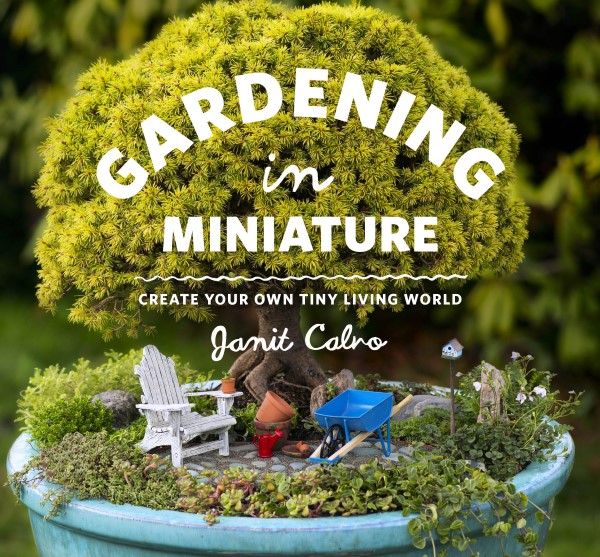
What gardening trend is hotter than vertical gardens, succulents, or edible landscapes? Miniature gardens! You may love them or have yet to be introduced to these tiny landscapes, but after today you are going to run out and grab Miniature Gardening Guru Janit Calvo’s book Gardening in Miniature: Create Your Own Tiny Living World so you can sink your teeth into the mini world.
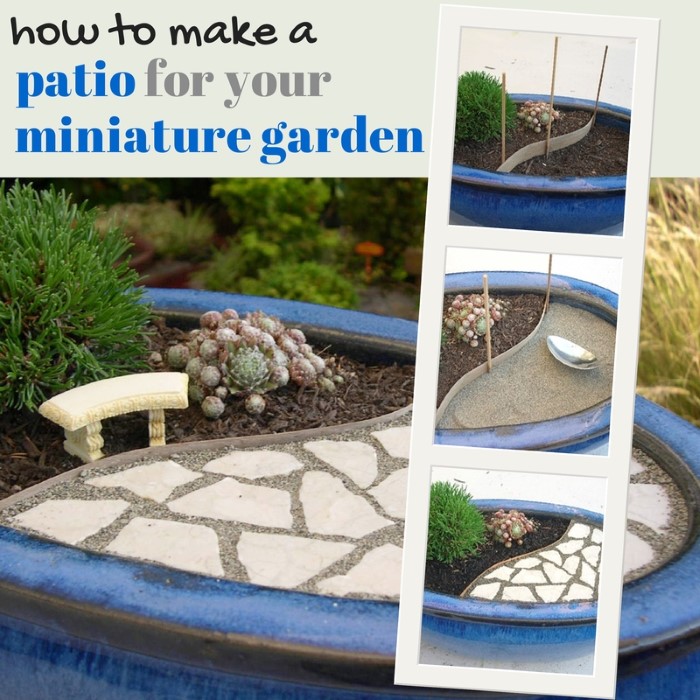
How to make a patio for your miniature garden - Step by step instructions from Gardening in Miniature author Janit Calvo
Now hold onto your floppy hats people, today Janit has joined us to share a project to make a patio in your very own miniature garden. Oh yeah, this is your lucky day. So read up, enjoy, and you can go get the book after the tutorial.
Create Your Very Own Miniature Garden Patio
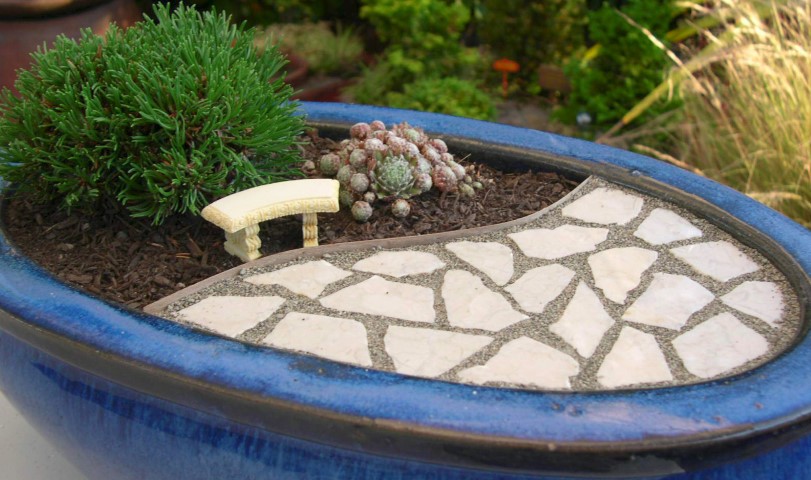
A tiny patio area in a miniature garden is the perfect place to put a wee bench or pot, but is also helps to deliver the message to the viewer that it is a true garden in miniature. Any well done, realistic miniature of any kind compels us to look closer, and quickly enchants and delights because what is supposed to be full-size, is suddenly very small – and very real. It’s this “Hey, how can that be?!” moment that creates the surprise and generates the fun (otherwise known as “the squealies” in the world of miniature gardening).
A miniature garden patio combined with a tiny bench, or any in-scale accessory, illustrates the scale of the garden instantly to the viewer because you know how big the patio and bench are supposed to be in full-size.
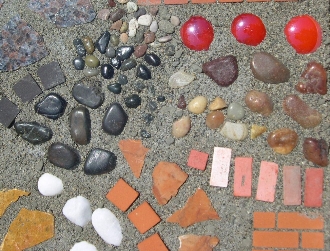
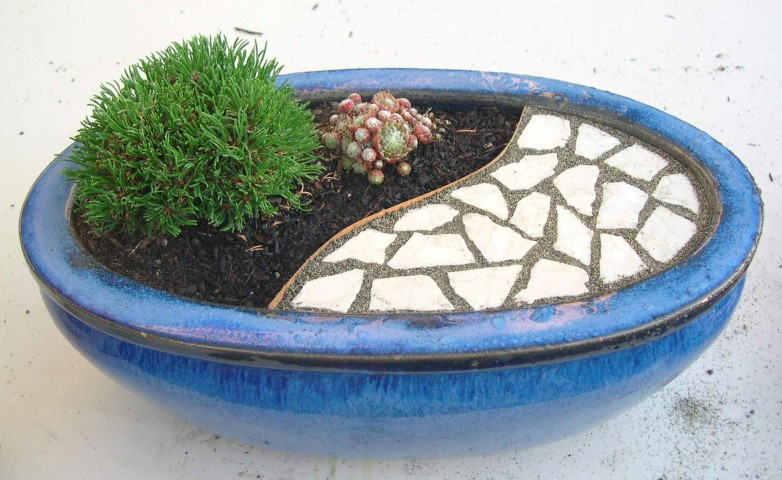
In this project, you will create a permanent miniature garden patio that will not wash away by using the Mini Patio Mix Kit from Two Green Thumbs Miniature Garden Center. It can be used with brick, tile, marble, stone, pottery, china, seashells, or even pennies and it is especially made with the miniaturist in mind with in-scale miniature sand (Details matter in miniature ;o). This project only takes an hour or two and it’s an excellent way to use broken pottery from Grandma’s china set, or tile pieces from your latest home renovation project.
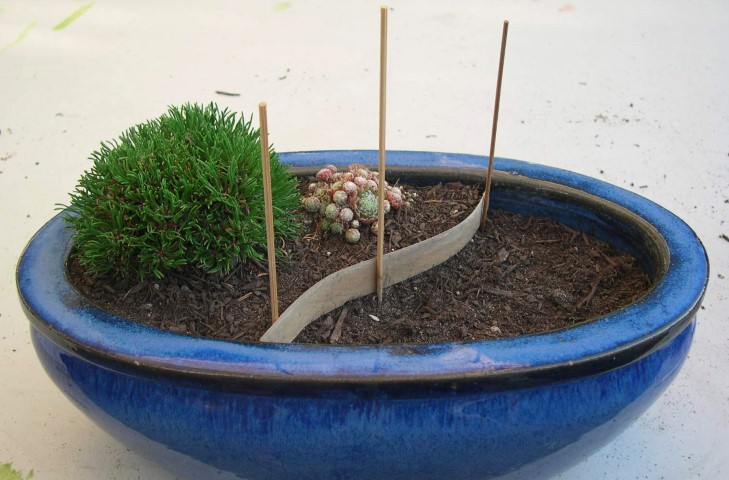
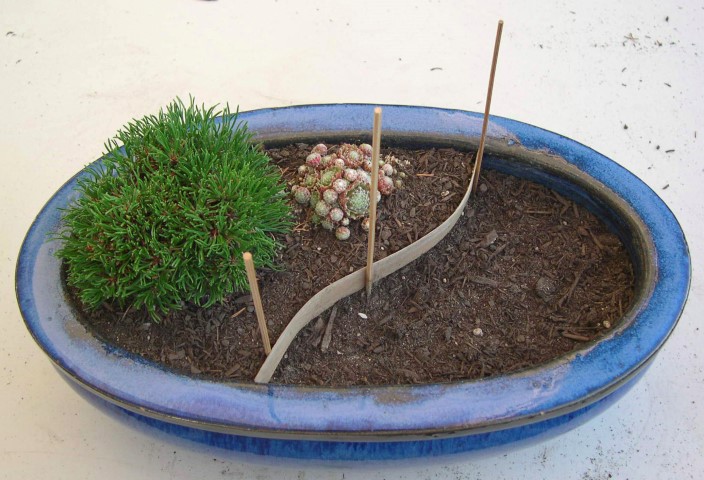
Before your begin to build the patio, have your soil surface 1 inch to 1 1/4 inches deeper than ground level, depending on the depth of your patio material. The bottom 1/2 inch of the cleared area will be filled with dry grout mix. When the patio is done, it should be even with the surrounding ground, so adjust the cleared depth accordingly. Create the S or U shape of your garden bed from your chosen design.
Mini Garden Patio Project Step 1
Find thin wood strips at your local wood-working shop, veneer strips at your local builder’s supply store, or cut up a plastic pot or yogurt container. You can eventually remove this border after the patio cures, if you want, but wait a few weeks for the cement to cure and harden before doing so. The border allows you to keep the patio mix from getting messed up in the soil while you work with your design.
1. Whatever border edging you’ve chosen, cut a little off the end to follow the inside curve of the pot so it is a snug fit—whether it is straight, curved, or slanted. This will keep the dry grout mix from washing into the garden bed when it is sprayed with water. Hold the cut end of the border edging where you want it on the inside of the pot. Use a skewer to help hold it in place, while bending the border against the edge of the garden bed and across to the other side, butting up against the other side of the pot. Note where you want to make the second cut with your fingers, then cut the border edging a little longer than the mark.
Mini Garden Prep
2. Put the border edging back in the pot using the skewers to help keep it in place. Take it out to shave more off the end gradually, if needed. Again, you want a snug fit against both sides of the pot and against the garden bed. Place skewers in the corners to hold the border firm. Then place a third skewer to hold the middle bend, creating a firm and level garden edge. The top of the border edging should be level with the top of the pot. Fill in with soil to help get it to the right place. Your miniature garden is now ready for its patio. Don’t water now—the soil in the patio area must be dry before moving on to the next step.
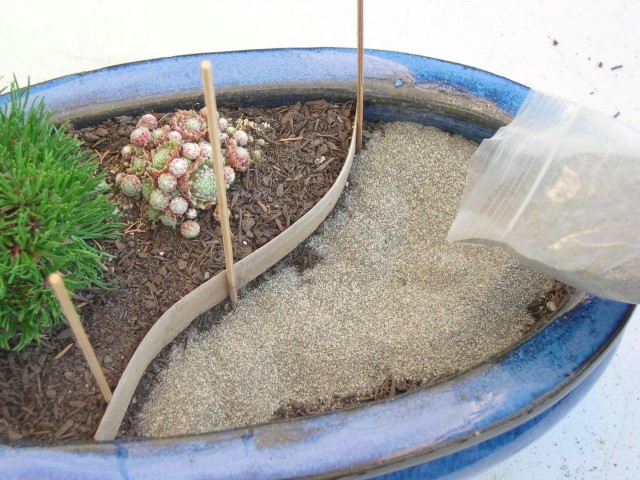
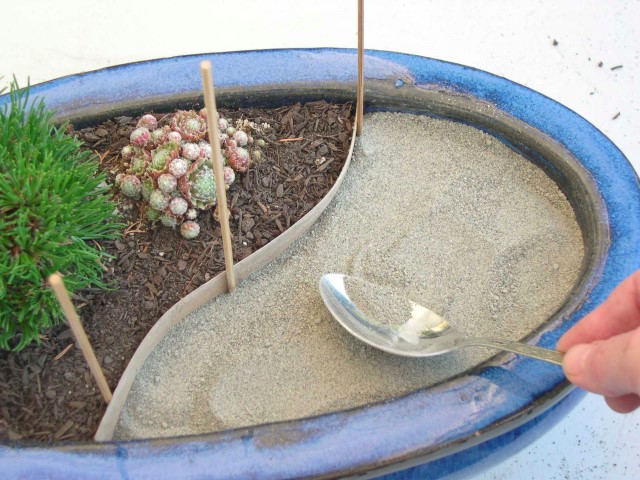
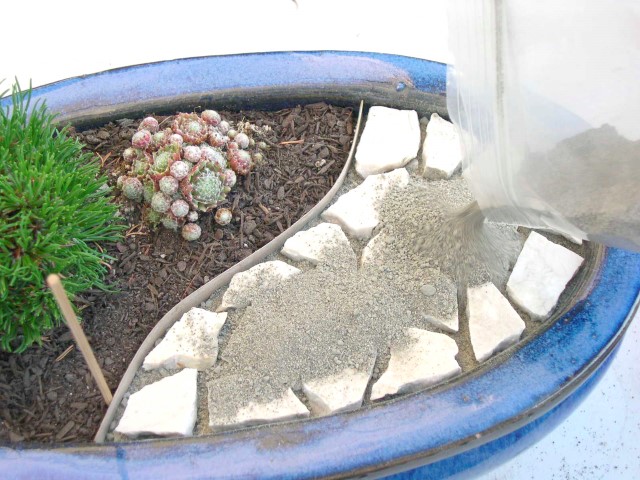
3. Top off the patio area with more dry potting soil, leaving at least 1 inch from the top of the border edge. Level the surface all around the patio area by adding more soil if needed. Tamp lightly to make sure there are no air holes in the soil. Pour sand into the contained area, about 1/4 inch deep. This sand base will buffer the dry grouting mix from the soil and roots. Smooth out the sand until even throughout the patio area. Gently push some into the corners if needed. Pour a pile of dry grouting mix into the contained area. Smooth out mix until even throughout the area. Make this layer about 1/2-inch deep.
Mini Garden Patio Project Step 2 Mini Garden Patio Project Step 3
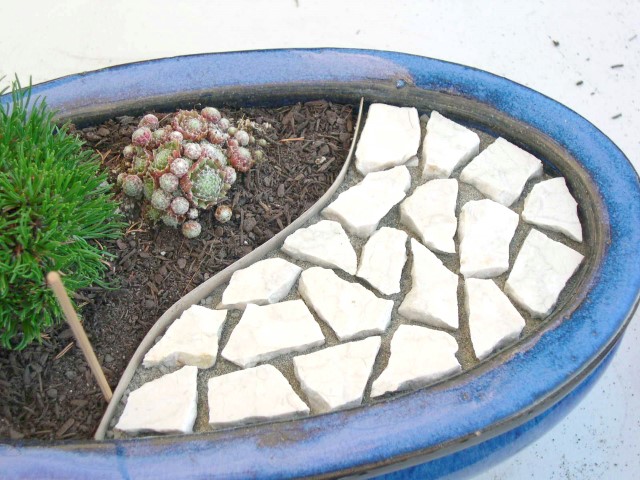
4. Lay out the patio pieces or tiles so you can see the different shapes and sizes. Get your cobblestone pebbles or your pebble sheet ready, too. If you are putting a pathway in the middle, lay this in first, then work around it with the patio stones. Think of it as a jigsaw puzzle and start with the corners first. Place them, working from one side to the other, adjusting pieces for the best fit. Stone tops should be level with each other and the pot’s edge. When laying the stones, eliminate smaller spaces as you go. If a tile fits perfectly on 2 sides but leaves a large gap on the other side, try another piece. The gaps between the stones should be consistent across the patio for a realistic look.
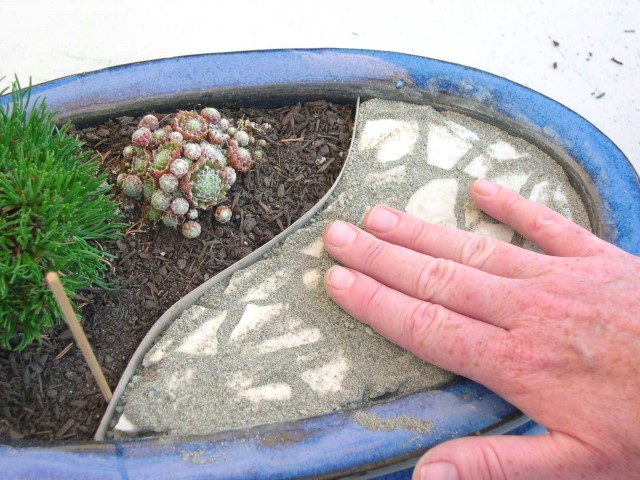
Mini Garden Patio Project Step 4
As you lay the pieces in, put your hand flat on top to see if they are level with each other and the garden border. Keep checking; if a stone is too low, gently lift it up, add a little sand beneath it, lay it back down, and check again.
5. When you are finished laying in all the stones, gently tamp them down with a flat piece of wood or one of the unused tile pieces. This will level the top of each stone to create a smooth surface.
Mini Garden Patio Project Step 5
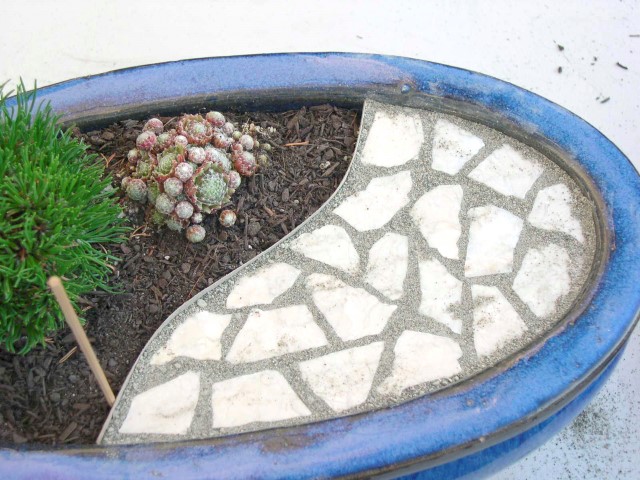
6. Gently pour a small pile of the dry patio grouting mix onto the middle of your patio, over the stones. Be careful not to pour it into the garden by using your other hand as a barrier. Then with a flat hand, smooth the mixture into the spaces, corners, and edges of the patio between stones. Carefully tap the stones to get the mixture into the cracks. Then tap the pot itself to settle the stones and the mix. Check the surface again to ensure that all stones are level with each other.
Mini Garden Patio Project Step 6
Using caution—the edges of the tile, marble, or glass pieces may be sharp—sweep off the excess with your hand or a brush and return it to the bag for future use. Take care to not disturb the stones. If some mix gets into the garden bed, clean it out later when the patio has cured awhile, so as not to upset the work already done. You can remove the skewers gently if they are not holding the border in place any longer. If your border edging still needs to be held in place, cut the skewer in half and bury it just beneath the surface. Gently firm up the soil on the plant side of the border.
Mini Garden Patio Project Step 7 Mini Garden Patio Project Step 8
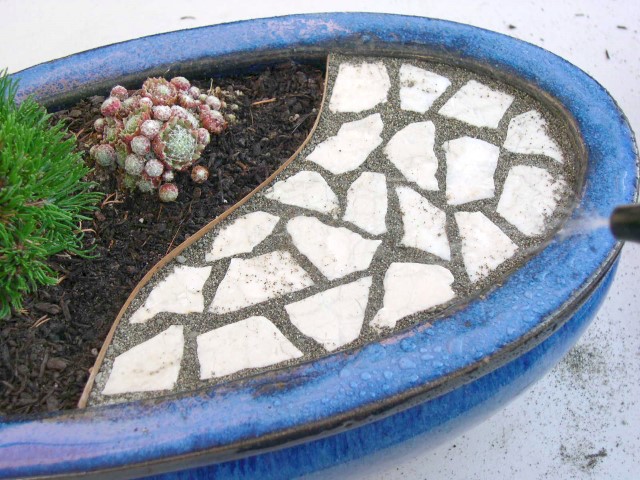
7. Gently mist the patio from one side to the other. Wash the stones and wet down the dry mix as you work across the patio. Stop when the water starts to pool on the surface.
Mini Garden Patio Project Step 9
8. Let your patio cure slowly. The slower it cures, the stronger it will be. If you have made your patio in a moveable container, place the pot in the shade for a couple of days so the patio won’t dry out too quickly. If your patio is in a sunny garden bed, cover it with plastic (a plastic bag is fine) and keep the plastic in place with wood skewers or rocks, for at least one day. Mist the patio often throughout the first day to slow the curing process, too. Wait to brush off sand or excess mix until after the patio has cured—otherwise, the texture will be ruined and it won’t look real.
9. If you must water plants in the garden bed while the patio is curing, do so gently and sparingly from the back side, being careful not to get any on the patio. Your patio will set up within a few hours, but curing takes longer. Treat the area gently, keeping it damp and out of the sun for at least 24 hours. After that, add accessories to complete the scene.
Mini Garden Patio Project Step 10
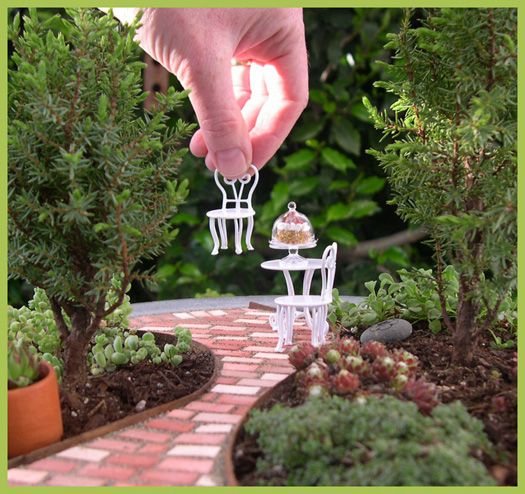
Once cured, your patio is ready for accessories. You will find these in the Two Green Thumbs Shop. In fact, they have just about everything you could ever possibly imagine for a miniature garden.
It has everything you need to pick up this new hobby, including scaled down garden designs, techniques for creating tiny hardscapes, miniature garden care and maintenance, tips on choosing containers, how to buy the right plants, and where to find life-like accessories. Inspiring step-by-step projects feature basic skills that can be recreated in any number of designs, like a tiny patio, a trellis, a pond, and a secret garden.
Save
Original article and pictures take gardentherapy.ca site
Create your own succulent garden birdbath A succulent garden birdbath
There was an old, leaky concrete birdbath left on the property by our home’s former owners and, today, I decided to make it into something beautiful! Lately, I have seen many ideas in gardening magazines and on Pinterest showing an an old birdbath converted into a succulent garden. I already had the birdbath, so I set about gathering the other necessary materials.
A trip to a nearby nursery yielded the tall “Blue Chalk Finger” (Senecio vitalis), the “Chocolate Ball” Sedum, “Chinese Dunce Cap” (Orostachys) and a couple of annual purslanes. While choosing the plants, I kept in mind the gray of the birdbath and the sedum colors that I already had available in my garden. It took great restraint, but I got the succulents I came for and kept moving, even though the nursery grounds were an explosion of color and scent!
Home again, I rooted around in the garden shed and pulled out some builder’s sand, my own compost (you could use potting soil) and the wheelbarrow, plus a pot full of small stones gathered from our yard. My cost for this project came to only $20 because I was mostly using materials and plants I already had. By the way, at the nursery, a small planted pot of four succulents mulched with pebbles cost $39! My project is about five times that size!
First, I rolled the base of the birdbath across the yard – it weighs about 150 pounds – and I’ll tell you, this was the hardest part of the whole project! Once I got the base to the flower bed where I wanted it, I had to flip it end over end into place and wrestle it around until it was level. Probably I should have waited for some help, but I was on a mission and it was getting hot! After a rest, I lugged the concrete basin (only about 40 pounds) and put it in place.
In the wheelbarrow, I made a mix of roughly 2 parts compost to 1 part sand and mixed it well. A bucket full of this mix was smoothed into the basin. Small rocks and stones were added. I tried to build it up in the middle so there would be some height and the plants would cascade.
Now the fun part: adding the plants! The tall Senecio took its spot on the top and the rest I tucked in and around the rocks, with some of the longer sedums draped a bit over the side to add interest. A trip down the street to my neighbor’s yard yielded some more good “filler” sedums and the rest I dug up from our front flower bed. Of course, I had bought a “Chocolate Ball” Sedum at the nursery for my neighbor as a thanks for sharing her different varieties with me, so I stopped to chat a while with her.
Back to our garden and putting on the finishing touches of tiny sedums. A light watering followed for the completed succulent garden and a cold drink for me, too! The entire project took about two hours, including the nursery trip and neighborly chat! Time well spent in my book!
Step 2: Add mixed soil to birdbath in a mound Succulent Birdbath Original article and pictures take ourfairfieldhomeandgarden.com site
Note: please use safety gear when working with concrete and power tools.
Cut the concrete form into 20 two-inch thick molds by using and hand saw or a handheld circular saw. Use a sheet of paper wrapped around the tube as a guide and carefully cut the first ring off the tube. Cut it open by using a box cutter to slice through the ring’s width. Place the cut ring on the tube to use as a guide for all the remaining cuts. Tape the ring together and place it a fraction more than two-inches from the end if you are using a hand saw, or place it where the guide runs if you are using a handheld circular saw. Cut 20 rings to use as stepping stone molds.
Mix the topping or repair concrete and add it to the top of each stepping stone. This layer gives the stepping stones a smooth, refined top, perfect for leaf prints.
Working quickly before the concrete hardens, spray the back of the leaf with cooking oil and press firmly into the concrete. The best leaves are flat, strong, and have thick veins. Always press the back of the leaf (with all the veins) into the concrete for the best impression. Leaves such as hosta, rhubarb, and ivy work well.
Original article and pictures take www.ebay.com site


