Wednesday, September 9, 2015

DIY Floating Planter for Water Gardens and Ponds

DIY Floating Planter for Water Gardens and Ponds

A floating garden is a brilliant way to bring color to your pond or backyard water feature. The best part is that you don’t have to go hunting for a pond planter because it is a simple DIY you can make at home. Once you have created a floating planter, you can then pop in colorful, long-blooming annuals for a gorgeous container garden display.


floating SunPatiens planter

I first saw these floating planters at the Epcot International Flower and Garden Festival during my spring speaking tour. They have plenty of lakes in Florida, and floating planters were everywhere. The flowering annuals seemed to be thriving in the blazing hot sun, like a rainbow of polka dots throughout Epcot.


DIY pond planters

SunPatiens floating planters

Floating planters at Epcot

A few weeks later when I toured the California Spring Trials, I visited Sakata, where they breed SunPatiens, and saw they had a DIY version of the planters for home gardeners. How exciting! I asked them so very nicely if they would share the instructions. Please note: this post is not sponsored by SunPatiens; I haven’t been paid in any way to promote this content. I’m sharing the project simply because I love it! The SunPatiens folks have kindly agreed to share the photos of the DIY and instructions, and the photos from Epcot are from my trip.


How to make a floating pond planter

pond planters

How To Make SunPatiens Floating Gardens


I’m usually someone who stays away from flowering annuals; preferring perennials, shrubs, and trees for their many years of beauty in the garden. Annuals have a lot of value though, in providing a long season of flowers. With so little care needed for annuals like SunPatiens, I get the appeal of planting them in the landscape to let them really shine for a season and don’t get upset about having to replace them the next year.


Sakata created this fun project because it is the perfect way to show off how crazy easy they are to care for. They grow in both sun and shade conditions while thriving and blooming without much care. SunPatiens are a perfect landscape plant because they are low maintenance and bloom for months.


SunPatiens

Materials


  • 4 sheets of polystyrene board, 2″ thick and 36″ across (depending on how large your planter will be)
  • Latex-base glue (or other glue compatible with the polystyrene)
  • Sharp scissors
  • 1/4″-thick capillary mat or felt
  • Nylon cord and concrete blocks for anchors
  • 4″ eye bolt with nut, and two 1-inch washers
  • Up to 50 4-inch bedding plants or one 1-gallon tropical plant and 20 4-inch plants
  • 1-1/2 cubic-foot light potting mix

floating planters for a pond

Make it!


1. Cut two polystyrene boards in a circle the size you want your base, and glue together. Smaller gardens (less than 30″ diameter) may only require a single sheet of polystyrene for the bottom.


2. Cut the other two sheets into a circular rim about 2” wide to create the side walls.


Make the base of your floating planter

3. Glue the side walls together, then glue the side walls to the top of the base.


4. Drill 4 evenly spaced “weep” holes in the sides (not in the base) to allow water to escape when it rains.


5. Spray paint the floater black. Be sure to use water-based paint!


 floating SunPatiens planter

6. Cut a 1″ diameter hole in the bottom of the planter. Cut a piece of capillary matting and line the bottom of the disk—be sure to also cut out a 1″ diameter hole through this mat.


7. Cut a 1″ wide strip of capillary matting and insert it through the hole in the bottom of the disk to act as a water wick. Lay the strip across the bottom of the mat, and allow 8 – 10″ to hang below the floater into the water.


Water wick

8. Fasten a 4″ eye bolt, nut, and 1″ washer to the bottom of the planter. Once it is in place, use the nylon cord and concrete block to anchor the planter to keep it from straying too far.


9. Add the potting mix and appropriate plants. Remember to use sun-loving plants since it usually gets really bright out there!


Add sun-loving plants

Helpful Tip: Vary the height, type, and color of plants for an interesting contrast. Taller plants should be placed toward the middle while shorter plants and cascading plants like ivy around the edges. This will help hide the container and create a soft edge.


SunPatiens planter

About SunPatiens


SunPatiens is a revolutionary new hybrid impatiens bred and grown by Sakata using fair trade practices which conform to the principles of the Convention on Biological Diversity. The SunPatiens family consists of three unique series, Compact, Spreading, and Vigorous, each offering a distinct growth habit that is perfect for nearly every garden application. Three-season performance is the hallmark trait for all the series, so regardless of which variety you select, your SunPatiens will be covered with beautiful flowers from spring, through the torturous heat of summer, right up to the first hard frost. SunPatiens can be found at your local garden center.


Floating Planter

Original article and pictures take gardentherapy.ca site

Tuesday, September 8, 2015

DIY Farmhouse Chalkboard with Rustic Wooden Frame

DIY Farmhouse Chalkboard with Rustic Wooden Frame

I have a big empty space on my kitchen wall, just above our antique stove.


I don’t do empty spaces. I’ve never been a minimalist.


I haven’t left the space empty intentionally, but every time I make something and hang it there, then list it in my shop – it has sold quickly. It makes for great sales, but not for a pretty kitchen.


I didn’t want to spend much money, so I designed a farmhouse style rustic wooden frame chalkboard.


It’s an easy project that requires very basic woodworking skills, so anyone can make it.


DIY rustic farmhouse framed chalkboard tutorial | www.knickoftime.net

Supplies needed


1 x 4 x 8″ furring strip (cost about $3)


3/16″ x 24″ x 24″ lauan plywood (cost about $4)


miter saw (or regular saw with miter box)


wood stain (we used this color)


white paint (we used leftover paint from our kitchen walls)


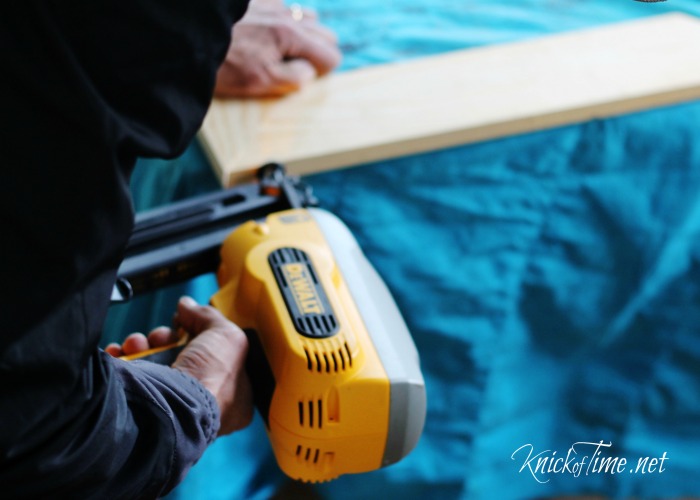
nail gun (we love this one)


sandpaper and sander


paintbrush & paint roller


Instructions


Step 1 – cut furring strip and lauan.


The overall size of my frame is 28″ x 21, so my wood cuts were:


2x – 28″ length


2x – 21″ wide


lauan – 24″ x 17″


We used a miter saw to miter the angles at the corners, but straight edges would work fine too. You could have them cut for you at most home improvement stores, and get the lauan cut at the same time, which would save you this step.


wood frame

Step 2 – Nail or screw furring strip pieces together at the corners.


wood frame

Step 3 – Stain the wood for the frame.


While the stain is drying, use a paint roller to apply chalkboard paint to the lauan plywood sheet, and set it aside to dry. I applied 2 coats to mine.


Step 4 – By the time I had finished painting with chalkboard paint, the stain was dry enough to paint the frame white. Allow paint to dry thoroughly.


wood frame

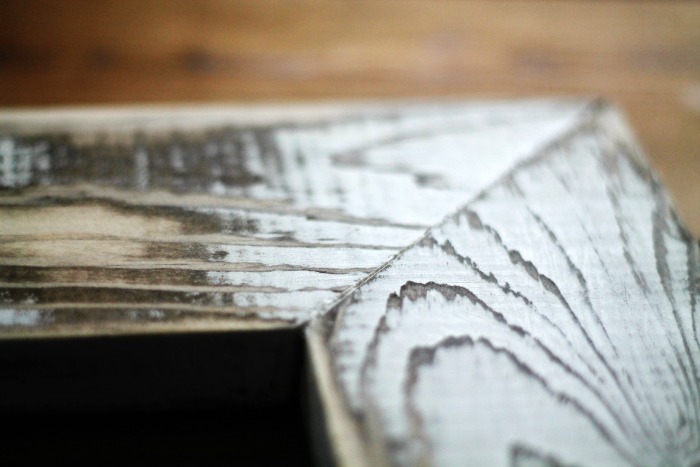
Step 5 – Sand the frame to distress it. I heavily distressed mine, but you could also do very minimal distressing if that’s your preference.


rustic wood frame

Step 6 – Drill pilot holes through the back of the chalkboard into the wood frame, then screw both pieces together.


DONE!


DIY rustic farmhouse framed chalkboard tutorial | www.knickoftime.net

I am the WORST chalkboard artist, so I’ll probably never use mine as a chalkboard. Instead, I’m using it as a display for flowers. I used a staple gun to attach cotton twill tape to the back side, and hung an old lightning canning jar to hold the flowers.


DIY rustic farmhouse framed chalkboard tutorial | www.knickoftime.net

This rustic wooden frame is the perfect style for my farmhouse kitchen and it gives me a great excuse to treat myself to fresh flowers every so often!


signature fountain pen

See more easy DIY Projects HERE.


DIY Projects

Original article and pictures take knickoftime.net site

Friday, September 4, 2015

DIY Easy Bottle Garland for Everyday Flowers

DIY Easy Bottle Garland for Everyday Flowers

I love walking in the garden, but also enjoy fresh flowers in the home. Especially if we are entertaining, I always have a few vases and arrangements on the tables. I sometimes even place a small vase in the powder room. Recently, I saw this bottle garland for sale online, made up of the cutest little vases and thought, “How pretty would this be in a kitchen? How about my office window?” So when Hobby Lobby was have their glass items at 50%, off I picked up 5 cute bottles, and some silver wire to make my own bottle vase garland.


DIY Easy Bottle Garland


Close up of flowers in bottlel garland ~ Bottle Garland ~ gardenmatter.com
Flowers closeup ~ Bottle Garland ~ gardenmatter.com

It couldn’t be easier to do.


Materials ~ Bottle Garland ~ gardenmatter.com

Command Hook ~ Bottle Garland ~ gardenmatter.com

Using Command Mini Hooks placed on the sides of the windowsill, I attached the wire by making a loop.


Wrapping wire around bottle ~ Bottle Garland ~ gardenmatter.com

Then I wrapped the wire around the neck of each bottle 3 to 4 times, leaving a few inches between each bottle.


Purple Stock in bottles ~ Bottle Garland ~ gardenmatter.com

Once I got it to the length and curve I wanted, I cut extra to make another loop so that it could be connected to the command hook on the other side of the window.


A $4.00 bouquet of purple stock was more than enough to fill the vases, and they look so pretty.


This would make a great gift, don’t you think?


This DIY bottle garland is easy to make. For less than $10 you can hang this from any window and place cuttings from your favorites flowers to display.

Original article and pictures take hearthandvine.com site

DIY Dyed Bushel Baskets

DIY Dyed Bushel Baskets

DIY dyed apple bushel baskets (1)


DIY Dyed Bushel Baskets


Fall is almost upon us and I’m already doing up my harvest themed projects! I was asked to speak this fall at Minter Garden Center’s Apple Fest event, so I needed to come up with some ideas that would fit into my demo.


Apple bushel baskets are the perfect addition to any fall vignette. You can plant them up, stuff them with gourds and of course, have them spilling over with apples. Read on to see how I used fabric dye to color them up so that they still kept their rustic charm.


DIY dyed bushel baskets (5)

Apple bushel baskets are very inexpensive and can be bought at any garden center or craft store. The are usually a light wood color, but occasionally they may be a darker tan. Some come with wire handles while the smaller ones usually do not.


Fill a container or sink big enough to fit your baskets with very hot water. I boiled a big double boiler on the stove for this and poured it into my metal basin. Add your fabric dye and stir. For the ombre basket I dyed the whole thing in yellow first.


Dyed Bushel Baskets (2)

Then I added just enough red dye color to make the mixture orange and set the basket in the liquid about half way using bamboo stakes to hold it up out of the water. The longer it soaks, the deeper the color so check this often to get the color you want.


Dyed Bushel Baskets (1)

For the full orange DIY dyed bushel basket, I fully immersed the whole thing in the orange dye solution and let it sit for quite awhile, like 20-30 min, spinning it on it’s side to make sure all areas got soaked.


How to dye bushel baskets

I emptied out the orange dye batch until I had about 2 inches left on the bottom and added the rest of the red powder dye to soak the bottom of the ombre basket in.


Dyed Bushel Baskets

Next up was the green baskets. I decided to put a pattern on one using a wood burning tool. It worked out great because the markings still show well after being dyed. I simply just fully immersed these two baskets in the dye solution, the bigger one spending the most time in the batch to get darker.


Dyed Bushel Baskets (4)

Now you can embellish them even more! I weaved in some red colored raffia on the ombre basket and made a mini burlap banner for the large green one.


Dyed Bushel Baskets (3)

I planted up a plastic pot from a spent hanging basket with an ornamental grass, a purple heuchera, some yellow pansies and some adorable ornamental peppers then inserted it into the large ombre bushel basket.


DIY dyed bushel baskets (4)

A fall mum was simply popped into the large green basket and the other two DIY Dyed Bushel Baskets are perfect for staging with harvested veggies and gourds.


How to dye bushel baskets (1)

I LOVE how these turned out and that they are not overdone with paint… I enjoy the colors of fall and wanted to make sure these baskets were rustic.


DIY dyed bushel baskets (2)

Now I can use them in all sorts of vignettes! Fill them with fall mum’s, spill out some colorful gourds, or use them simply as planters.


DIY dyed bushel baskets

Have fun customizing your own apple bushel baskets for your fall decor!


Many more cool fall projects to come! Be sure to sign up for my monthly-ish newsletter to get them all!


Subscribe


Original article and pictures take www.sowanddipity.com site

Wednesday, September 2, 2015

DIY Driftwood Wreath Instructions

DIY Driftwood Wreath Instructions
Restoration Hardware wreath

This DIY driftwood wreath is so simple to make and costs a fraction of the ones I saw at Restoration Hardware recently. It all started with a visit to my very stylish daughter’s home and noticed an awesome driftwood wreath hanging in their dining room. It looked just like one from Restoration Hardware, but I couldn’t believe that they had spent $129 on a “wooden” wreath. “No way, Mom, we got it at HomeSense” (our version of Home Goods). That made more sense. It cost a fraction of the Restoration Hardware version.


driftwood wreath New House New Home
driftwood wreath close-up New House New Home

Anyways, the following week I came across a bag of small driftwood pieces for a really low price while out thrifting. I had a plan!! Why not make my own version?


Here’s what you’ll need:

Driftwood pieces about 3-4″ long (scour your local beach/riverbank or pick some up at a craft store)


Glue Gun and glue sticks


wreath supplies New House New Home
driftwood wreath supplies New House New Home
Yes, I only paid $5 for the whole bag!

Step One: Heat up your glue gun.


Step Two: While the glue is heating up, sort through your pieces to find a mix of bigger and smaller ones.


base layer wreath New House New Home
driftwood wreath base layer New House New Home

Step Three: Start layering bigger pieces on the base of the wreath, glueing as you go. The big pieces will add some depth to the wreath and act as a base for smaller pieces to be glued in place.


finished wreath New House New Home
Step Four: Continue layering driftwood until your can’t see the wreath base and you have a nice rounded look.

Step Five: Fill in any “holes” with smaller pieces adding some interesting ones to the very outside layer.


All in all, it took me about 30 minutes to make this statement piece. I’m loving how it looks on the grass cloth wallpaper in our back entrance. But I may move it outside once the warmer weather arrives.


I love saving money!! And this easy project saved me over $100!

Original article and pictures take www.newhousenewhomenewlife.com site