Wednesday, May 31, 2017

Silverware Stamping Tutorial

Silverware Stamping Tutorial
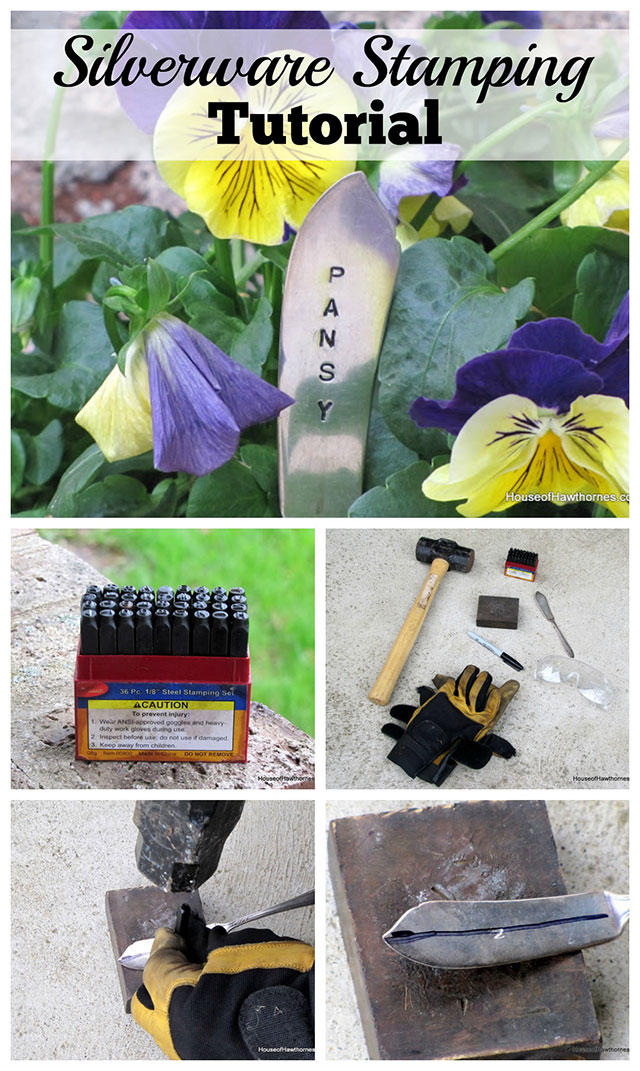
Easy to follow silverware stamping tutorial. Great idea for wedding favors or handmade gifts. via houseofhawthornes.com

I promised to show you how I stamped my silverware from this post,so I’ve put together a silverware stamping tutorial for you.


Easy to follow silverware stamping tutorial. Great idea for wedding favors or handmade gifts. via houseofhawthornes.com

It is really so darn simple.


First you need to find some silverware suitable for stamping. In my experience it seems like silverplated silverware is easier to stamp than stainless steel.


I would assume stainless is a harder metal than silverplate, which is a thin layer of silver over top of copper, brass or nickel. I skipped out on Metallurgy 101 though.


Also, if you are going to stamp a knife, be aware that a lot of silverplated knives have stainless steel blades (yet the handles are silverplated). So in my example below I used a butter knife which was totally silverplated (it’s all one piece of silverplate rather than the table knife which is sort of two pieces).


Easy to follow silverware stamping tutorial. Great idea for wedding favors or handmade gifts. via houseofhawthornes.com

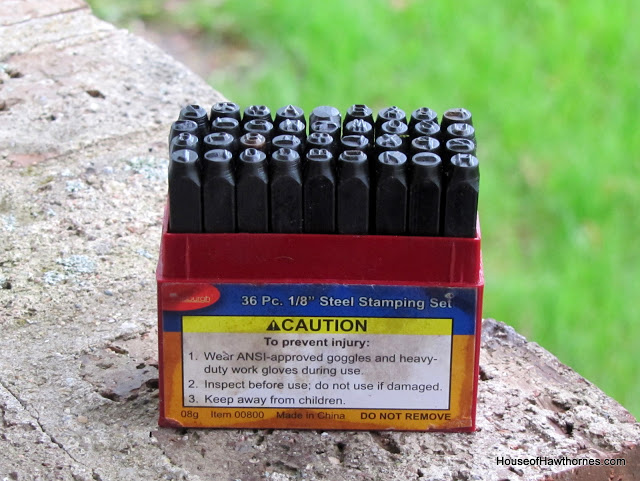
I bought my stamps about a year ago at Harbor Freight. We have a Harbor Freight in town, but you can order them online also at their website HERE.


They have three different sets listed. I used the 1/8″ set. Harbor Freight has things on sale a lot, plus they also have 50% off coupons if you get their flyers or sign up for their email list.


You might think that I shop here a lot, but not really. My husband is their #1 customer though. By the looks of his garage, we should probably buy stock in the company.

Easy to follow silverware stamping tutorial. Great idea for wedding favors or handmade gifts. via houseofhawthornes.com

The stamps are long pieces of steel with a letter or number on the end.


Easy to follow silverware stamping tutorial. Great idea for wedding favors or handmade gifts. via houseofhawthornes.com

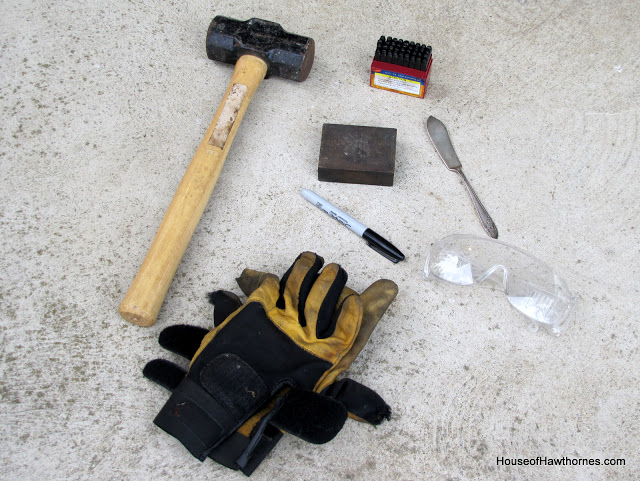
Supplies:


  • the steel stamping set
  • a piece of silverware
  • a hammer of some kind – I prefer a larger metal mallet type hammer (better to smash your fingers with)
  • a magic marker
  • an anvil or something to stamp onto (I used a small brass block that I found in the garage)
  • and for safety you should wear gloves and safety glasses
Easy to follow silverware stamping tutorial. Great idea for wedding favors or handmade gifts. via houseofhawthornes.com

Instead of the brass block, which you may or may not find in your garage, you could use the flat part of a vise
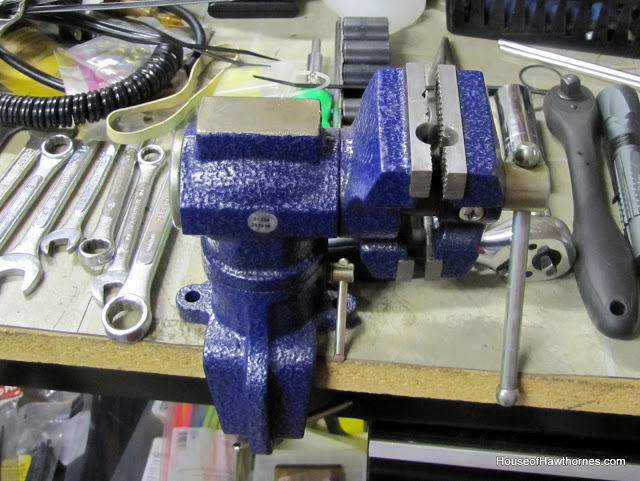

Easy to follow silverware stamping tutorial. Great idea for wedding favors or handmade gifts. via houseofhawthornes.com

or an anvil.


Isn’t this one cute. It looks like a cartoon version. Where’s Wile E. Coyote?
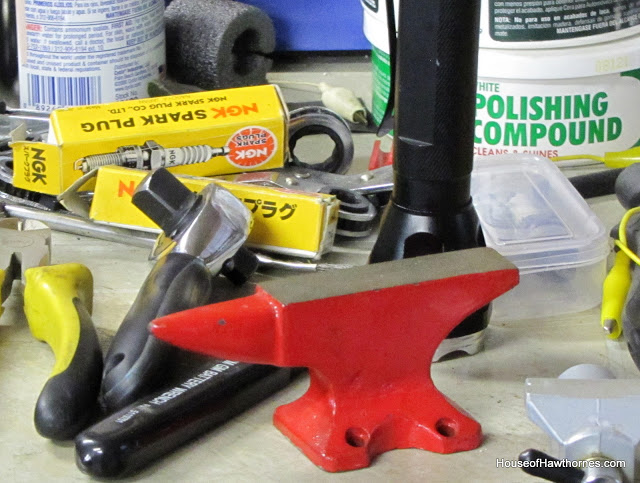

Easy to follow silverware stamping tutorial. Great idea for wedding favors or handmade gifts. via houseofhawthornes.com

This is where it gets really simple.


I figured out the middle letter of the word I was going to stamp and stamped that letter first. Just give the stamp a good old whack with the hammer.


If you hit it really hard you just need one whack. If you’re using a smaller hammer you may need to hit it a few times.


Just be careful to not smash your fingers. I found the gloves really useful to hold onto the stamps more firmly.


Easy to follow silverware stamping tutorial. Great idea for wedding favors or handmade gifts. via houseofhawthornes.com

The word was PANSY, so I started with the N. Oh, and I forgot to mention that I drew a line down the middle of the knife so I could somewhat keep the letters lined up. BTW, I don’t go for perfection, to me it’s more of a handmade look.
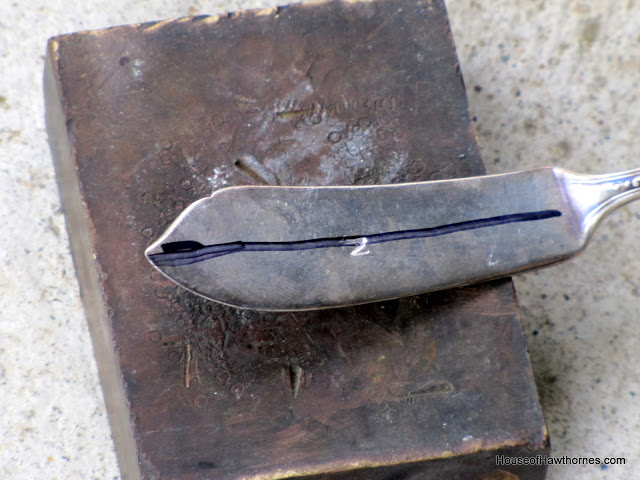

Easy to follow silverware stamping tutorial. Great idea for wedding favors or handmade gifts. via houseofhawthornes.com

And then went outward from that letter. So after the N, I did the A and S and finally the P and Y.
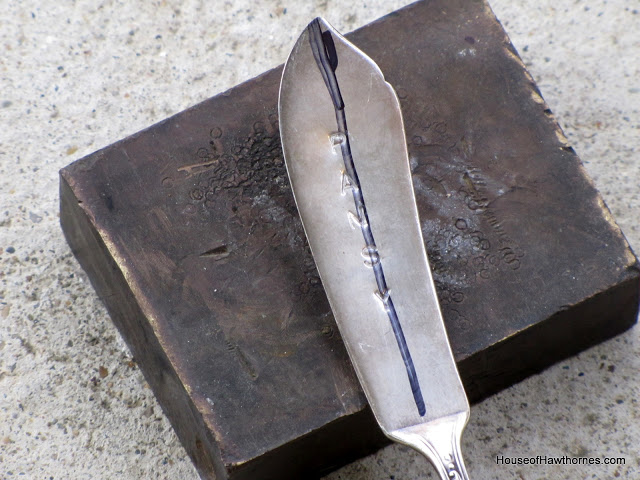

Easy to follow silverware stamping tutorial. Great idea for wedding favors or handmade gifts. via houseofhawthornes.com

When I was done, I rubbed some marker onto the letters and then wiped the excess off with a paper towel. You don’t have to do this step, but I found it made the letters pop out visually a little more. You can use a Sharpie for this, but be warned that it does dry fast and takes a lot of elbow grease to rub it off.
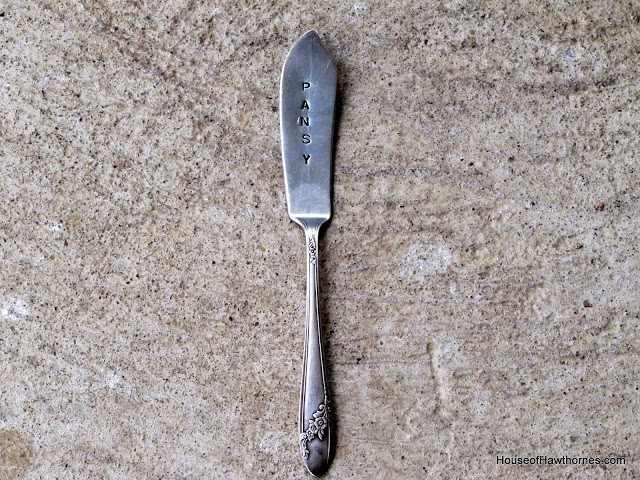

Easy to follow silverware stamping tutorial. Great idea for wedding favors or handmade gifts. via houseofhawthornes.com

Voila, the only thing left is to put it in a pot of viola (Oh, I crack myself up).


Easy to follow silverware stamping tutorial. Great idea for wedding favors or handmade gifts. via houseofhawthornes.com

The possibilities really are endless once you buy your stamps. You can stamp knives, forks, spoons, metal jewelry tags or just about anything metal.
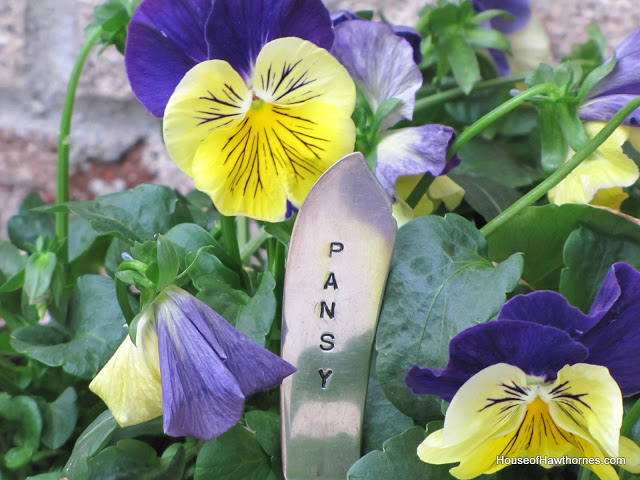

Easy to follow silverware stamping tutorial. Great idea for wedding favors or handmade gifts. via houseofhawthornes.com

Since Mother’s Day is just around the corner, I wanted to show you what you could make with a fork.
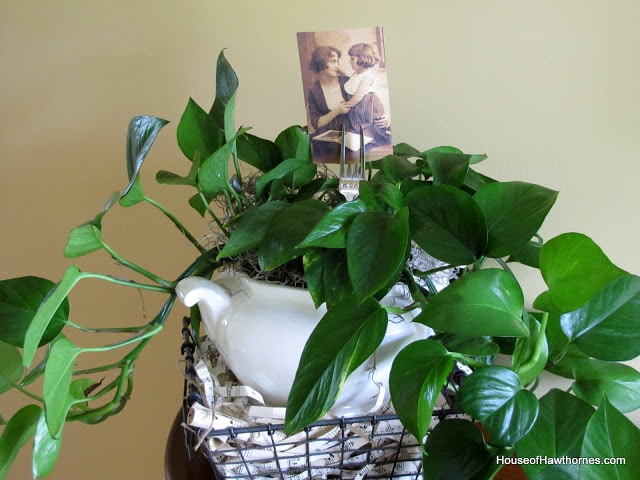

Easy to follow silverware stamping tutorial. Great idea for wedding favors or handmade gifts. via houseofhawthornes.com

The image is from The Graphics Fairy.


Easy to follow silverware stamping tutorial. Great idea for wedding favors or handmade gifts. via houseofhawthornes.com

Have fun stamping. Watch out for your thumbs!


Edited To Add:


I’ve had quite a few people asking about using them for weddings (stamping Mr. and Mrs. on forks or wedding dates, ect). A very cute idea, BTW.


I would say if you are expecting people to eat with them, I would skip the steps about using a magic marker, because that could be toxic. And you certainly don’t want to start the marriage off on a bad note. If you still want to do the last step where you “color” them in a little, you could use liquid food coloring and wipe it into the letters a little.


And I would pick up a couple extra pieces of silverware, so you could practice first, because it does take a couple tries to know how hard you have to hit it to get a clean indentation.


Original article and pictures take www.houseofhawthornes.com site

Monday, May 29, 2017

Friday, May 26, 2017

Side Dutch Braid

Side Dutch Braid
dutch braid

Thick blonde Dutch side braid from hairspirationbykylee.


source


Original article and pictures take trends-style.com site

Wednesday, May 24, 2017

Shutter Arbor ~ Our Fairfield Home & Garden

Shutter Arbor ~ Our Fairfield Home & Garden
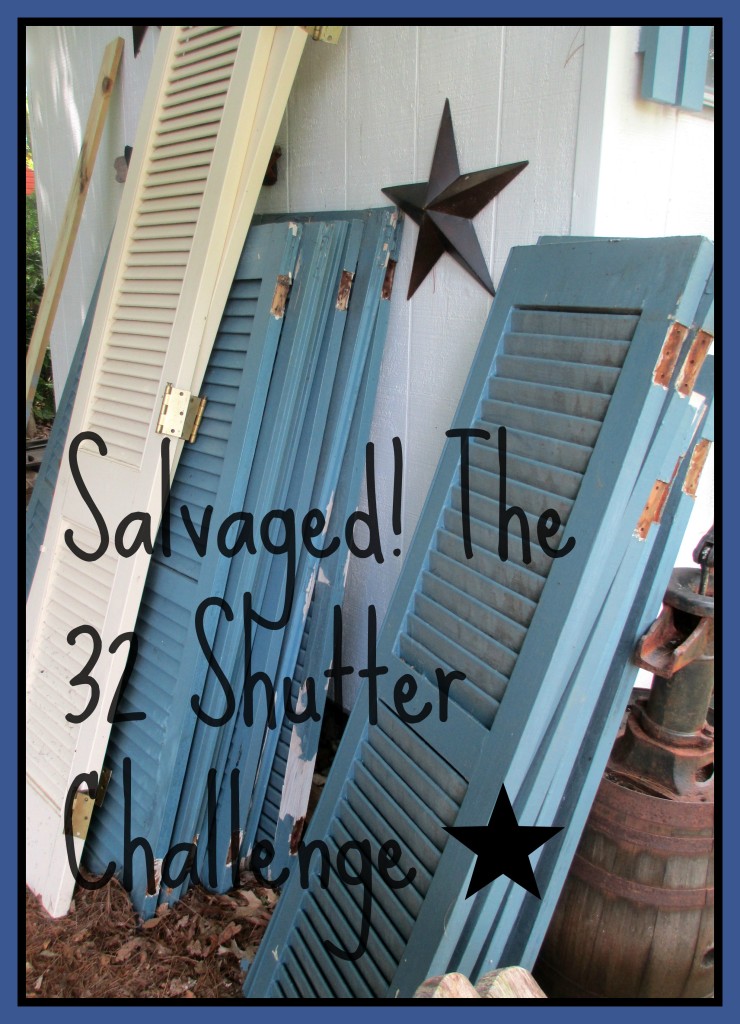
Shutter Challenge http://ourfairfieldhomeandgarden.com/salvaged-the-32-shutter-challenge-repurposing-shutters-in-the-garden/
Salvaged! The 32 Shutter Challenge

Shutter Arbor http://ourfairfieldhomeandgarden.com/salvaged-build-a-shutter-arbor/

Shutter Arbor ~ Our Fairfield Home & Garden


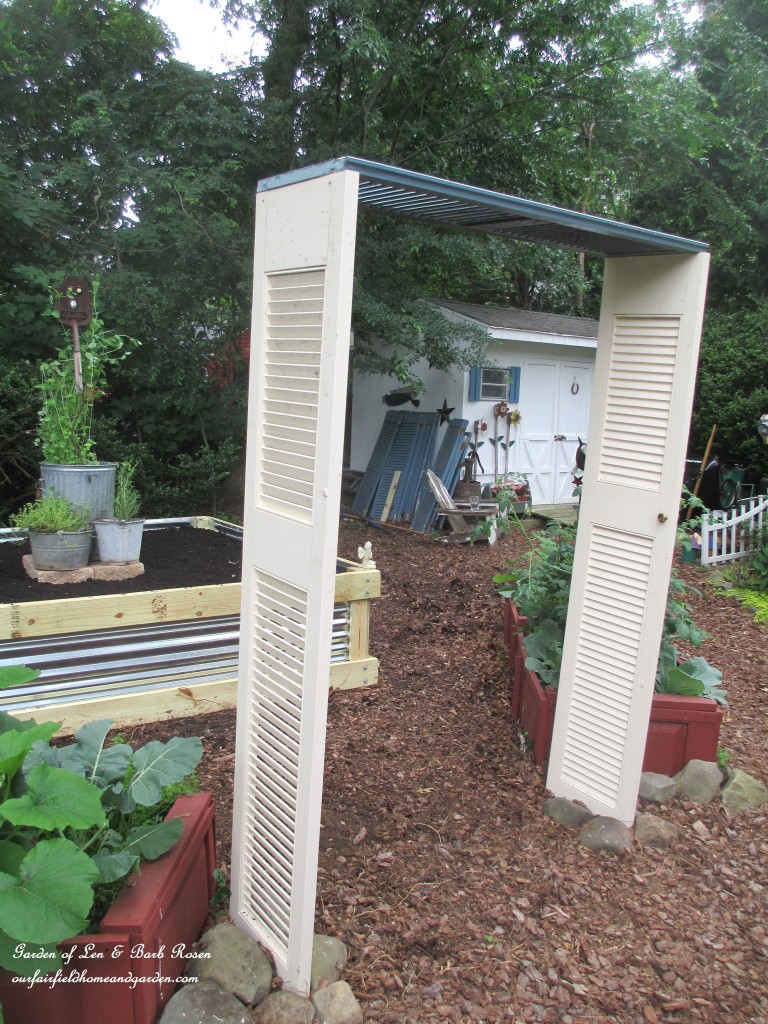
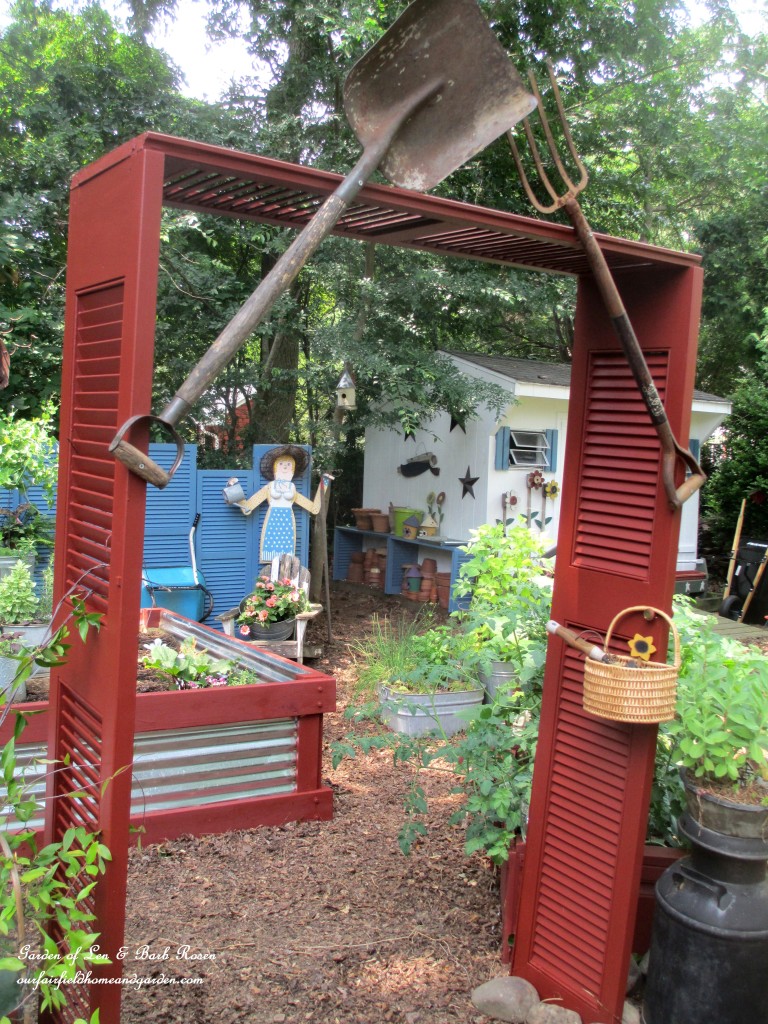
If you can use an electric drill and a screwdriver, you can make your own garden arbor out of salvaged shutters. Lay the pieces out on the ground and attach one shutter on to the tops of two others.


Salvaged Shutter Arbor http://ourfairfieldhomeandgarden.com/salvaged-build-a-shutter-arbor/
Shutter Arbor in place.

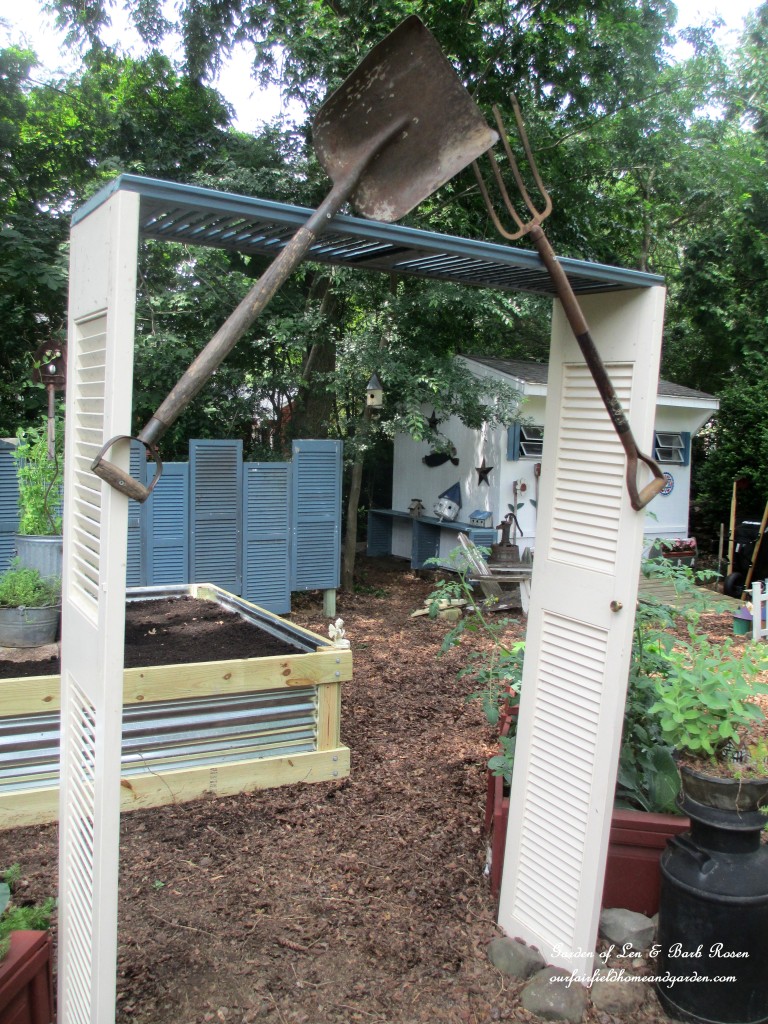
A strip of pressured treated wood was added for extra stability on the bottom of the abor. This was buried so you don’t see it at all! A shovel and a pitchfork, picked up at garage sales, were added as bracing and accents. Now it was time to paint!


Salvaged Shutter Arbor http://ourfairfieldhomeandgarden.com/salvaged-build-a-shutter-arbor/
Garden Tools were added as bracing and accents!

Painting the Shutter Arbor took longer than it did to make it! Because two of the shutters were white, two coats of paint were necessary.


Salvaged Shutter Arbor http://ourfairfieldhomeandgarden.com/salvaged-build-a-shutter-arbor/
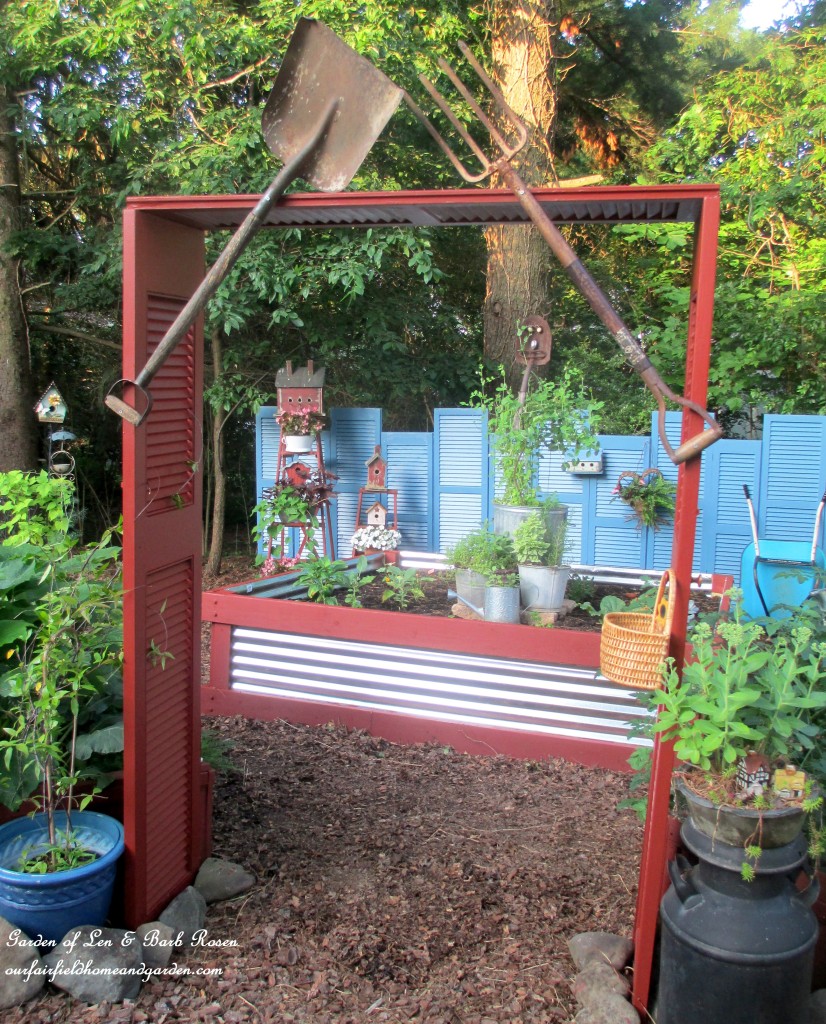
Painted Shutter Arbor

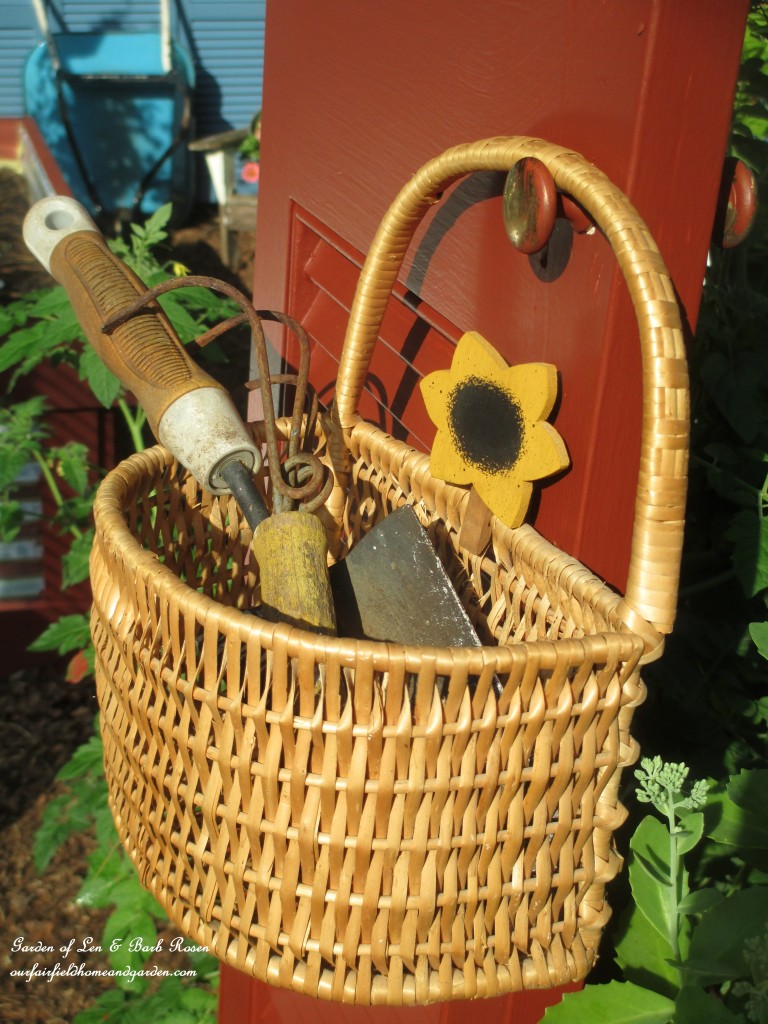
There was a handy little door knob on the shutter arbor and I just happened to have a half basket that was made for it! Voila’ a handy hand tool basket at the ready for when I tend the garden.


Tool Basket http://ourfairfieldhomeandgarden.com/salvaged-build-a-shutter-arbor/
Tool Basket on the Shutter Arbor!

Original article and pictures take ourfairfieldhomeandgarden.com site

Tuesday, May 23, 2017

Shot Of Heroine

Shot Of Heroine
pastel–pixies: “ •.¸☾☮☼¸.• purple blog •.¸☾☮☼¸.• ”
pastel–pixies

Original article and pictures take 78.media.tumblr.com site

Monday, May 22, 2017

short-haircutstyle.com

short-haircutstyle.com

2017 Copyright. All Rights Reserved.


The Sponsored Listings displayed above are served automatically by a third party. Neither the service provider nor the domain owner maintain any relationship with the advertisers. In case of trademark issues please contact the domain owner directly (contact information can be found in whois).


Privacy Policy


Original article and pictures take www.short-haircutstyle.com site

Wednesday, May 17, 2017

Shooting Star Succulent Planter

Shooting Star Succulent Planter

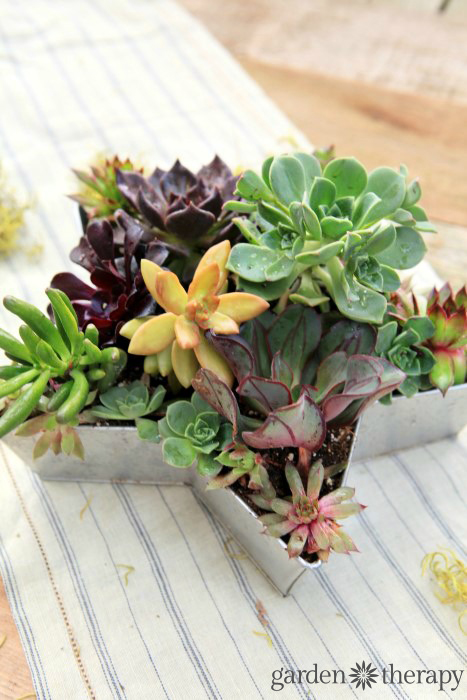
This festive succulent star centerpiece makes for a beautiful container display and table decoration. Set the planter out on the outdoor table for decoration or hang it on a fence or wall in a sunny spot that you can enjoy all summer long.


Celebrate summer with this shooting star succulent planter DIY project

I made this succulent star to adorn my patio table which is in hot, direct, unrelenting sun. All. Day. Long. I’ve added umbrellas and even a fan to the south-facing deck and, while the shade can provide relief when I sit out in the warmth, most of the plants that I have tried to keep in decorative containers have wilted or crisped from the harsh conditions. I wanted something that didn’t need to be watered three times a day and succulents are just the thing!


Aeonium and other succulents

Unless you have been living under a rock, you know that succulents are the hottest home garden plant since tomatoes. They are wonderfully drought tolerant, beautiful, and low maintenance. There are so many decorative garden projects that use succulents but it is also important to spend some time learning about the plants and their care. After you read how to make this succulent planter, have a read through The Essential Succulent Care Guide that covers planting, watering, light, overwintering, and pruning.


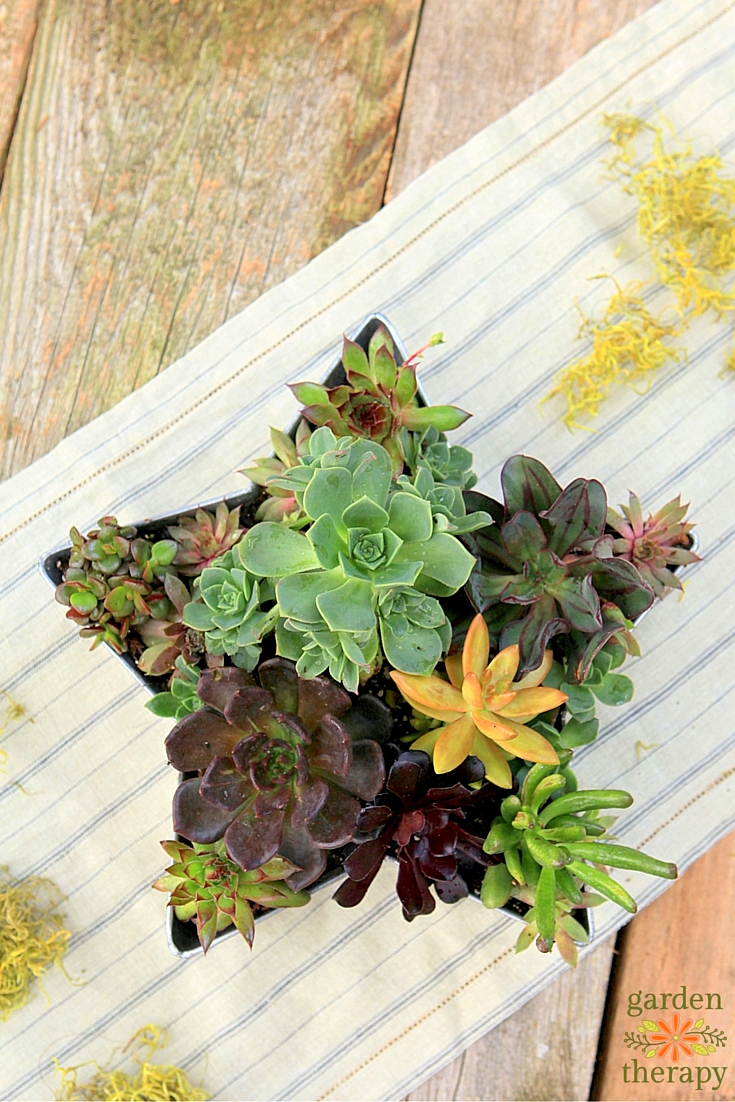
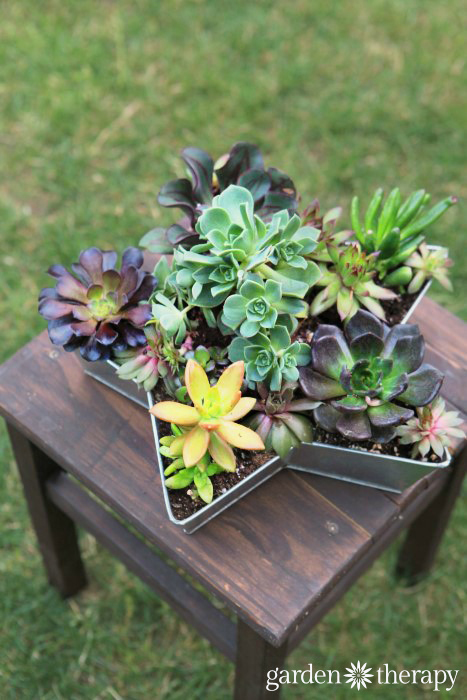
Gorgeous succulents planted in a star-shaped planter

Materials


How to make a succulent star

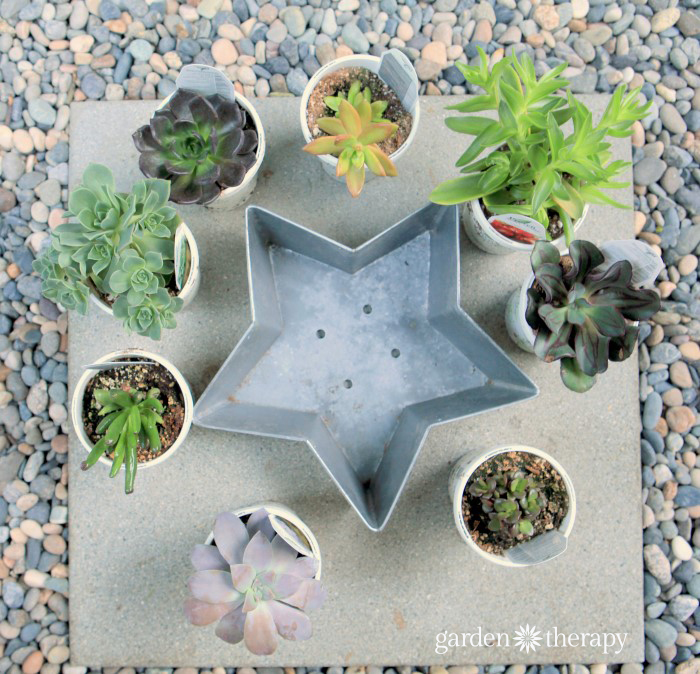
Metal star container (I found mine at a thrift shop and couldn’t see any similar ones online. Look for any shallow container that is water safe. Make sure there are drainage holes, or create your own by drilling through the metal or punching out holes with a hammer and large nail.) There is a wreath form here.


Various succulents*


  • Aeonium haworthii “Pinwheel”
  • Aeonium “Zwartkop”
  • Echeveria imbricata “Black Prince”
  • Echeveria Nodulosa “Painted Echeveria”
  • Sedum Nussbaumerianum “Coppertone”
  • Crassula ovata arborescens “Baby Jade”
  • Crassula ovata “Hobbit Jade”

Paintbrush


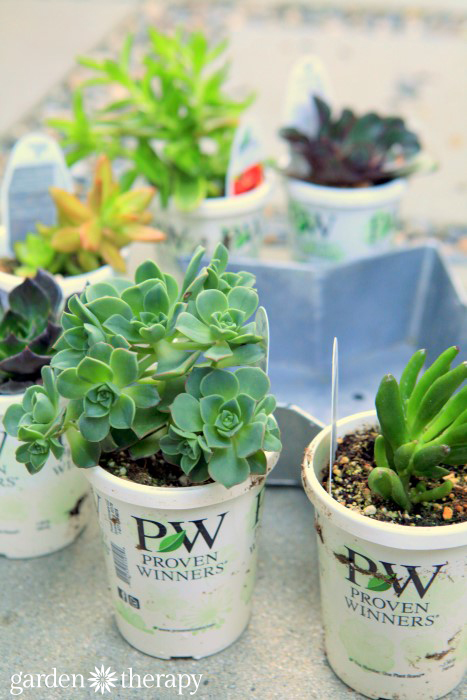
* The succulents in this project were generously provided to me by Proven Winners. You can see them all on their website here.


Proven Selections Succulents

Make it!


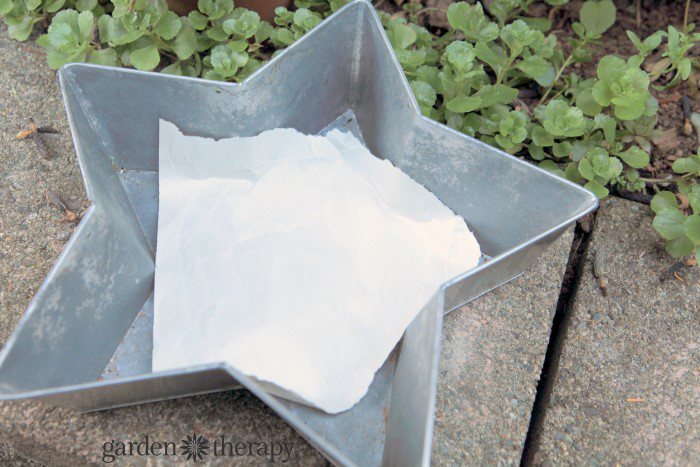
Line the bottom of the planter with some newspaper or unbleached paper. Add a bit of soil to the bottom of the planter. The plants I was sent were in large plant pots and there was plenty of extra soil to fill the bottom of the planter and to fill in the gaps. If you need extra soil, then get a cactus and succulent mix from your nursery.


Line the planter with paper

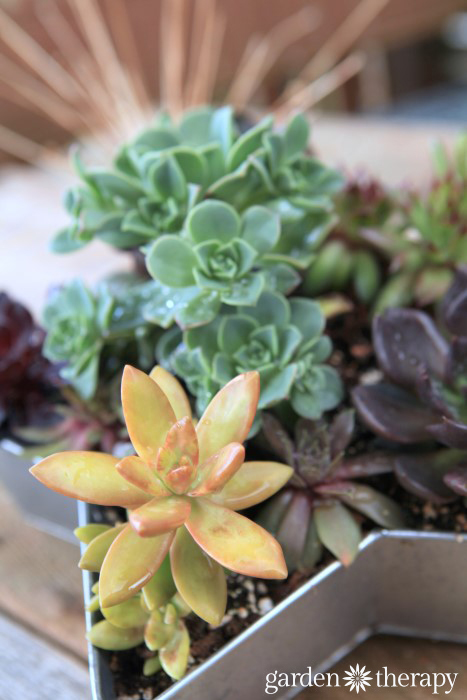
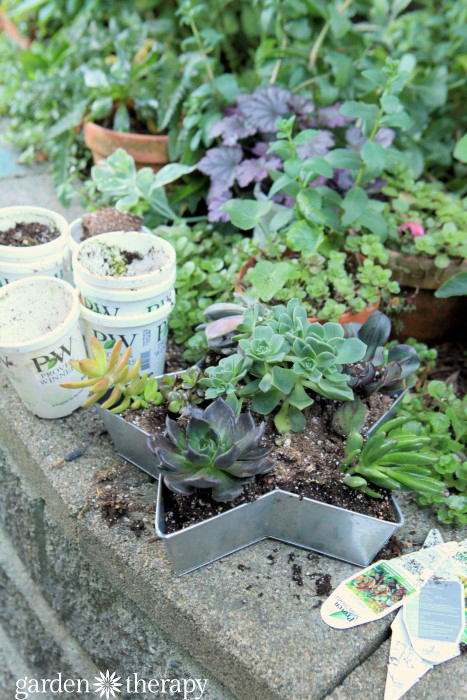
Remove the plants from their pots and shake off any excess soil. Add them into the planter, nestling them close to each other. If you want to retain the overall shape of the planter, make sure that the succulents don’t overhang the edges. Instead, plant larger rosettes in the center and fill in any gaps with smaller cuttings. Feel free to move the plants around if they just aren’t working in the layout you have created.


Planting the succulent star

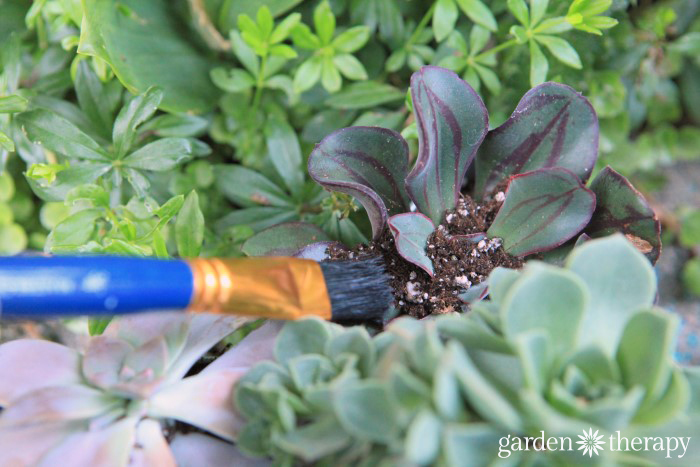
Brush off any soil from the leaves with a paintbrush to clean up the finished display.


Use a paintbrush to remove soil from succulent leaves when planting

Water the container well once you have finished planting. Leave it in a bright location, out of direct sunlight for a few days. Then you are free to move it to a bright and sunny spot.


Finished succulent star planter

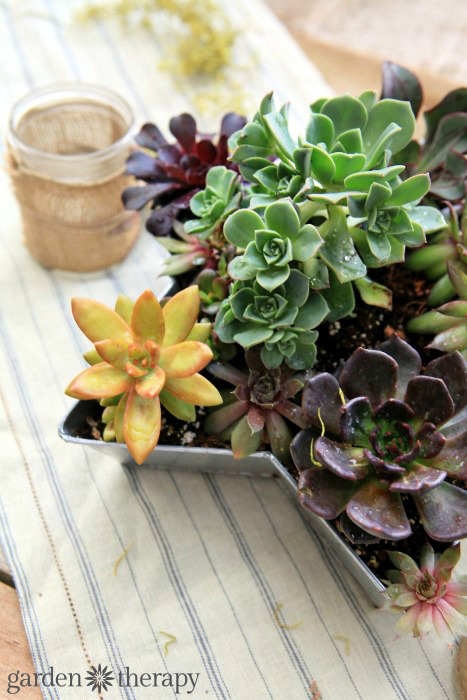
When the water has all drained through, set the table and make this planter the star!


Set the table with succulents - how to make this succulent star

More on caring for succulents here:


This is THE Guide to caring for succulents - choosing, planting, water, light, pruning and even container ideas

Save


Original article and pictures take gardentherapy.ca site

SHINE

SHINE
  • SUMMER LOVING X OPI
  • YES NO
  • JUST BECAUSE
  • FASHION & JAMIE FRAISER
  • RUN A MILE
  • SPARK A LIGHT
  • A REALLY BIG DIAMOND

Original article and pictures take www.theyallhateus.com site

Monday, May 15, 2017

Share this post

Share this post
Love this girl and her hair.


1481 Notes


Original article and pictures take 78.media.tumblr.com site

Friday, May 12, 2017

Setting Up My Terra Cotta Pot Edging

Setting Up My Terra Cotta Pot Edging

Today is cooler and the temperature may dip to 37 degrees tonight so I stopped flower planting, and worked on setting up my terra cotta pot edging under a spruce tree in my yard.


This is my starting point. A few sedums, hostas, lady's mantle and astilbes in various stages of growth.

The soil is dry and leaves and pinecones need to be raked up.


All raked up.


I wash up the pots with soapy water, but I like the aged pot look so I don't use bleach.


I loosen the dirt, dig any weeds in the area, and line up the little pots first. You can stick a piece of bark mulch under one side if the pots don't sit straight.


Gradually the pots get larger and larger until they reach the rubber edging on the deck plantings.


After the perennials fill in a little more, I will add a few annuals if necessary. Usually, the perennials pretty much fill it up.

If you have run out of ideas for flower bed edging try terra cotta pots!


UndertheTableandDreaming


Home Stories A2Z

Cottage Garden Party

.


Funky Junk's Saturday Nite Special

eclectically vintage

Original article and pictures take www.organizedclutter.net site