Thursday, June 30, 2016

How To Make Garden Art Flowers from Dishes

How To Make Garden Art Flowers from Dishes
How to make garden art dish flowers using both drill and no-drill methods. Grab old plates, dishes, cutlery, and candy dishes and turn them into blooms for your garden.

I may receive a commission if you purchase something mentioned in a link on this post for sites including Amazon.com. Other links may go to websites where I have been paid to write a blog or article. See the entire disclosure here.


Options for Making Garden Art Flowers
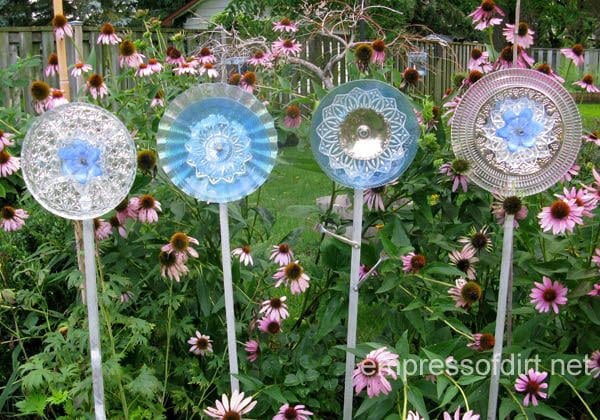

How to make garden art dish flowers using both drill and no-drill methods

While you can assemble them with a good, waterproof adhesive (more on this below), I find it’s best to also drill through the plates and secure them with wire. This way the dish flowers can stay in the garden throughout the seasons without the risk of falling apart. Don’t worry about drilling holes in glass: I promise you it’s way easier than it sounds.


But, if you don’t want to drill the glass, that’s fine! You simply use more adhesive instead of wiring the pieces together.


You’ll probably want to start watching at yard sales or thrift stores for suitable dishes so you can make several flowers all at once. I have also provided instructions for other glass garden art projects here, so if something doesn’t work for one creation, it will probably find use in another.


Love garden art and creative gardening ideas?


Drill or Not – Your Choice


These instructions will show you how to create glass garden flowers from start to finish, including a video showing how to drill through glass. With the right drill bit, it’s really a simple process and once you try it, you’ll definitely feel confident enough to make a whole bunch more.


You can mount the flowers on wooden posts as I’ve done here, use rebar or pipes, or simply hang them on a wall or fence. This post shows an update of how I displayed them on my patio wall.


Plus, as soon as you are confident that you can indeed drill holes in all sorts of used kitchen items, the entire key to the garden art kingdom is yours.


Dish Flower Tools & Materials


How to make garden art dish flowers using both drill and no-drill methods
Some of these links go to my affiliate account at Amazon.com

  • Used kitchen glassware and metal plates, bowls, serving dishes, votive candle holders…. I choose pieces around 1/8″ thick.
  • Tiered serving dishes work great because they already have holes drilled in them.
  • Old forks and spoons (to use as leaves on the wooden flower stem)
  • Plastic or metal dish pan
  • Old towel (you might drill a hole in it)

  • 5/16″ diamond drill bit ($15-20 US) – cuts glass, marble, porcelain, granite, and slate
  • 1/8″ masonry drill bit (optional-if you want to make a pilot hole in the glass to keep the diamond bit from slipping
  • 1/2″ titanium drill bit (for drilling holes in the forks and spoons)
  • Cordless drill
  • Safety glasses and protective gloves
  • Masking tape (optional)
  • Sharpie marker

  • 16-gauge wire (10 inches for each flower)
  • Washer and bolt (1 each per flower) or strong metal buttons with two holes (1 button per flower)
  • 1″x1″x48″ wood posts (1 for each flower)
  • 1/2″ wood screws (for attaching forks and spoons to the wooden stem)
  • copper pipe end cap (optional) for attaching flower to a pipe stem

If you are new to using silicone sealant as an adhesive, read these tips first.
If you are new to using silicone sealant as an adhesive,

read these tips first.


Design


  • Pick various sizes of dishes that look good together and fit well together.
  • For the flowers you see here, I used clear and blue glass plates plus some small metal serving dishes.
  • If you want to make several flowers to group together, you might want to pick a colour theme (blues, reds, greens, or simply all bold colours or pastels).

Set-Up


  • Place folded towel in bottom of dish pan.
  • Add enough cold water to cover towel plus a little more.
  • Have dishes, drill (and bits), and safety glasses and gloves ready.
  • Mark the plates where you want to drill each hole with the Sharpie.

Optional – Pre-Drill


  • Place a small piece of masking tape over the intended drill hole area and pre-drill a starter hole using a 1/8″ masonry drill bit. The masking tape keeps the drill from slipping. The starter hole helps the diamond drill bit stay in place.

This video is fairly old but it does show me drilling a hole in a dish with one hand! The other hand is hold the camera, so you can see it’s not difficult.


Drill The Glass


This will take from 1-4 minutes per dish, depending on the glass.


  • Place the glassware in the dish pan. Allow some water onto the surface of the glass.
  • Put on your fancy safety glasses and gloves.
  • Start drilling on medium speed, holding the drill at a 45 degree angle to the plate.
  • Hold the drill steady but do not press too firmly against the glass. The diamond drill bit will do the work. You want consistent speed, not force.
  • After about ten seconds, slowly move the drill (while you’re drilling) to a 90-degree angle, directly over the hole.
  • As you drill it will look like little clouds of smoke are moving in the water around the hole. That’s the tiny bits of glass being drilled away.
  • Usually after a minute or two , the drill bit will suddenly plunge through the plate when the hole is done (be prepared).

Drilling Metal Plates & Cutlery


  • Thin metal serving dishes drill quite easily using a metal (titanium) drill bit.
  • Metal cutlery (forks, spoons) can really vary for ease of drilling. You just have to try and see if it works. I have luck with about half of what I try. The rest are mightier than me and my drill and will survive a nuclear attack.

Assembly & Adhesive


Assemble the Flower


  • Place some silicone sealant wherever the plates will be touching each other to keep the pieces from rubbing too tightly together. Work from back to front and line up the drilled holes as you go.
  • Allow the sealant to dry (usually takes 3 hours).
  • Thread a nut onto a 10″ piece of wire and fold the wire in half. Pinch the wire together to hold the nut in place and thread the wire through a washer. Thread everything through the front of the dishes. The nut and washer keep the wire from slipping through the flower. Alternately you could use a two-hole metal button at the center of your flower to hold the wire in place.

Prepare the Wooden Stem


  • Drill a pilot hole and then a 5/16″ hole through the wooden stem. (Drilling the pilot hole first keeps the wood from splitting.)
  • Use forks and spoons as leaves, attaching them with small wood screws.
  • Hammer post into ground.

How to make garden art dish flowers using both drill and no-drill methods
Mount the Flower on the Stem

  • Attach flower by threading wire through hole in wooden stem and secure at back.

Alternate Way to Mount the Flower


  • You can also attach a copper pipe end cap to the back of the flower (using the same silicone sealant as adhesive). Allow to dry and insert matching copper pipe as a stem.

How to make garden art dish flowers using both drill and no-drill methods

Original article and pictures take empressofdirt.net site

Wednesday, June 29, 2016

How to Make Earth-Wise Owls

How to Make Earth-Wise Owls
Earth-wise owls - a recycled craft project

I may receive a commission if you purchase something mentioned in a link on this post for sites including Amazon.com. Other links may go to websites where I have been paid to write a blog or article. See the entire disclosure here.


DIY Owls Made From Cardboard Boxes


I first found this project in a magazine article when I was around 7 years old (a long time ago!) when owls were all the rage in crafts and decor. And now they’re popular again, probably spurred on by the popularity of Harry Potter books.


I’ve noticed lots of owls on Etsy and Pinterest recently and decided to create a really easy version that both kids and adults can make. Just make sure an adult handles the hot glue gun (if you use one). There are more fun recycled Earth Day craft projects here.


The materials are all household items, making it entirely recycled with the exception of the glue.


Once you’ve mastered the basic owl, you can go on to embellish it to look like any type of owl you like. But for starters, we’ll do the sweet and simple owls.


Make an owl family from recycled cardboard at www.empressofdirt.net
Here’s free instructions to make the grape vine bird nest the owls are sitting on

Overview of Steps


1. Cut out the cardboard strips (see sizes listed in Materials list below) and wings.


2. Peel off one paper side of the box to expose the corrugated section inside.


3. Roll up each piece of cardboard to get a nice rounded roll before applying glue.


4. Apply a line of glue down the inside middle length of each cardboard piece, roll up snugly, hold closed with elastic bands while glue is drying.


5. Make beak.


6. Glue pieces together.


Earth-wise owls - a recycled craft project by www.empressofdirt.net

Materials For Making Earth-Wise Owls


  • 2-3 Corrugated cardboard boxes (12″x18″x18″) – “corrugated” is the wavy layer in between the outer and inner paper walls of the box.
    For this project you will peel off one layer of paper, leaving one other layer plus the corrugated middle.

From the cardboard boxes cut out the cardboard pieces listed below for Mama and Baby:


Mama Owl (8″ tall) Materials


  • Body: (1) 4″ x 140″ strip of cardboard (you can use several shorter pieces—at least 16″ long—and join them if needed)
  • Head: (2) 4″ x 45″ strips of cardboard – these form the cylinders for each of the eyes
  • Beak wrapper: (1) 4″ x 6″ piece of cardboard
  • Wings: (2) 4″ x 7″ piece of cardboard – cut to form wing shapes (see below)
  • Eyes: (2) Black buttons (1 1/2″ in diameter)
  • Beak: (1) Silver cereal spoon with 4″ handle or a bit shorter

Baby Owl (4″ tall) Materials – This is for ONE baby owl


  • Body: (1) 2″ x 45″ strip of cardboard (you can use several shorter pieces—at least 6″ long—and join them if needed)
  • Head: (2) 2″ x 20″ strip sof cardboard
  • Beak wrapper: (1) 2″ x 3 1/2″ piece of cardboard
  • Wings (2) 2″ x 3 1/2″ piece of cardboard – cut to form wing shapes (see below)
  • (2) Black buttons (1 1/2″ in diameter)
  • (1) Tiny spoon with 2″ handle or a bit shorter (I broke mine off with pliers to get the right length)

Tools and Glue


  • Adhesive / glue that works on cardboard. I used a hot glue gun and it worked really well. [See it at Amazon]
  • Ruler, pencil, scissors, elastics.

Separating cardboard to make a craft owl at www.empressofdirt.net
Related: DIY Repurposed Owl Wreath Tutorial

Steps For Making The Owls


Please read all of the steps first – there’s some tips you’ll want to know ahead of time.


1. Cut open one corner of each carboard box so the cardboard lays flat. Cut out the cardboard strips (see sizes listed in Materials list above).


Making an owl family from recycled cardboard at www.empressofdirt.net

And cut out the wings: first cut the rectanglular sizes listed, then place the two pieces wrong sides together (corrugated cardboad facing out), and cut out wing shapes like the one in my wonderful illustration (right).


2. Peel off the PRINTED side of the cardboard. If there is no printed side, just peel whichever side you want.


Scoring corrugated cardboard for a owl craft project at www.empressofdirt.net
DIY leaf lantern

If the sides don’t peel off completely, just score the ridges of the corrugated cardboard with the tip of your scissors. The uneven texture will look good. Trust me.


I demonstrated this with big pieces of cardboard, but yours will already be cut to size: this makes it easier to peel them.


3. Before you start gluing and assembling your owl, take the time to roll up each piece of cardboard and form nice rounded cylinders with the cardboard. This will make it easier for the next step.


Applying glue to corrugated cardboard - owl craft project - www.empressofdirt.net
Related: 12 Owl Art & Craft Projects

You’ve just pre-rolled the cardboard strips, now you want to open them flat, one at a time, and apply the glue.


Tip: Make sure the cardboard that will end up visible on the outer roll of each cylinder looks good. Take note of which end of each strip of cardboard will be the inside middle – that’s where you’ll start gluing and rolling. The same way you roll up a sleeping bag.


Rolling corrugated cardboard strip - owl craft project - www.empressofdirt.net

4. Apply a line of glue down the middle center length of each cardboard piece, working in manageable sections. Roll up the cardboad snugly, hold closed with elastic bands while glue is drying. I’m using a tube of silicone in the photo but I found a hot glue gun works faster.


Here’s another nature project idea: DIY Thrift Shop Bug House


Rolls of cardboard drying - owl craft project - www.empressofdirt.net

TIP: If you’d like your owl to have a rounded belly, push the centre of the cylinder out slightly before the glue dries (as shown below).


Elastic holds cardboard roll in place - owl craft project - www.empressofdirt.net
5. Make the beak.

  • Bend the spoon where the handle meets the spoon head. You’ll want almost a 90 degree angle (see image below).
  • Be sure your spoon handle is no longer than the depth of the beak cardboard piece. You don’t want it sticking out the back of the owl’s head!
  • Pre-roll your beak cardboard so it will form a nice shape when you glue it.
  • Apply glue to the length of the spoon handle and fasten to one inside end of the cardboard piece. Roll it up snugly.

Making the owl's beak - owl craft project -www.empressofdirt.net
Hold in place with elastic band while the glue is drying.

  • This shows how the beak looks from the side:

Cardboard around spoon - owl craft project -www.empressofdirt.net

6. Next glue the rolled beak piece onto the body. I added mine where the cardboard roll ended on the body (to hide it).


Attaching beak to body - owl craft project -www.empressofdirt.net
Glue eye rolls to body and beak.

  • Glue on button eyes in centre of head cylinders.
  • Glue on wings, tucking top end just under sides of eye cylinders and have corrugated cardboard facing out. Secure to body with glue midway down inside of wing.
  • Allow to dry.

Attaching head pieces to owl - owl craft project -www.empressofdirt.net
Who’s your Mama?


Mama owl's face - owl craft project -www.empressofdirt.net
You’re done!


More Ideas For Decorating Your Owl


This is the simple version of the owl. If you want to embellish yours further, look up images of various types of owls and see what you like.


  • You could add head feathers or ears, wire feet, or decorate it for Halloween with a little witch hat!
  • Dress them up in hats and mitts and place them on a winter wreath.
  • Hang several from a mobile.
  • Make giant, open wings to make your owl in flight.

Mama owl - owl craft project -www.empressofdirt.net
Here they are wearing red mittens in the snow:

Snowy owls DIY craft and seasonal home decor project

More Ideas For Earth-Wise Owls


  • Hang them on a door wreath.
  • Give them seasonal accessories like hats, mitts, sweaters.
  • Make them in more sizes – from giant to tiny.
  • Or hang a little toy mouse from its beak: the horrors!

Owl babies - owl craft project -www.empressofdirt.net
These babies are out of the nest for the first time.

~Melissa the Empress of Dirt ♛


Earth-wise owls - owl craft project

Original article and pictures take empressofdirt.net site

Monday, June 27, 2016

How to Make Concrete Planters

How to Make Concrete Planters

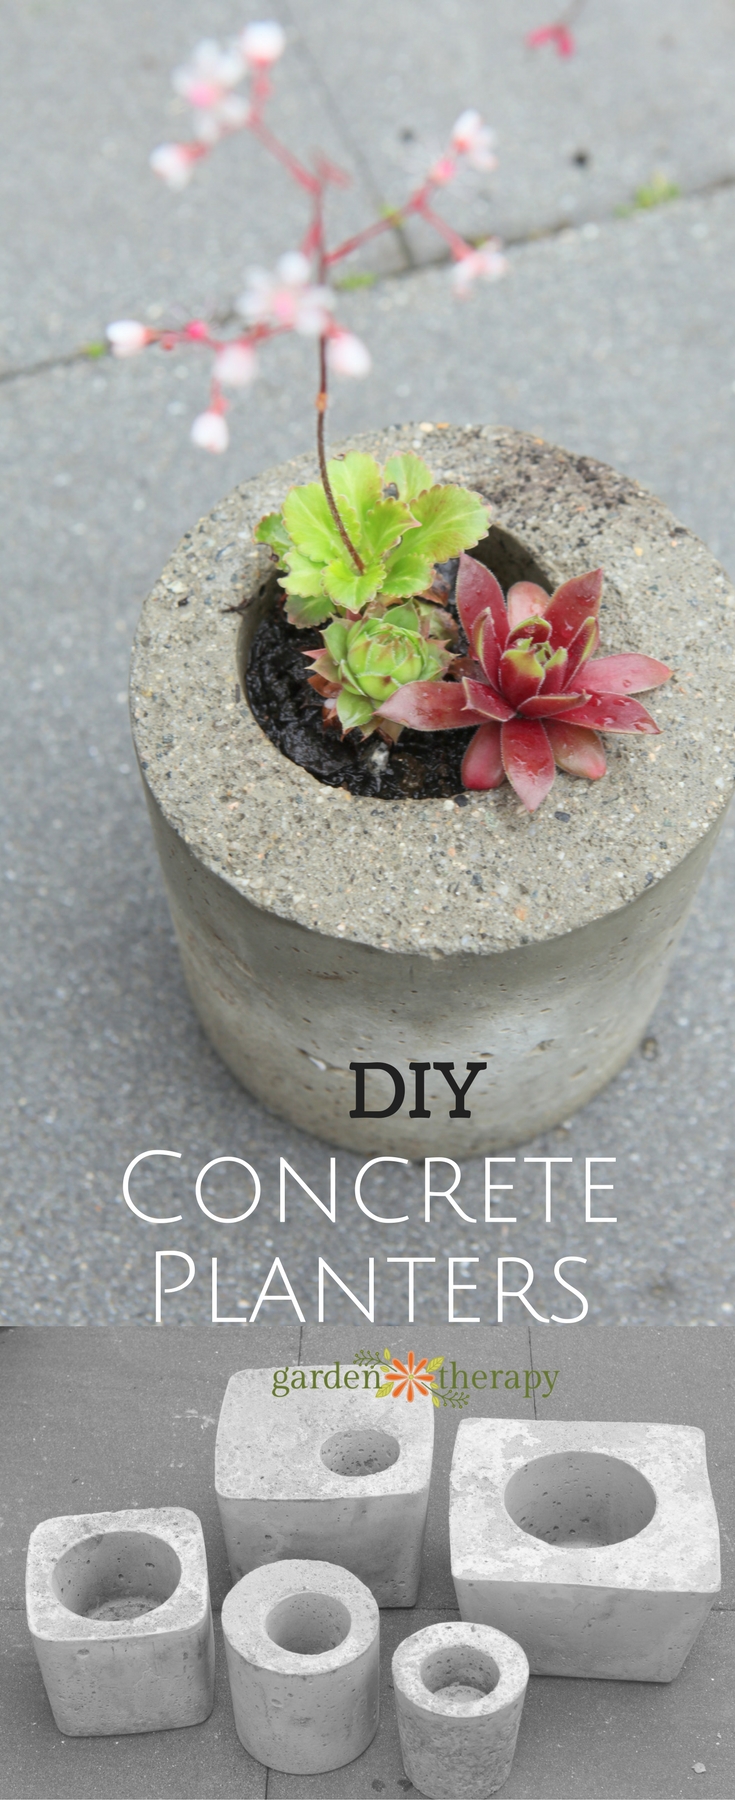
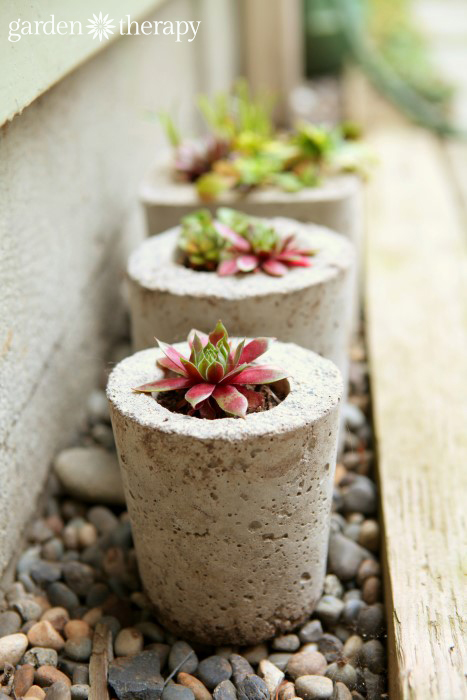
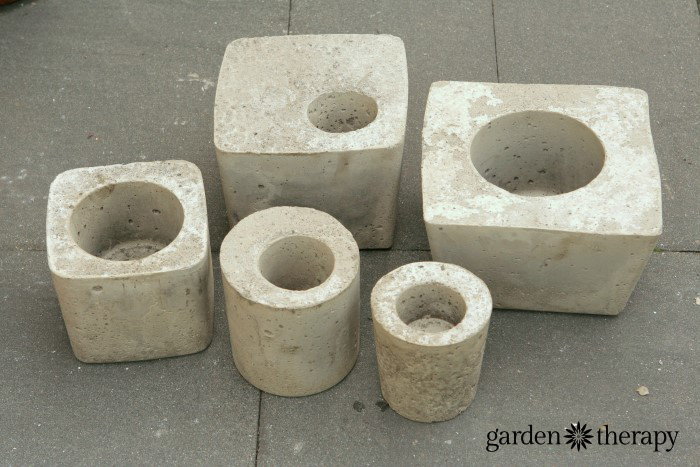
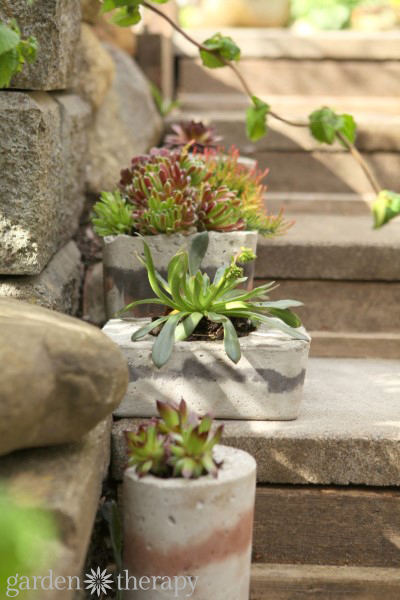
These DIY concrete garden planters are simple to make in just a weekend and with materials you may already have around the house. They look modern with unique shapes that come straight from the recycling bin!


How to make concrete planters

I made these planters many years ago, and have since made many more for gifts and to decorate my home garden.


Make these concrete planters using your recycling bin!

At the time I didn’t write out the whole tutorial with steps and materials, so here it is:


Materials


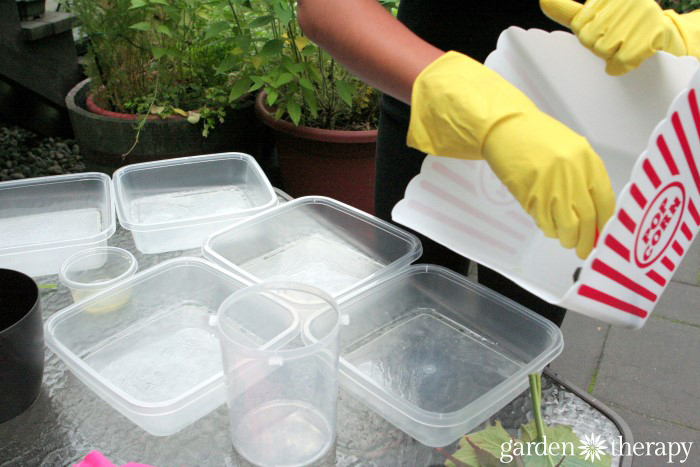
  • Plastic containers to use as molds—choose all sorts of shapes for the molds, but make sure that the plastic is strong enough to hold the shape of heavy concrete. If the sides of the container are too flimsy, they will warp and you will get some weirdly-shaped planters (although they may also turn out kind of fabulous!).
  • Cooking oil
  • Foam brush
  • Fine concrete (topping or repair concrete)—standard concrete has gravel in it and these larger stones will affect the overall look of your planters. Look for a smooth concrete made of sand and no large rocks, typically used to repair concrete or as a top coat for rough surfaces. As long as the planter isn’t huge, this will be the best concrete to choose.
  • Trowel
  • Rocks
  • Instructions

How to Make Modern Concrete Garden Planters

Make it!


Thoroughly grease the containers with cooking oil so that the concrete doesn’t stick. I’ll write it again for emphasis: thoroughly. It can be tough to get the concrete out of the molds, so take some time and grease them up well. You will thank me later.


How to Make Concrete Garden Planters (step 1)

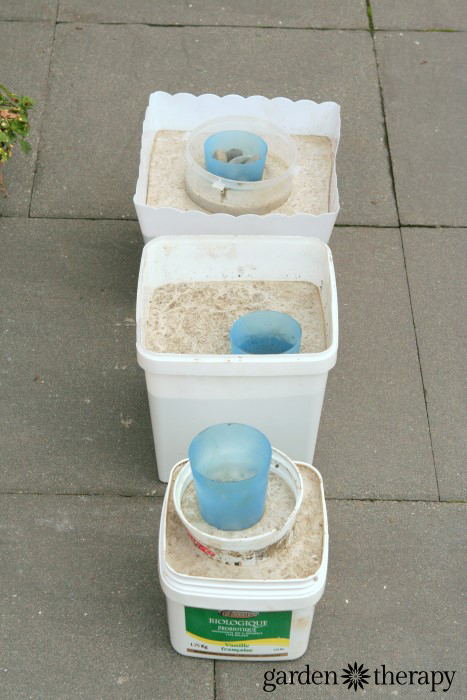
Mix the concrete by following the instructions on the package. Scoop concrete into a large mold and set a second, smaller mold into the first one. Make sure that you grease both the outside and the inside of the smaller mold. You can fill the smaller one with more concrete and insert an even smaller mold in that one. Keep going until the planters get too small and fill the final one with some pebbles to weigh it down.


How to Make Concrete Garden Planters (step 4)

How to make these concrete garden planters from plastic containers

Top up all of the planters with more concrete and tap them to remove bubbles. Smooth the surface so they even.


Let the planters dry for 24 hours. Unmold them by shaking the concrete loose, or cutting it away where it is too difficult to remove. It may take a bit of work, but if they were well oiled this is where you will thank me.


concrete garden planter made from plastic container

I have used the same containers many times over now, so it is possible to get them out with some upside-down shaking.


Now, let the containers cure for another week or so to ensure that they are fully ready for drilling. Use a concrete drill bit to drill a hole into the bottom of the planter for drainage.


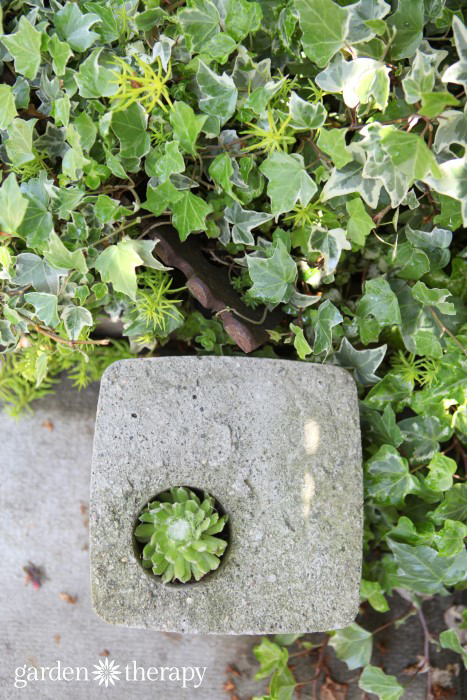
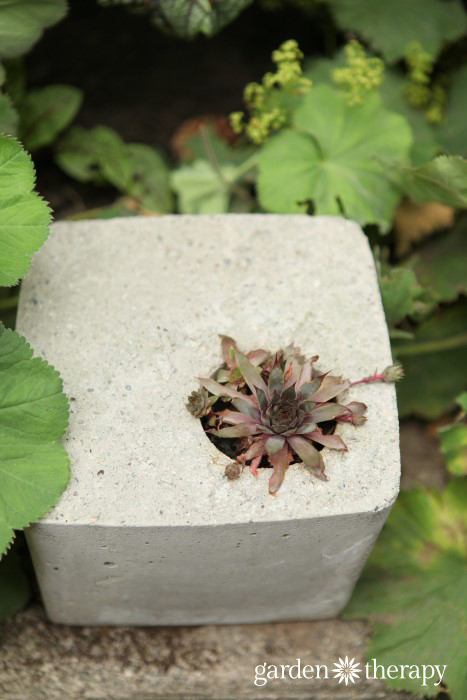
Plant them up with sedum or annuals and keep them well watered. Set them around the garden and enjoy!


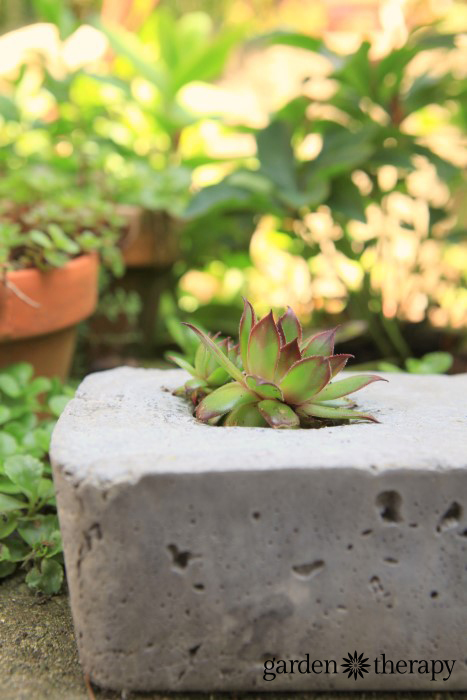
gorgeous and unique square planter DIY project

I like to use concrete for building outdoor projects and I have used it quite a lot. To me, it is like making garden sculptures!


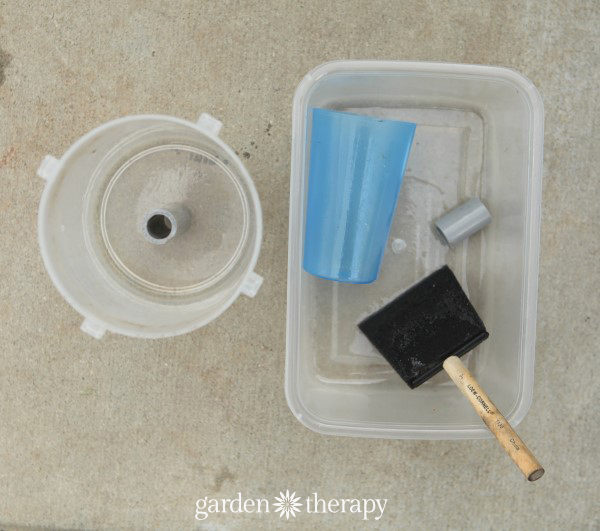
I made a version of these planters with concrete dye layers for my book, Garden Made. I added PVC pipe for drainage in that project.


Garden Made Book Concrete Planters project

The PVC pipe requires measuring it and cutting it to the right height to go from the inside planter to the outside one. Oil it well and pour the concrete around it. You can certainly use this method or the drilling method that was described above for making drainage holes. Each has its merits and both require some finicky work. With the PVC pipe, you will inevitably be chipping at it (or drilling it!) to get the excess concrete out of the hole, so choose your method based on what you have on hand.


How to add drainage into concrete planters with plastic pipe

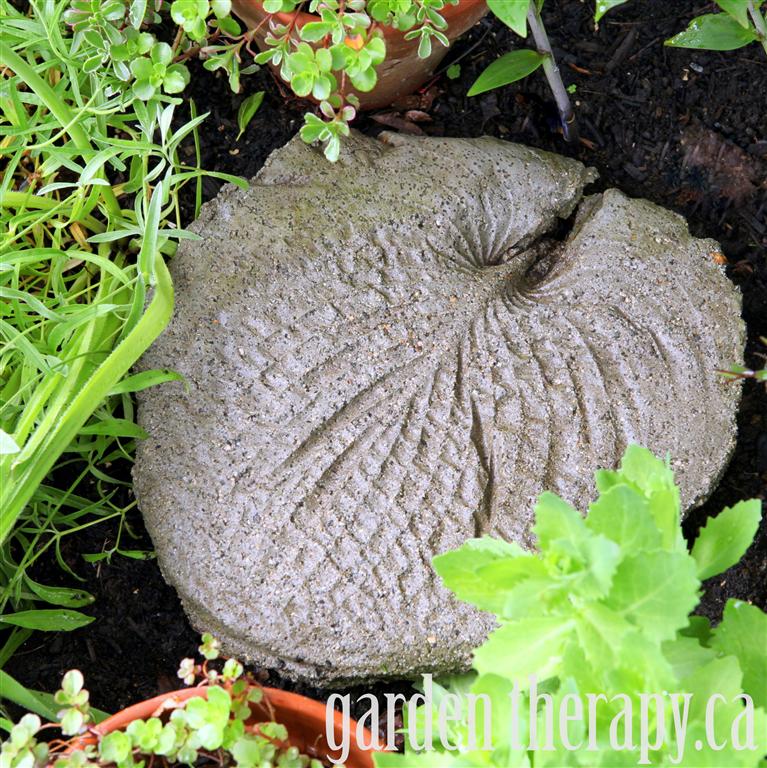
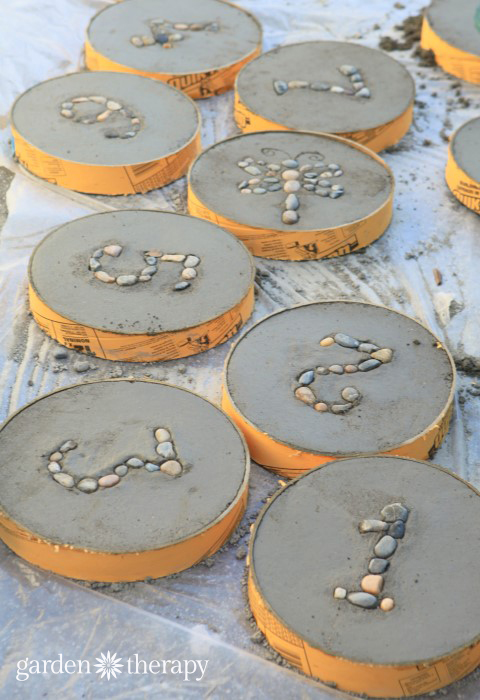
You can also make some stepping stones while you are at it. Like these:


Leaf Print Stepping Stones


Leaf Imprint Stepping Stones DIY Project

Large Leaf Cast Stepping Stones
Hosta Leaf Concrete Stepping Stone DIY


Adorable Hopscotch Stepping Stones
How to make concrete stepping stones for the garden with numbers set in rocks


Or you can visit here for my other concrete garden projects.


Original article and pictures take gardentherapy.ca site
Friday, June 24, 2016

How to Make Citronella Candles

How to Make Citronella Candles

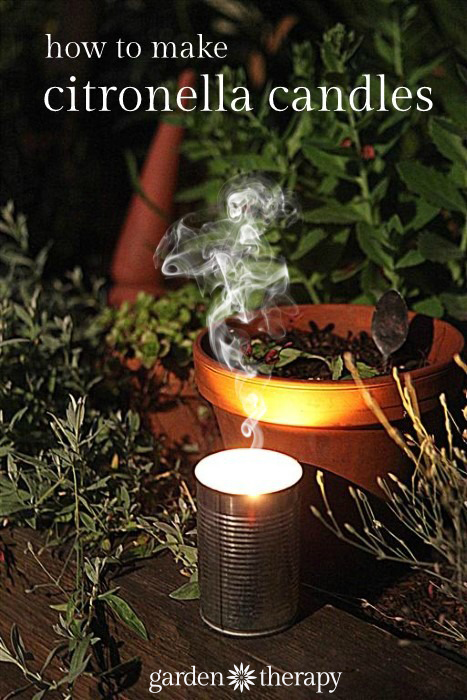
If your favorite thing in the summer is warm nights outside, then likely one of your least favorite things is getting eaten alive by mosquitoes. Making citronella candles in cans is a great recycling project that is inexpensive and effective, much like the Soy Beeswax Jar Candles I made a few months back.

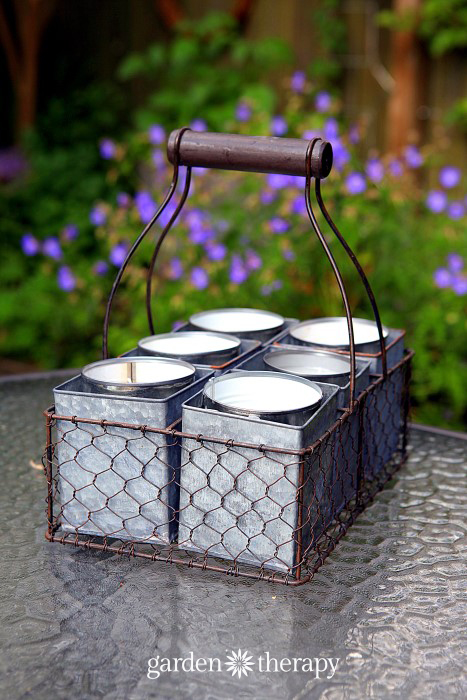
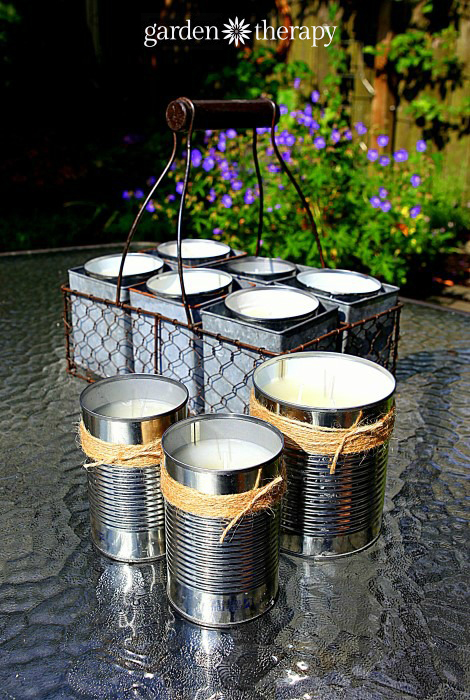
DIY Citronella Candles in antique milk crate

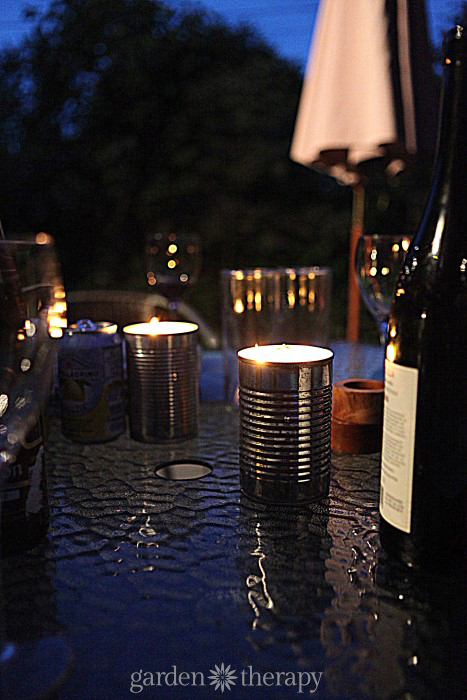
I make plenty of candles to create a bug-free barrier around the patio so I can enjoy my warm breezes and summer cocktails in peace. They aren’t bad for adding atmosphere either!


Citronella Candles to keep bugs away from the party

I’m not overly crazy for the smell of citronella, so I added a few additional scents to the latest batch: pine and mandarin orange. While the most effective candles will still be primarily citronella, feel free to add a few other fragrances the bugs won’t like such as eucalyptus, rosemary, peppermint, and oregano. I have an all-natural bug spray recipe with these scents too – they work really well.


How to make citronella candles from cans and recyled wax

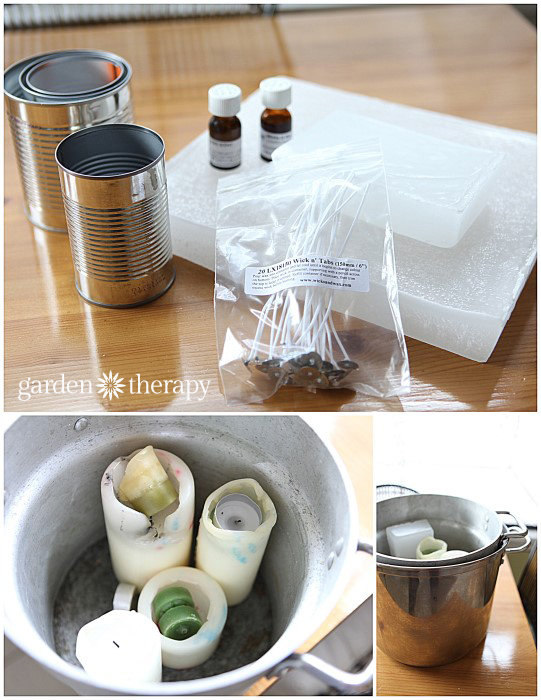
Materials


Make it!


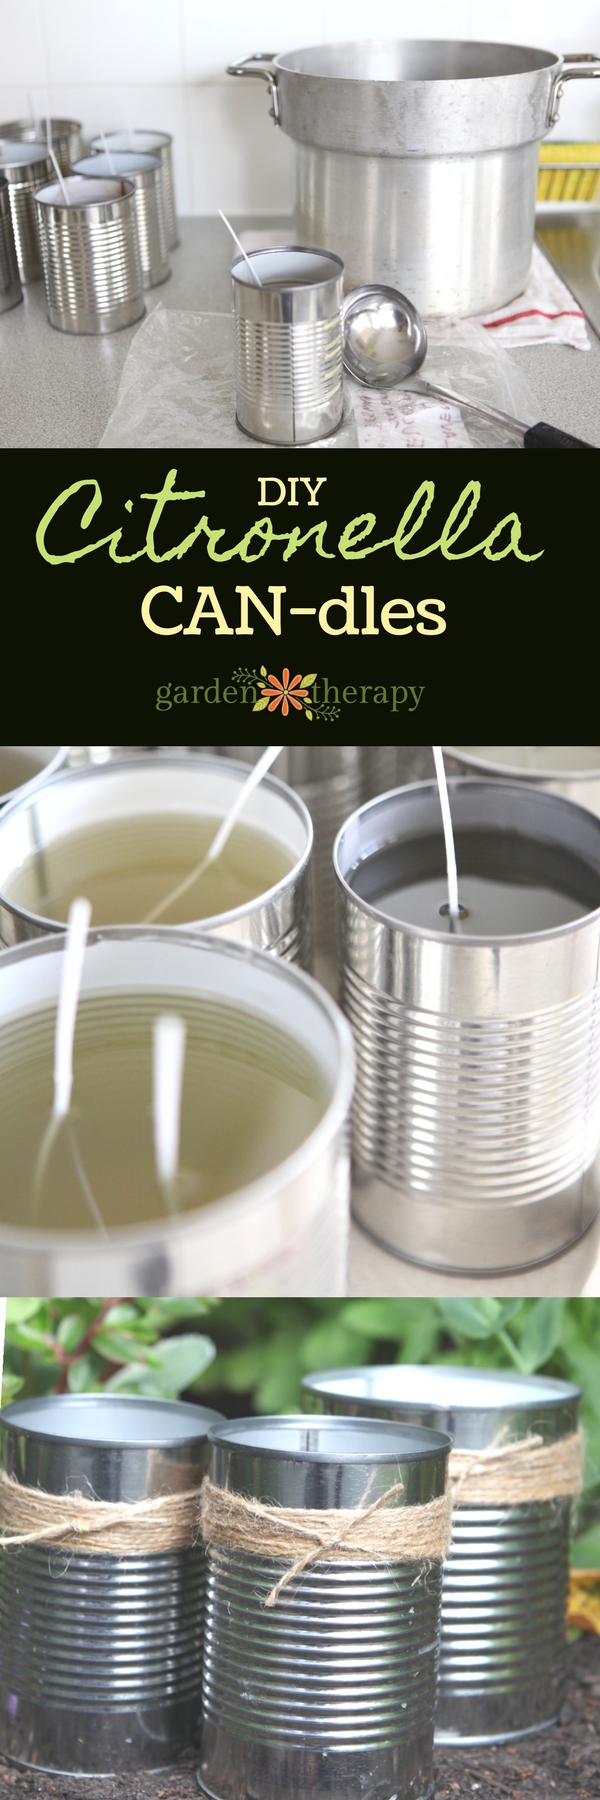
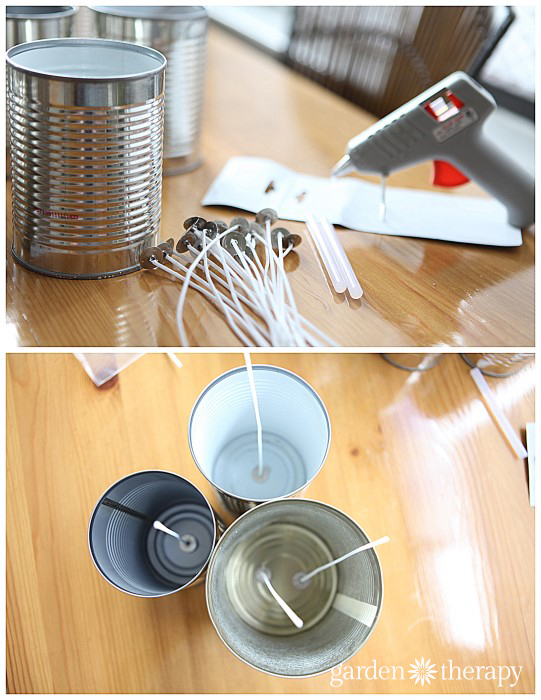
1. Using the hot glue gun, affix the wicks to the bottom of the cans and press it firmly into the center. If you are using a larger can, add two or three wicks spaced apart around the center.


DIY Candles in Cans Turorial Step 2 via Garden Therapy

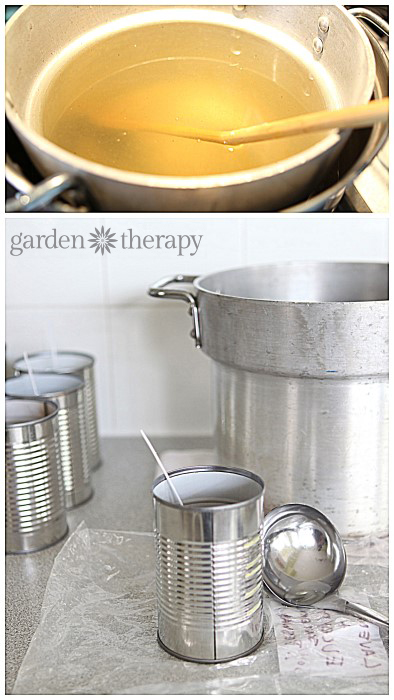
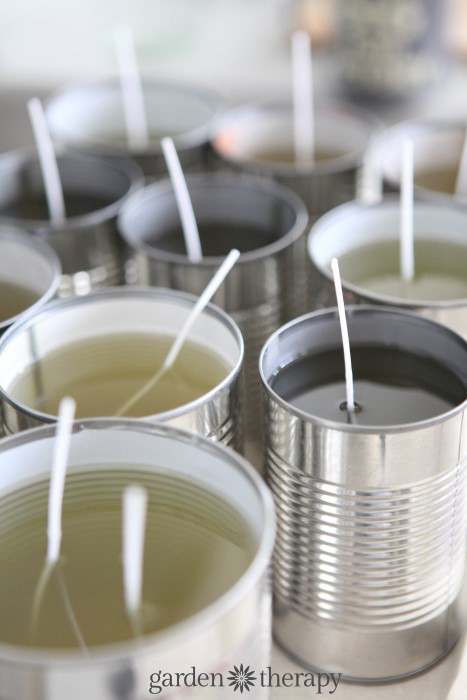
2. Assemble your double boiler and add wax or old candles in small pieces. Don’t worry so much about bits of wick or other specks in the wax as you won’t see them in the candles when they are done. Heat over medium heat until the wax is completely melted.


3. When the wax is melted it’s time to add the fragrance. Add 1 oz of citronella oil per pound of wax and augment the scent with 0.5 oz of other scents per pound.


DIY Candles in Cans Step 3 via Garden Therapy

4. Let the wax cool slightly and carefully pour into containers. I can usually gently maneuver my wicks to stay in the center as the wax cools, but if you are having trouble, secure the wicks with a chopstick or clothespin to keep them in line. Be careful not to disturb them too much and set them in a warm place to cool. Cooling slowly and completely will create the best looking candles.


easy DIY citronella candles in cans

5. If you get a depressed area around the wick when cooled, warm up some more wax and pour it into the void.


6. Allow your candle to cure for 48 hours undisturbed before burning. Then, when you fire it up, let the candle burn so that there is a full, wide pool of wax before you blow it out. It is said that candles have a memory, so it’s best to let the first burn set the tone for all the rest.


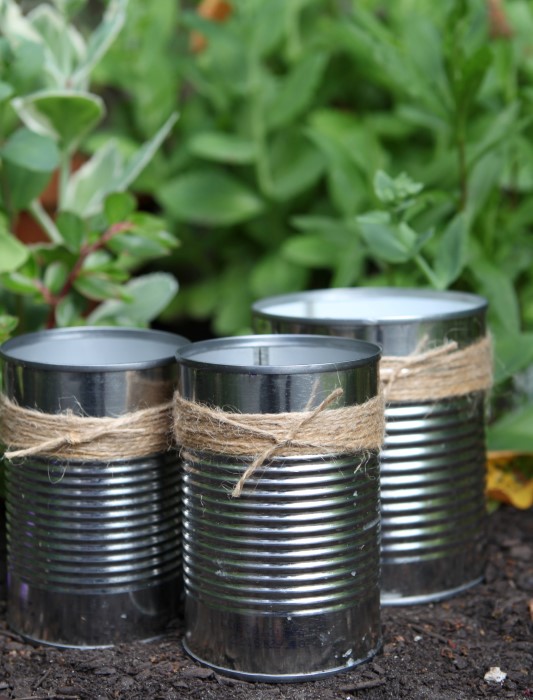
DIY citronella candles in upcycled soup cans

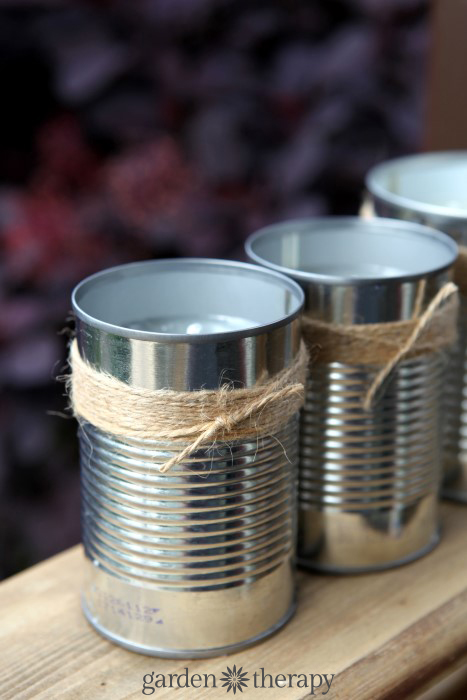
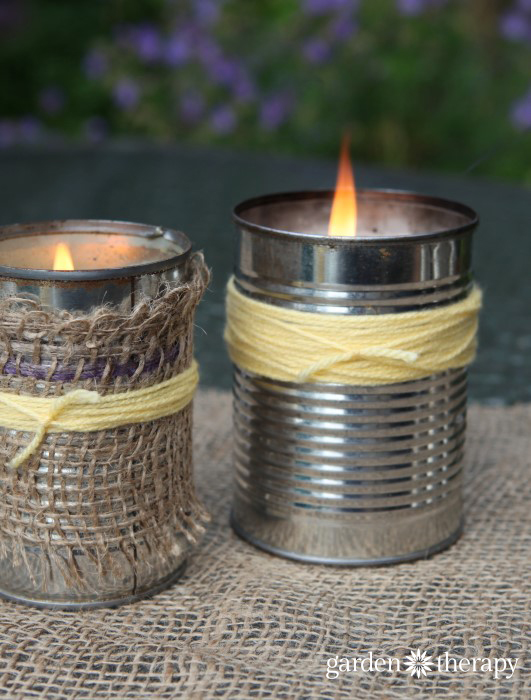
7. Decorate your candles by wrapping them in burlap, twine and/or yarn. Store them near the garden, deck, or patio so you can quickly light up when the pests start buzzing around.


DIY Tutorial on How to Make Citronella Candles for the garden

DIY upcycled citronella candles in recycled soup cans

Keep mosquitoes from spoiling the party with upcycled citronella candles


Need relief from annoying bugs on the go? Try this all-natural insect bite roll-on remedy.


Pin it!


How to Make Citronella Candles

Original article and pictures take gardentherapy.ca site