Monday, September 18, 2017

Tips on growing Snowdrops from the Milntown Gardens

Tips on growing Snowdrops from the Milntown Gardens
Tips on growing snowdrops from head gardener of Milntown, Juan Quane

Snowdrops are a sign that spring is on its way


At a time of the year when trees are bare and temperatures chilly, they welcome us with pure white and green tinged petals that bob in the breeze. One of the best public places to view them on the Isle of Man is Milntown, just outside of Ramsey. I visited this week and was able to ask head gardener Juan Quane for some tips on growing them at home.


Juan has been gardening at Milntown for seven years and during that time he’s seen Snowdrops migrated from the front lawn to various places in the woodland garden. Watch the interview and hear more Snowdrop growing tips. His tips on growing and situating clumps of these lovely springtime flowers include:


    1. Plant snowdrops ‘in the green’, meaning while the plant still has leaves. Planting from bulbs can result in lower success rates.
    2. Try to get your snowdrops from garden centres or from friends. You can dig them up and replant them while they’re still flowering.
    3. A new clump of snowdrops will double in size every two years.

  1. To create a drift of Snowdrops, plant small clumps about six inches apart and wait for the space between to fill up naturally.
  2. Alternatively, divide a clump up into individual plants then cast them out as a handful across the area you wish to plant. Dig each one in on the space they land upon.
  3. Don’t mow the green leaves of Snowdrops until they’ve completely turned brown. The bulbs need to retract all the nutrients from the leaves before they go dormant for the season.

I met Juan Wednesday afternoon and we had a chatty walk around the Milntown garden and woods. Though it’s late winter, there were early Camelias in bloom and I was also shown some surprisingly tender plants that can survive our mild winters without much damage. Scented Geraniums and even Aloe Vera, a succulent from the desert, were flourishing in the February cold; they apparently even have Bananas overwintering outdoors.


Soon we were in the woodland garden and walking among the scatterings of tiny white flowers that emerge this time of the year. Snowdrops – both delicate and hardy, they are an early source of nectar for bees and a delight for everyone wanting a little cheer in otherwise wet and dormant gardens.


Snowdrops love growing in the same types of places as bluebells and wild garlic so if you have either growing in your garden then you’ll know you have the right habitat. Saying that, a lawn can be an ideal place. Snowdrops grow well in both of these places at Milntown but also have spread of their own accord into areas of the walled garden where they find warmth and protection. We even spotted a cheeky clump of them growing at the base of a fig tree in the kitchen garden!


Usually planted in clumps, Snowdrops will over time create carpets of blooms that can easily be dug up and resituated in other places in the garden. It’s best to dig them when they’re ‘in the green’, meaning that they still have leaves, and then planted as individuals or in smaller clumps. These flowers also come in various types with some of them having larger white flower heads or ruffled layers of petals. Milntown have just discovered a new variety growing in their garden in the past couple of years. It could be a unique hybrid but they suspect that it might be ‘Galanthus flore pleno’, a known variety that can be found in garden centres.


The oldest planting of Snowdrops at Milntown is a circular Faery Ring on the front lawn. Though a previous garden designer at the gardens decided that they weren’t quite right there and had them dug up and moved, the circle is still there. That’s because even if a single bulb is left, it can regrow and repopulate the same area over just a few years.


The circle appears nearly complete now and the bulbs that were there before have been scattered in relatively new plantings throughout the woodland garden. You can best see them popping up through the leaf litter in late February.


The Milntown Gardens are open six days a week (closed on Tuesdays) from 10am to 5pm. The last admission is at 4.30pm and free mobility scooters are available for the less abled. For more information on Milntown, visit www.milntown.org.


Watch the interview with Juan Quane to learn more Snowdrop growing tips


PS – the house at Milntown is also available for tours…though it’s reported to be haunted! I featured it as one of the Spookiest places to visit on the Isle of Man just last year. I’m sure the spooks will be courteous enough to stay away for a daytime visit though.


Original article and pictures take lovelygreens.com site

Thursday, September 14, 2017

Tips for Making a Birdcage Planter

Tips for Making a Birdcage Planter
Birdcage planters are a favorite with creative gardeners. These tips share ideas for setting up a new or upcycled birdcage as a planter for succulents or annuals.

I may receive a commission if you purchase something mentioned in a link on this post for sites including Amazon.com. Other links may go to websites where I have been paid to write a blog or article. See the entire disclosure here.


Birdcage Planter Ideas


First, let’s look at some birdcage planter ideas. Then, I’ll give you my best tips for successful planting.


Birdcage planters are a favorite with creative gardeners. These tips share ideas for setting up a new or upcycled birdcage as a planter for succulents or annuals.

1 Black birdcage with succulents | Empress of Dirt


This one was created by Susan StLouis who shared it on a tour of her garden. See the entire creative garden container gallery here.


2 White birdcage with succulents | Garden Therapy


Stephanie of Garden Therapy shares how she planted this new, decorative birdcage with succulents.


3 Green birdcage with bird on top | Our Fairfield Home & Garden


Barb added a bird’s nest plus moss and ivy for a low-maintenance option.


4 Modern birdcage with flowering annuals | House of Hawthornes


You can often find these newer birdcages at thrift shops and yard sales. Pam planted hers with flowering annuals.


Tips for Making a Birdcage Planter


Birdcage planters are a favorite with creative gardeners. These tips share ideas for setting up a new or upcycled birdcage as a planter for succulents or annuals.

1 Birdcage


Where can I find a birdcage?


If you want to repurpose / upcycle an old one, look at:


  • thrift shops
  • yard sales
  • online ads e.g. Craigslist, Kiji – or place a wanted ad of your own
  • local Facebook buy, sell, trade groups

Where can I buy a new, decorative birdcage?


I see a lot of options on sites like Amazon and Etsy.


You can see various style and sizes here on Amazon.


Buying Tips


  • Be sure to check the size of the cage. Many of them look big in the photo but are actually quite small.
  • Confirm that the birdcage is well made and can endure life outdoors.
  • Make sure there is a way to get the plants in. Some decorative birdcages don’t actually have an opening or door, making it difficult to add plants unless you have hands the size of a mouse.

Make it Your Own


2 Liner or Soil Container


There are several options depending on the look you want. No matter what you choose, you want to form some sort of planting area that holds soil about 3-5 inches deep.


  • Use a coir liner and put container potting soil inside.
  • Use a piece of good quality burlap and form a planting area. Once the soil is added, the burlap stays in place.
  • Use chicken wire and moss.
  • Use a container that fits the base of the birdcage.
  • Use various flower pots that fit within the cage.

3 Soil | Container Potting Mix


For container plants, always use soilless container mix intended for the specific plants.


Want to combine them? Keep the plants in plastic pots with their preferred container mix and sit the pots in the cage. Conceal them with coir liner or burlap or show them off.


4 Plant Suggestions


Birdcage planters look fabulous with trailing plants spilling out of the cage.


Choose your plants based on the light conditions where you will hang it (sun, part sun, shade).


If you can’t find the plants you want in pots, you can always buy a ready-made hanging basket and transplant everything to the birdcage.


Look for trailing succulents


or flowering annuals including:


  • Alternantheras | Alternanthera spp.
  • Bacopas | Sutera spp.
  • Creeping Jenny | Lysimachia nummularia
  • Fuchsia | Fuchsia
  • Geranium | Geranium
  • Ivy
  • Lobelia | Campanulaceae
  • Nasturtium | Tropaeoleum spp.
  • Petunia | Petunia
  • Sweet potato vine | Ipomoea batatas

5 Care


Tips for happy garden container plants

Like any plant containers or hanging baskets, you need to keep on top of watering so they never dry out. You can find helpful tips for keeping container plants happy here. Also, keep your plant tags for specific instructions on feeding (fertilizing) and deadheading (removing old blooms to encourage new ones).


Recommended Resource


Container Gardening Complete by Jessica Walliser
Container Gardening Complete

If you want a good, thorough reference book to answer all of your container growing questions, this is it.


Plant a birdcage! Free a bird!


~Melissa the Empress of Dirt ♛


Birdcage planters are a favorite with creative gardeners. These tips share ideas for setting up a new or upcycled birdcage as a planter for succulents or annuals.

Original article and pictures take empressofdirt.net site

Wednesday, September 13, 2017

Tips for Arranging Home-Grown Flowers

Tips for Arranging Home-Grown Flowers

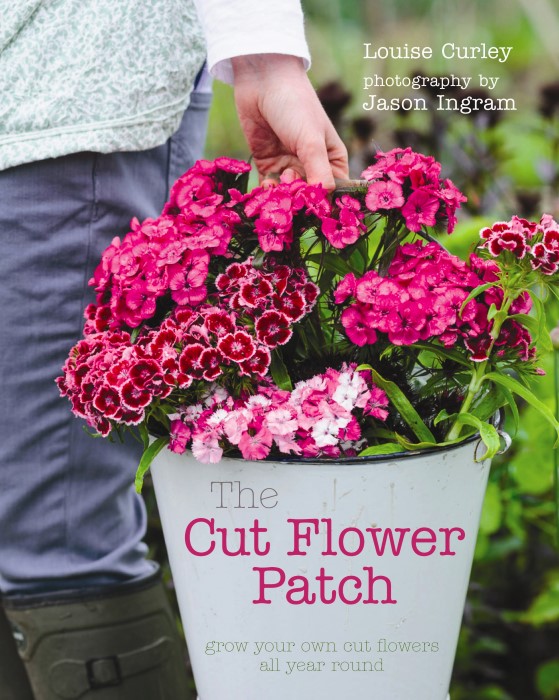
Have you ever wanted to grow your own cut flower garden? Imagine a garden packed full of deliciously colorful blooms whose only purpose is to adorn bouquets and will provide material for gorgeous and fragrant displays for years to come. Horticulturist and writer Louise Curley shares all you need to know about creating an economical and environmentally-friendly cut flower patch in her book The Cut Flower Patch: Grow Your Own Cut Flowers All Year Round. In her book you will find all you could ever want to know about sowing, planting, caring for, and cutting flowers from you garden. Today she joins us to share how to arrange your freshly snipped treasures.


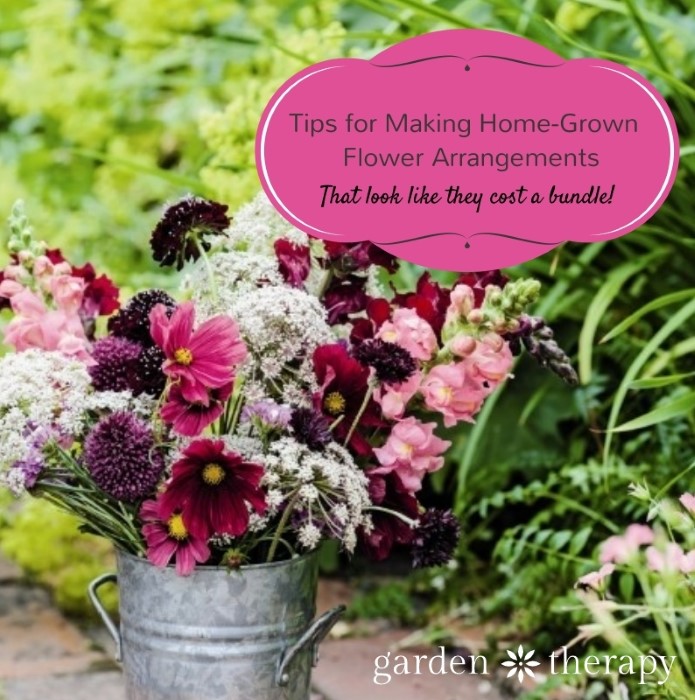
Tips for Making Home-Grown Flower Arrangements... that look like they cost a bundle!

Arranging Home-Grown Flowers


There can’t be many better ways to spend a summer’s evening than arranging your own, home-grown flowers, but the words ‘flower arranging’ can strike fear into many of us. There’s the belief that there are so many rules and techniques to follow. If you want elaborate floral decorations, this is certainly the case, but for most of us keeping it simple is the key. So here are my top tips for filling your home and vases with stunning flowers and foliage.


  • Think about where your flowers will be displayed. If it is up against a wall, only the front and sides will be seen, so arrange with this in mind. If the vase is to sit in the middle of a table it will be seen from all sides, so spread your flowers throughout the arrangement and have the tallest flowers in the middle of the vase, with the height of other blooms gradually decreasing towards the outside.

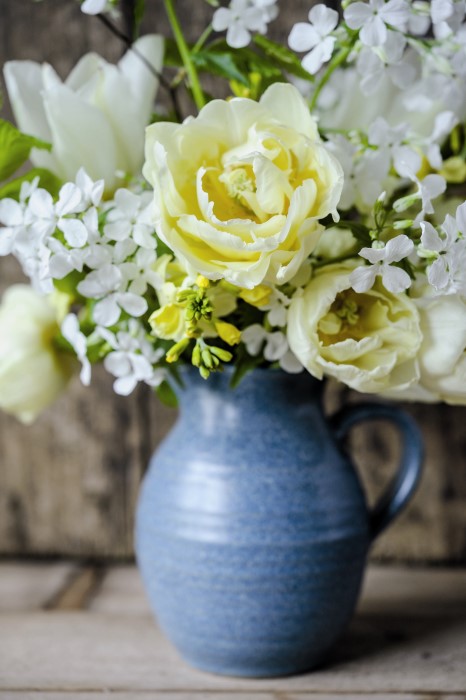
beautiful blue and white home grown flower arrangement

  • Consider the size of your arrangement and where you plan to put it. A large dramatic display may seem like a good idea for a dining table but I know from experience that your guests will just spend the night playing peek-a-boo.

  • Keep the height of your cutting material in proportion to the vase you have chosen. The arrangement should be as tall as the vase again.
    Home grown flowers make the most economical and environmentally friendly bouquets
    Home grown flowers make the most economical and environmentally friendly bouquets
  • If you are using foliage and fillers, place these in your vase first to create some structure and then fill in with your flowers.
    Flowers harvested from the cutting garden for arrangements
    Flowers harvested from the cutting garden for arrangements
  • Trim your cutting material to different heights. There should be shorter stems towards the edge of the vase with stems gradually getting taller towards the middle.

  • Using odd numbers of stems, say three or five stems, of a particular flower works well as odd numbers are much more pleasing to the eye.
    Simple tulip arrangements are a prefect idea for spring
    Simple tulip arrangements are a prefect idea for spring
  • Group a few stems of the same flower together, rather than dotting them about your arrangement. This helps to recreate the feeling of them growing in your garden.

We’re all so busy today with jobs and family life that even the above may same like a lot of work so it’s worth remembering that some of the most straightforward arrangements can be the most beautiful. A single stem of cherry blossom or a bunch of primroses looks stunning and requires hardly any effort on your part. So be inspired by your garden and grow and arrange your own cut flowers.


The Cut Flower Patch Book

Be sure to get a copy of Louise’s book The Cut Flower Patch: Grow Your Own Cut Flowers All Year Round for complete information on planning your cutting garden, choosing plants, weeding, staking, and a whole lot more!


Reprinted with permission from The Cut Flower Patch by Louise Curley © 2014. Published by Frances Lincoln. Photography © Jason Ingram.


You may also like:


How to Make Your Cut Flowers Last

Original article and pictures take gardentherapy.ca site

Tuesday, September 12, 2017

This site is temporarily unavailable.

This site is temporarily unavailable.

If you're the owner of this website,

please contact FatCow Web Hosting.


Original article and pictures take images.fatcow.com site
Friday, September 8, 2017

This Miniature Mushroom Tree is for the Gnomes

This Miniature Mushroom Tree is for the Gnomes

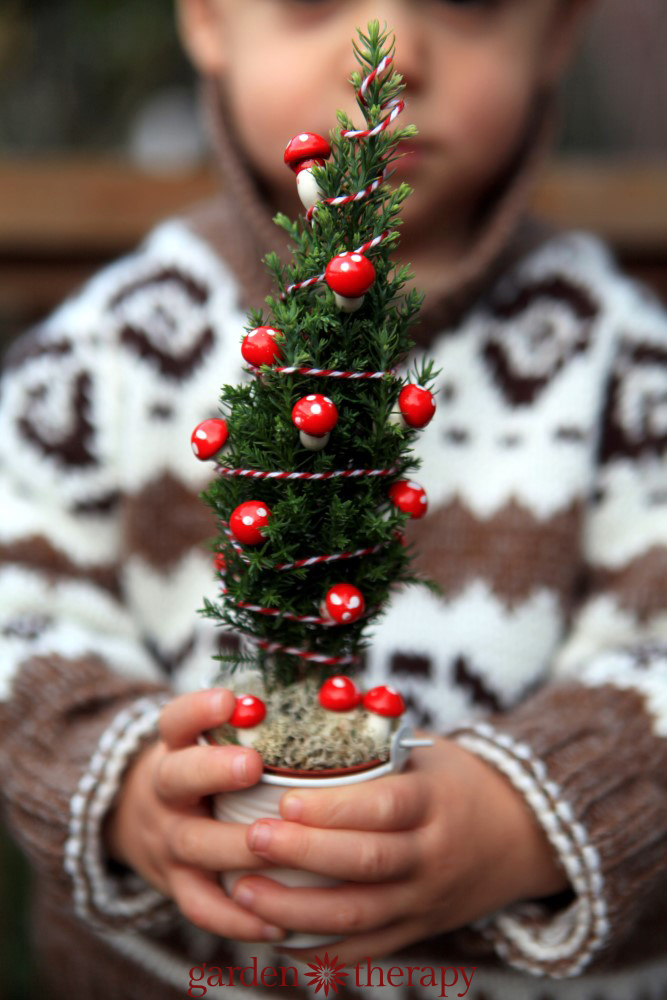
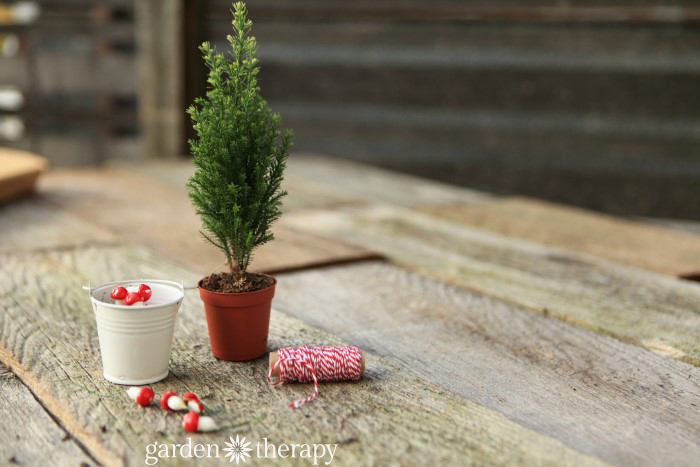
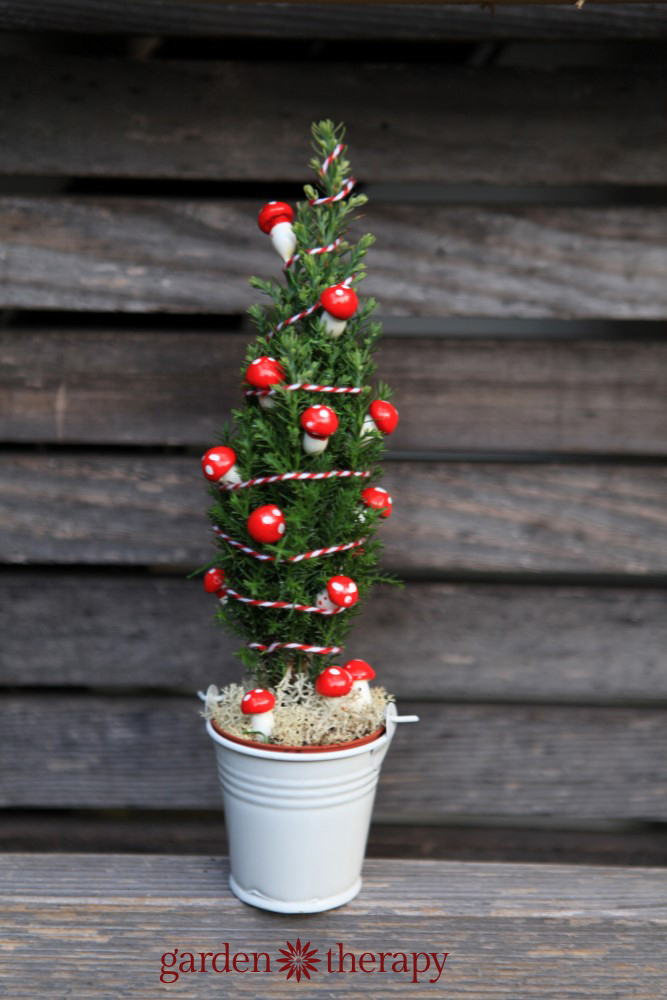
Forget the birds, this sweet little mushroom tree is for the gnomes! I made this miniature tree with glass mushrooms, an outdoor conifer, and a plant pot made out of a tiny bucket. It is meant to be kept outdoors in the garden with the garden gnomes.


How to Make This Adorable Gnome Minaiture Tree

Materials*


*Some of the following links may be affiliates while others are not. Either way, the links will take you to where you can find the materials used for this project.


Make it!


If your tree is going to be kept outdoors like mine, then the first step is to create some drainage in the plant pot. I’ve used a tiny white metal bucket sold as a set of three. It was purchased from a wedding supply shop as it’s meant as a wedding favor. It is also a perfect plant pot to fit a small one-inch nursery pot!


How to Make a Gnome Minaiture Tree (4)

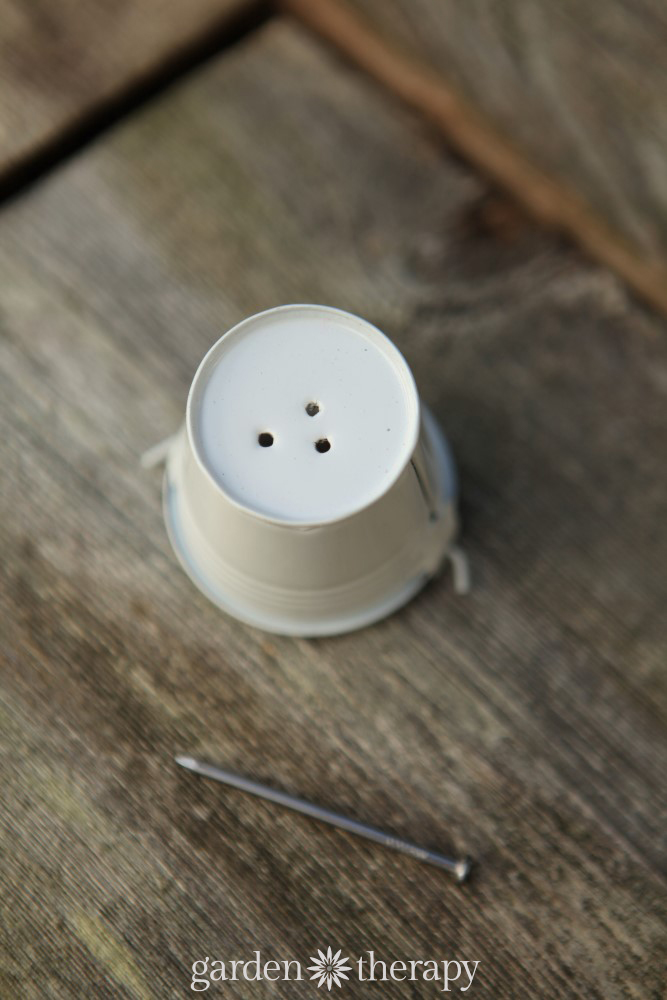
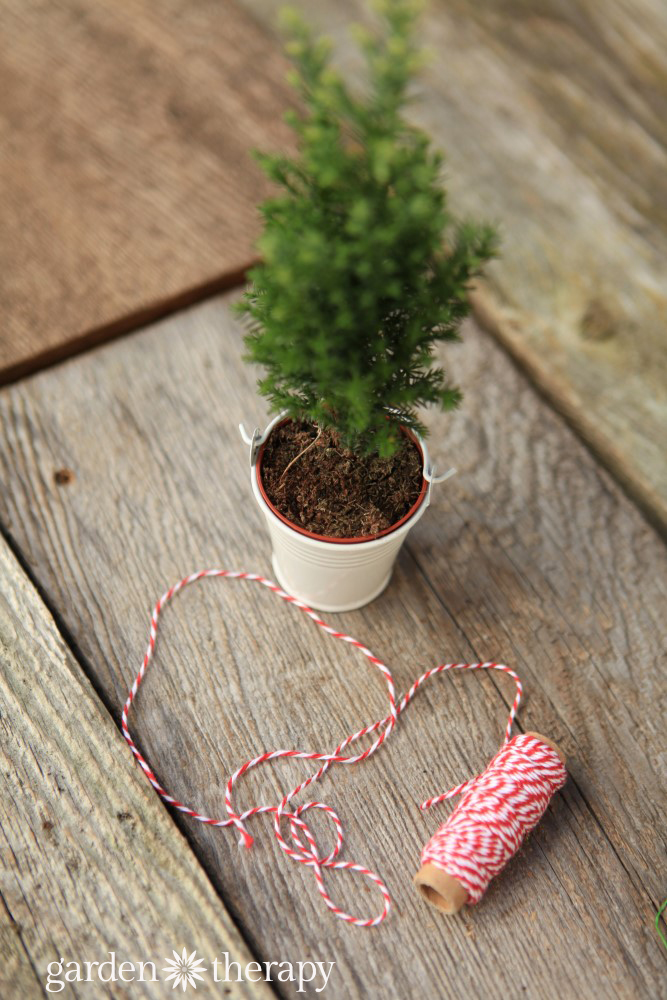
Add drainage to the pot by using a hammer and nail to simply poke some holes into the bottom of the pot. I did three holes to make sure that there was plenty of drainage in my rainy winter climate. Then put the plastic nursery pot inside the white bucket and your tree is ready to be decorated.


How to Make a Gnome Minaiture Tree (6)

Decorating the gnome Christmas tree is as simple as decorating a regular Christmas tree. Well, in fact, it’s much easier because this tree is teeny-tiny.


How to Make a Gnome Minaiture Tree

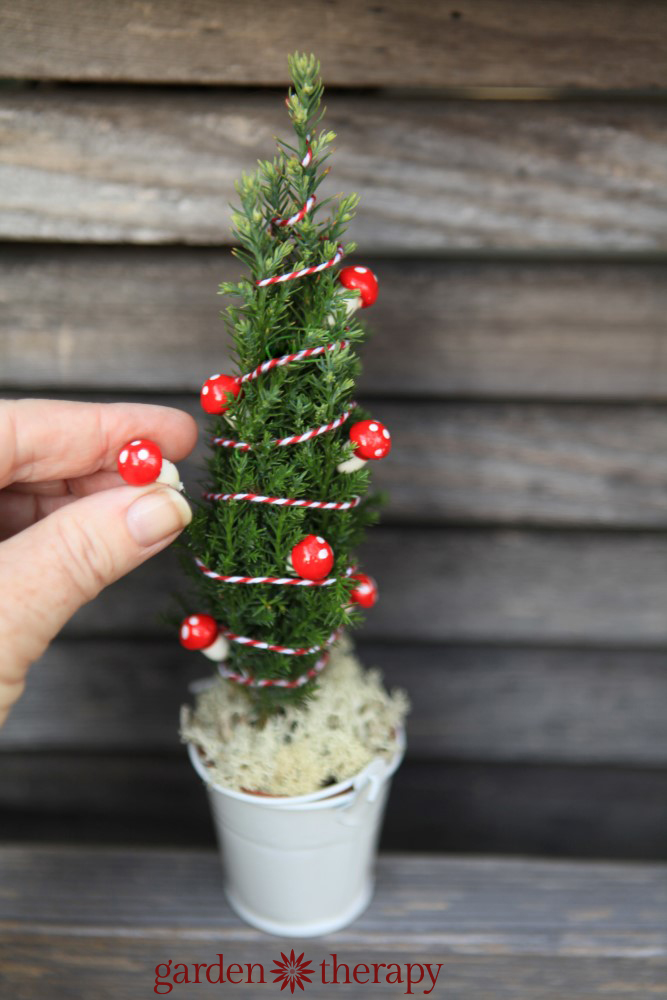
First, wind a length of red and white baker’s twine around the tree. Then add the mushroom ornaments by using the pin attached to the bottom of the mushroom and pushing it through the tree.


Miniature Mushroom Christmas Tree

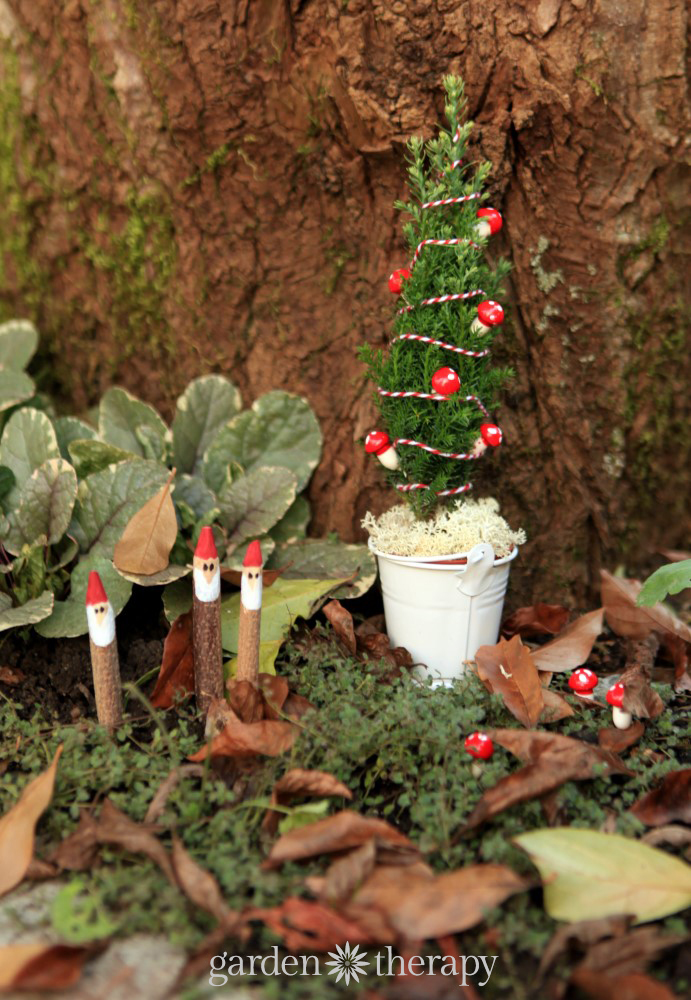
Set the miniature tree out in the garden (see the rest of my play garden here) so that the garden gnomes have something festive for the holiday season.


Miniature Gnome Christmas Tree and Twiggy Gnomes

While this mushroom tree is the perfect size to go along with garden gnomes, I have to admit I didn’t actually have any garden gnomes! Thinking quickly, I made a few with twigs and a little bit of paint. And I came up with a brilliant way of making the pointy hats (If I do say so myself). You can see how to make these twiggy gnomes in this post.


Save


Original article and pictures take gardentherapy.ca site
Wednesday, September 6, 2017

These Festive Pinecone Firestarters Make a Crafty Gift and a Fun Project

These Festive Pinecone Firestarters Make a Crafty Gift and a Fun Project

If you are anything like me you have a collection of pinecones somewhere. Perhaps you found some delightful ones on a walk in the neighborhood or a visit to a park. They just begged to be picked up, don’t they? That’s nature doing its job. As you collect those pinecones you may notice papery seed pods floating out of them. You are helping to reseed it and will be left with a perfect woody cone perfect for crafting up pinecone firestarters.


Looking for an easy, seasonal gift to bring to your next get-together? Make these fun pinecone firestarters and get ready to cozy up by the hearth!

Today, Amy Renea, the author of Crafting with Nature, gives you an idea of what to do with your pinecone collection.


These easy pinecone firestarters make a great gift that’s both pretty and practical.


Pinecone Firestarters


Arguably, my favorite pinecone craft is these beautiful yet incredibly functional firestarters. These make fantastic gifts for the host with a functional fireplace or for friends that go camping or enjoy backyard firepit parties.


Materials


  • Dry Pinecones with wide, open scales, baked at 200 degrees for 20 minutes
  • String or Jute for hanging
  • Wire rack or parchment paper
  • Food Coloring (optional)

Make it!


1. Bake the Pinecones

Prep your pinecones by baking at 200 degrees for 20 minutes or until sap has glazed the pinecones. Smaller pinecones will take less time than the larger specimens. See how to dry and scent pinecones.


2. Melt the Wax


While the pinecones are prepping, melt your wax in small 3-4” pieces in a small crock pot on low. When the wax is completely liquid, it is ready to dip or drip. Optional: Add 2-3 drops of food coloring if you would like your pinecones to have a colored tint. Note that this might stain your melting crock and the color might be difficult to remove.


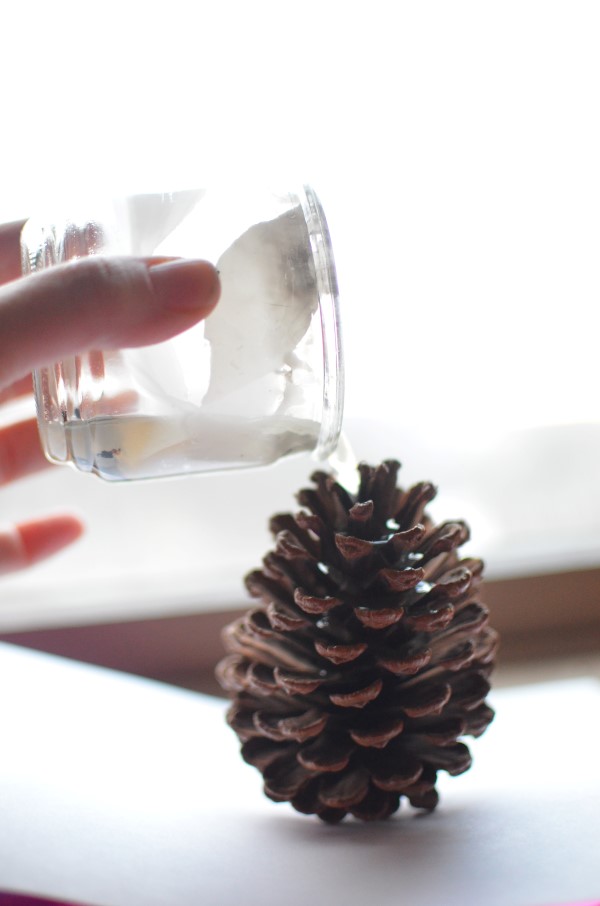
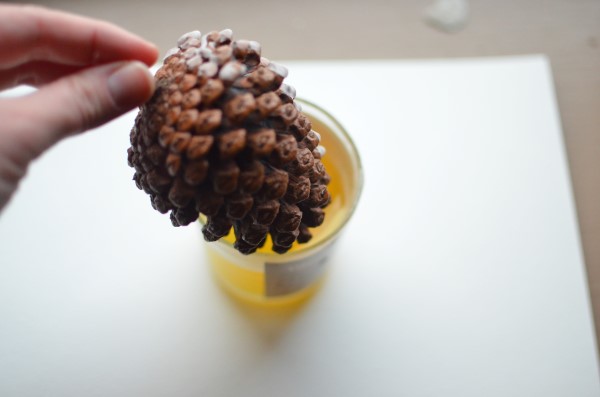
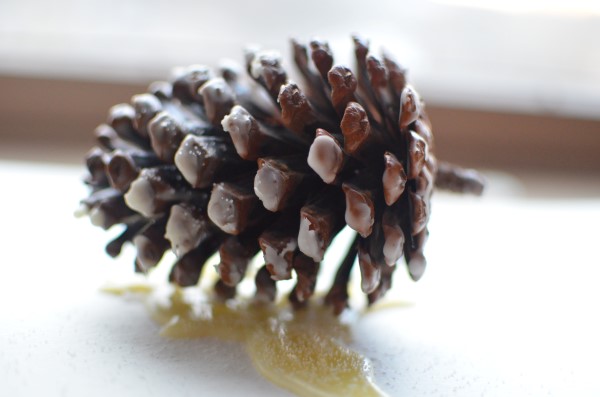
3. Drip the Wax onto the Pinecone


Attach small jute or string loops to your pinecones and carefully dip into the wax or gently pour wax down from the top of the cone. Make sure to cover your work surface to collect bits of errant wax.


Looking for an easy, seasonal gift to bring to your next get-together? Make these fun pinecone firestarters and get ready to cozy up by the hearth!

4. Add Another Coat of Wax


Dip or drip pinecones again until the wax is thick enough to completely coat the cone.


Looking for an easy, seasonal gift to bring to your next get-together? Make these fun pinecone firestarters and get ready to cozy up by the hearth!

6. Let Dry


Allow the pinecones to sit on parchment paper or a wire rack to dry. Optional: As the wax dries, sprinkle glitter or salt to add a festive feel to your pinecones.


drying-pinecone-firestarters

7. Your Firestarters Are Ready to Use!


Use 3-5 pinecones to start a fire, lighting the jute string and placing the cones into the kindling. Fire should always be contained in a fire pit or fireplace.


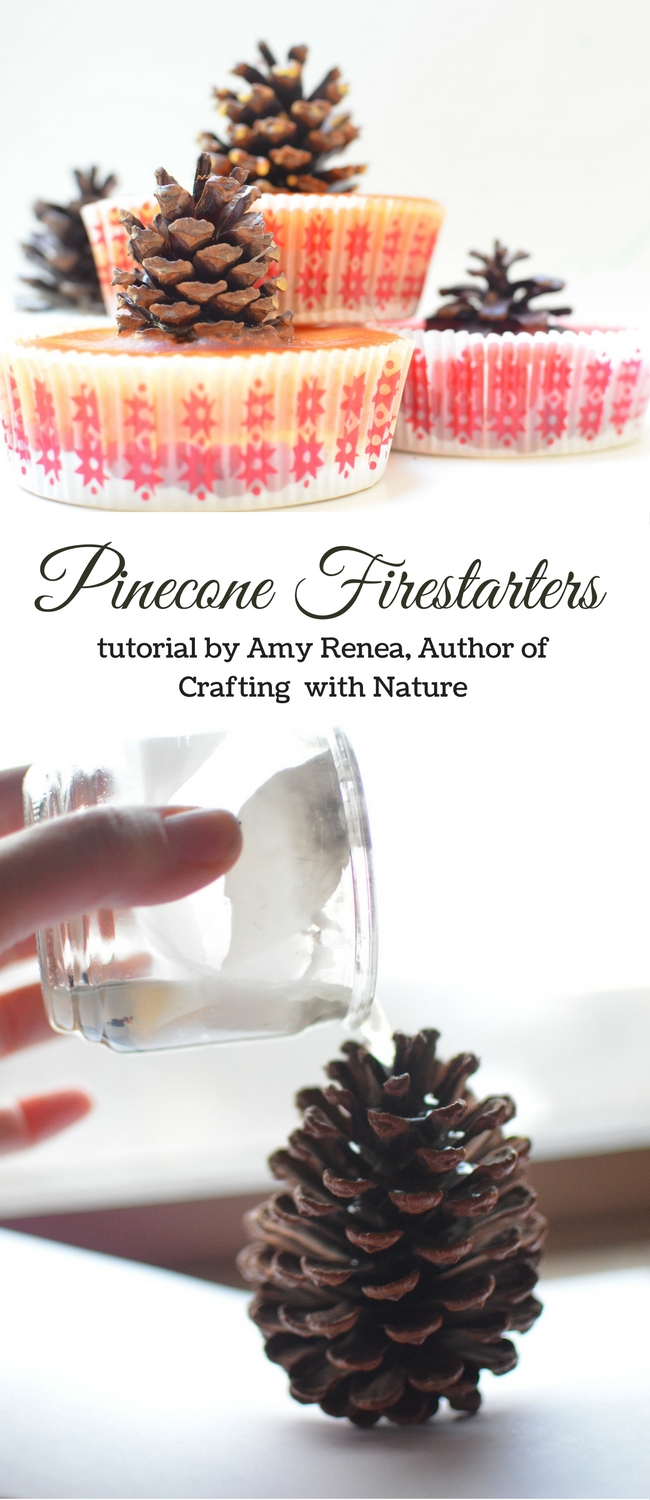
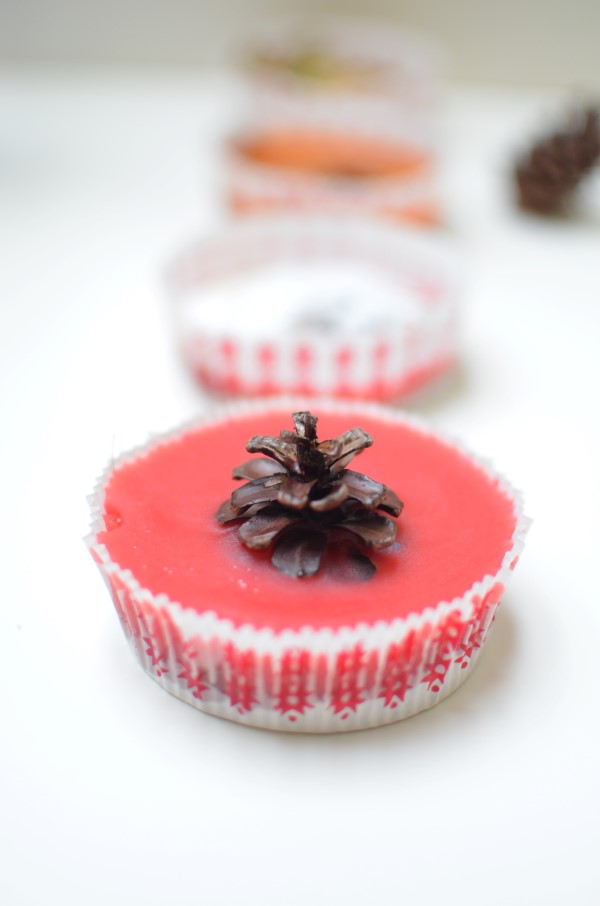
In my book, Crafting With Nature, I make a twist on these firestarters by making them into “cupcakes” with a sawdust base!


Looking for an easy, seasonal gift to bring to your next get-together? Make these fun pinecone firestarters and get ready to cozy up by the hearth!

About the Author


amy-renea-from-crafting-with-nature

Amy Renea is a blogger, writer, photographer, and mom living in Hershey, PA. Her blog, A Nest for All Seasons, highlights Amy’s love of living seasonally through DIY projects, garden ideas, recipes, and beautiful photography.


crafting-with-nature

Amy’s book, Crafting With Nature, teaches you how to use objects and ingredients from nature to create delightful DIY gifts (for your loved ones or yourself). There are plenty of ideas for DIY crafts, recipes and gifts made with natural materials you can grow or gather yourself. Amy provides detailed tutorials and recipes for things like making solid perfume, crafting wooden buttons to accent a hat, preparing natural dye for easy paper flowers, canning your own fruit jam, handcrafting wreaths, using seed pods to create beautifully rustic earrings and even making your own coconut oil for lotions or sea salt for hand scrubs.


Crafting with Nature is available everywhere books are sold.


Original article and pictures take gardentherapy.ca site
These DIY Outdoor Garden Lights Will Take Your Breath Away!

These DIY Outdoor Garden Lights Will Take Your Breath Away!

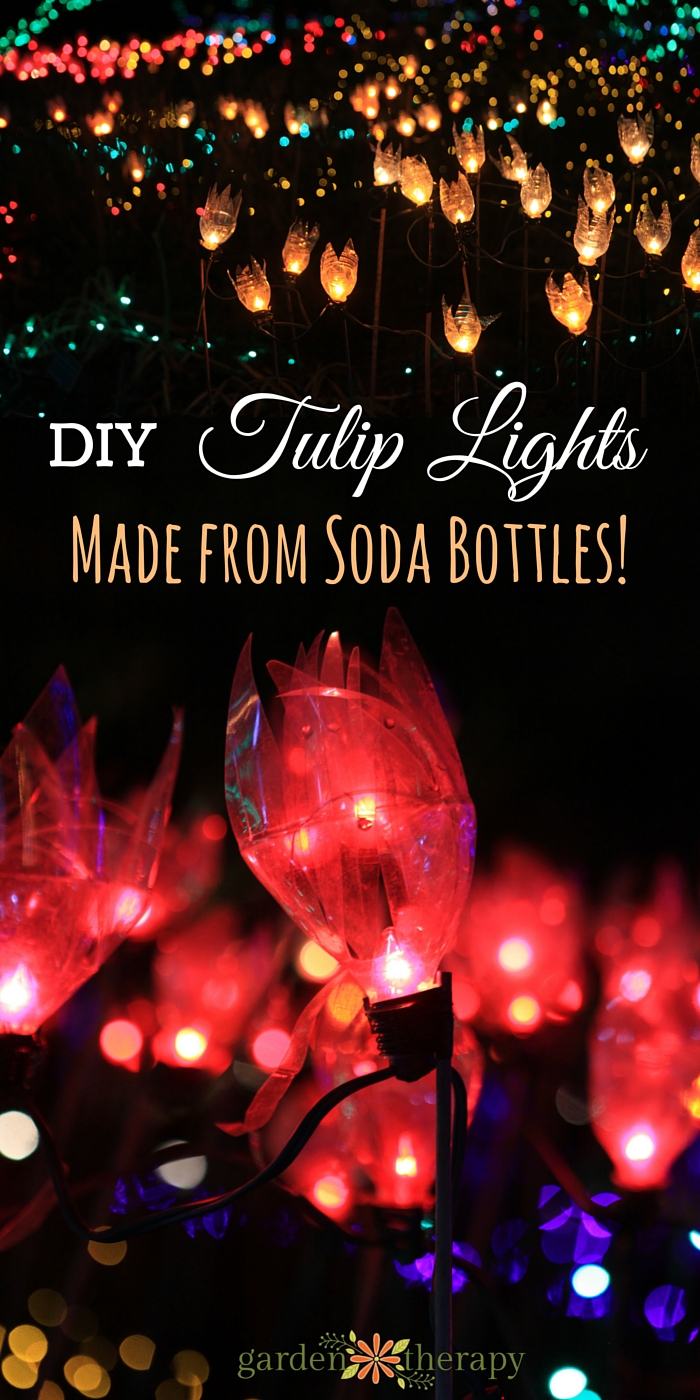
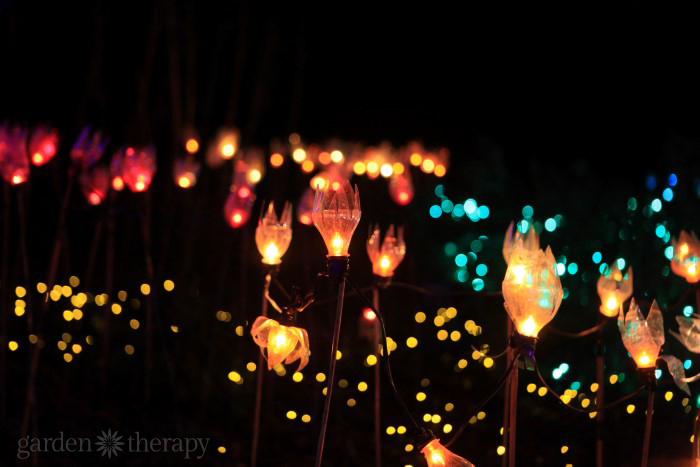
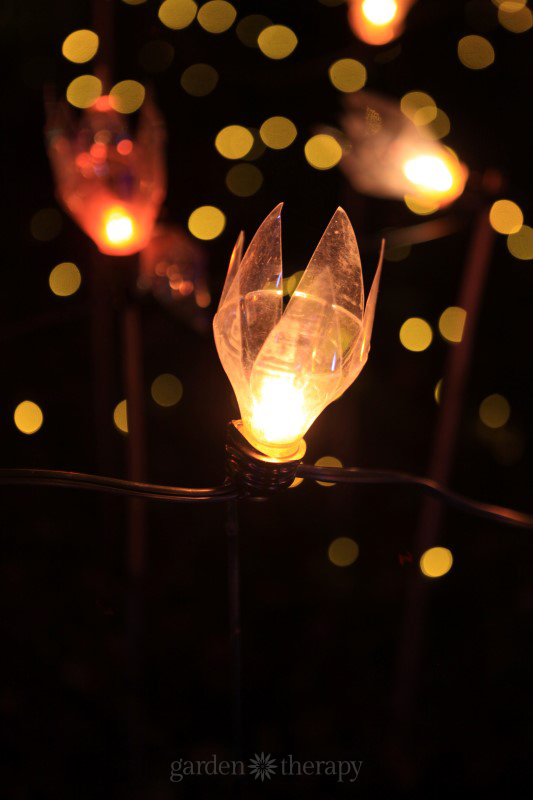
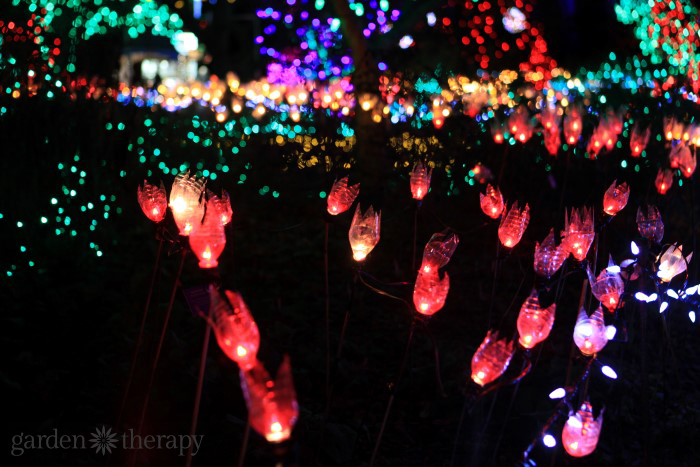
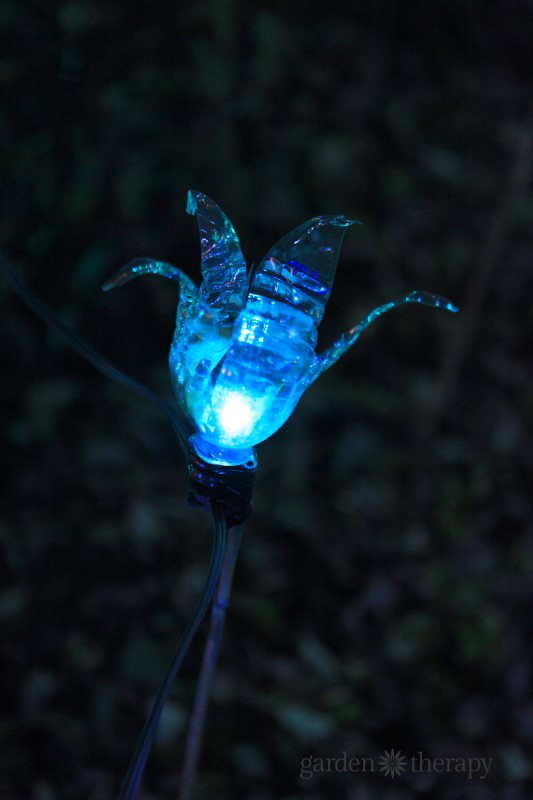
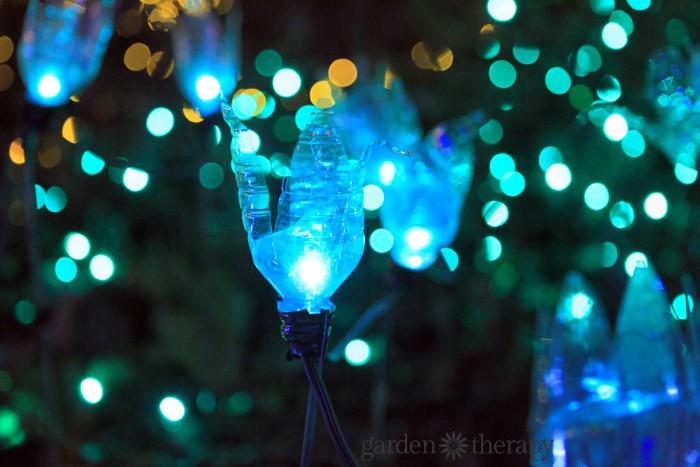
In months when the garden is asleep you can still have flowers that glow late into the night. Look closely at these stunning garden lights. The iridescent petals capture the light and create a graceful and enticing display in the garden. And then you see what they are made from and are a whole new level of impressed: these soda bottle tulip lights truly turn trash into treasure!


These tulip lights are a gorgeous way to use up recycling!

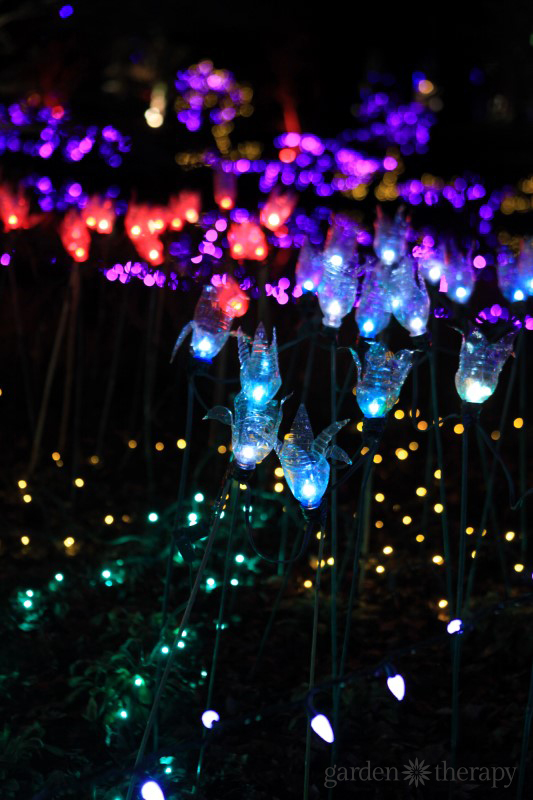
These garden lights were created by the decorating masters at the VanDusen Botanical Garden’s Festival of Lights. I was captivated when I first saw them spread out in organic waves that lined the pathways around the grounds. They look striking en masse, but even a few on their own is a holiday decoration that I can see having a place in my garden all year round!


DIY Tulip Garden Lights

Want to make your own? See how to make them in this simple DIY project.


DIY Tulip Garden Lights

Materials


Also, on my search for the materials for this I saw a few more things that I’m adding to my garden wishlist: These solar tulip lights and this string of solar flower fairy lights!


Make it!


Look for clear plastic water or soda bottles that are personal size. By “personal size,” I mean those that are 1 to 2 cups in volume as opposed to the large family-size bottles. Of course, you can use any size that you want. Smaller bottles will make smaller flowers and larger bottles can make huge blossoms.


plastic bottle recycling project

Cut the bottle in half through the middle so that it separates the top and bottom parts. Recycle the bottom half as you’ll just need the top for this project. Use your scissors to cut petals into the cut end of the soda bottle. You can use your creativity here to make your own design. Once they are cut, bend and curl them so that they create a more organic shape.


DIY Tulip Garden Lights (5)

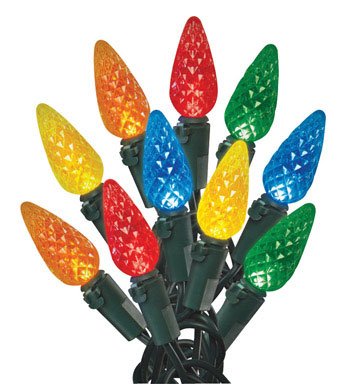
To light up your flowers with Christmas lights, start with a string of outdoor lights that have medium-sized bulbs (I like using C5 or C6). You want to make sure that the light will fit through the small mouth opening of the soda bottle.


String of Christmas Lights

Position one of the lights through the mouth of the soda bottle with the cords hanging from below the mouth. Secure the bulb in place with a piece of green electrical tape wrapped around the mouth of the soda bottle and the wires.


DIY Tulip Garden Lights

Now take a metal garden stake, preferably in green, and attach it to the mouth of the soda bottle with more green electrical tape.


DIY Tulip Garden Lights (8)

Continue to do this for the string of lights until you have a garden full of glowing tulip flowers. Now go position the set of gorgeous blooms out in the garden and light up the night!


DIY Tulip Garden Lights (2)

See even more creative outdoor lighting ideas.


Original article and pictures take gardentherapy.ca site