Springtime in Michigan is so beautiful. The trees are budding, flowers are blooming and the landscape is finally turning green. The following wedding inspiration board comes from Michigan with all of woodland.
Rustic Spring Time Woodland Wedding Ideas 2014 Trends
frosted elegant gray fall wedding ideas Details to adore: Image Credit:The Wedding Chicks curly wedding hair down and updos for Medium-length Hair gorgeous fishtail wedding hair for Medium-length Hair gorgeous long wedding hair down with floral crown for boho theme weddings long curly wedding hair for winter weddings perfect wedding half updos hairstyle and lace wedding dress prefect wedding hair up with long wedding dress for 2013 brides red curly wedding hair down with floral crown simple boho style wedding hair down with floral crown simple long curly wedding hair down with floral accessories trending elegant wedding hair down for 2013 brides blush pink and coral wedding bouquets for fall weddings orange and olive fall wedding bouquets for autumn weddings orange fall wedding bouquets and purple bridesmaid dresses pink and orange fall wedding bouquets purple fall wedding bouquets with orchids rustic fall leaves wedding bouquets for autumn rustic olive fall wedding bouquets for autumn weddings vintage purple and red fall wedding bouquets pink and coral wedding inspirations Original article and pictures take stellasweddinginspirations.blogspot.jp site
Jacki Cammidge is a participant in the Amazon Services LLC Associates Program, an affiliate advertising program designed to provide a means for sites to earn advertising fees by advertising and linking to amazon.com. Other links on this site may lead to other affiliates that I'm involved with, at no extra cost to you.
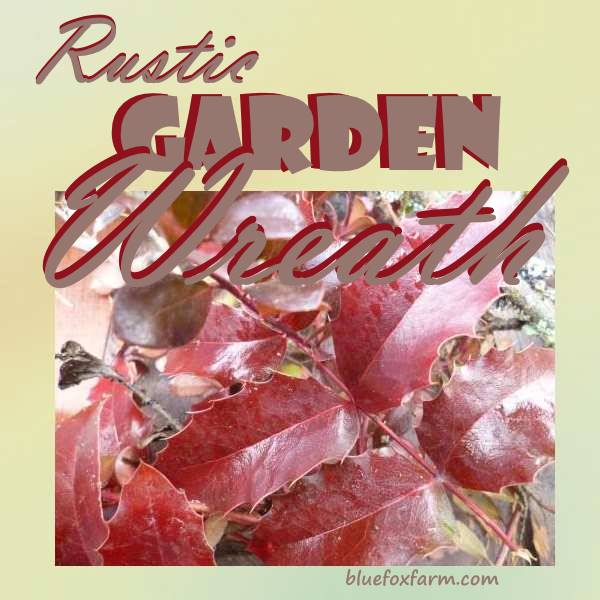
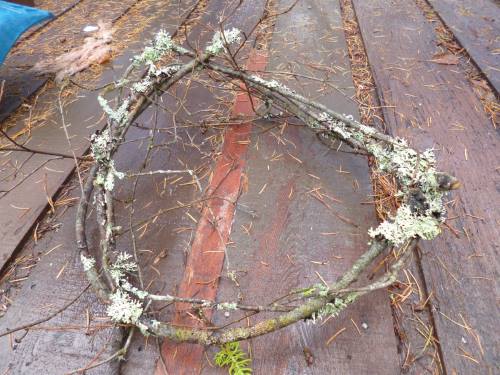
There's something about wreaths; ever since I discovered rustic country decor, I've made them out of twigs to decorate my door.
26Save
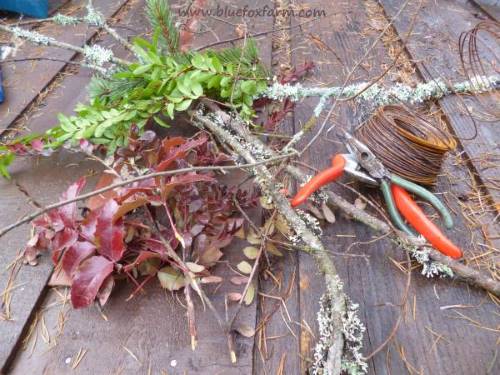
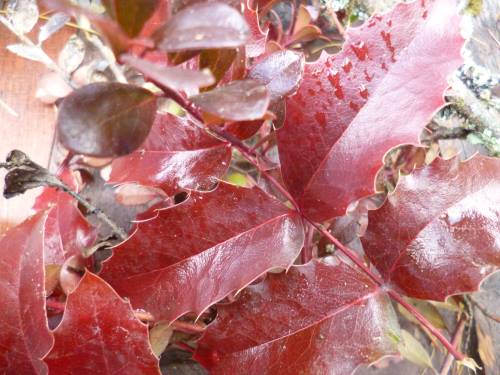
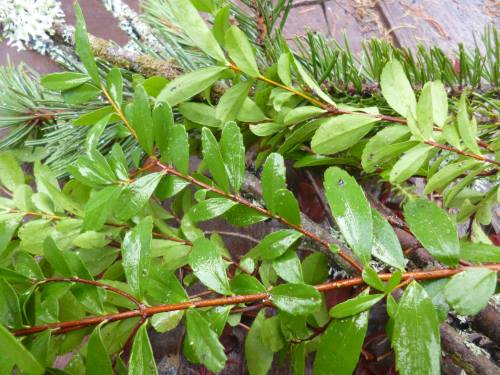
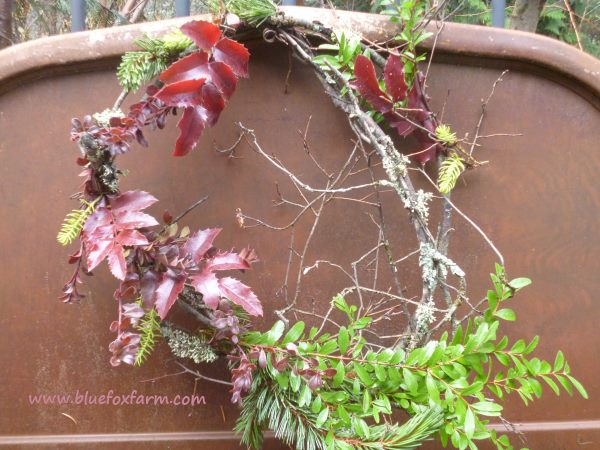
Here's one that I made from things I found on my walk this morning; some red Arctostaphylos (usually it's green - otherwise known as Bear Berry or Kinnickinnick), the red Mahonia, or Oregon Grape which looks (and feels!) just like holly, and a few other items from my garden; some sprigs of Paxistima (Cliff Green, Rat Stripper or Dwarf Mountain Lover - take your pick) and a bit of my little struggling Bristlecone Pine.
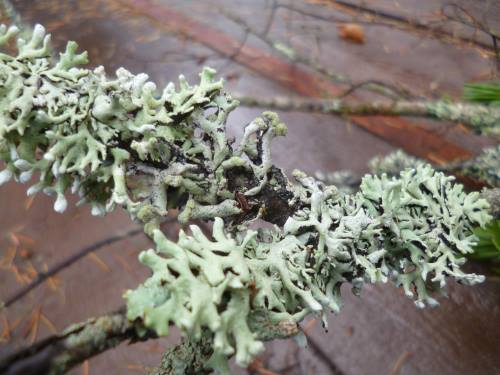
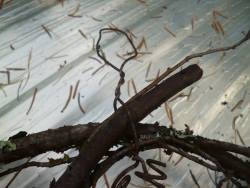
Normally, I use smooth Red Osier Dogwood or some kind of willow for the base, but I spotted these lovely lichen covered twigs and decided to live on the edge for once.
Other supplies are a bit of wire - I used tie wire here, but you can use whatever you have as long as it's pliable, or even string.
The other things you'll need are a pair of needlenose pliers, and some pruners.
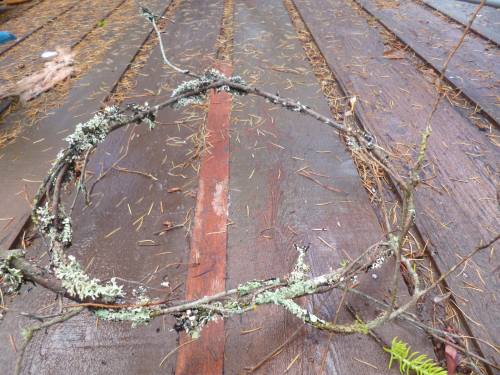
Supplies for a Rustic Garden Wreath... Lichen covered twigs form the base... One twig, curved into a rough circle shape... ...then reinforced with a second one...
A length of wire is made into a hanger...
...and attached to hold the twigs together...
Gorgeous red Mahonia and Kinnickinnick gleaned from the roadside... All combine perfectly - normally with the twigs I use, they are almost hidden by the accent plants; in this case, I wanted the rustic lichen covered twigs to show. 26Save
Keep your eyes open for possible candidates for your rustic wreath; almost anything can be used as a base, and then your options are endless; seed pods, pine cones, evergreen sprigs, prunings from a tree or shrub...use your imagination to decorate your house or porch for the season.
Find out more about the How to be Creative Guide or sign up below - it's free! Original article and pictures take www.bluefoxfarm.com site
I hope so because it's inevitable in a garden! Rusty garden art began—or so I imagine it—when people needed a place to dispose of old metal items. What happened next was, the garden grew up around it, rust set in, and it started to look pretty good.
From there, people (on Team Rust) started intentionally turning old junk into art, and the wonderful world of garden art began.
I've picked out some favorite pieces which you can also find in this collection:
You may (or may not) want eclectic art in your home, but the rules are different in the garden. This is the place to push boundaries and have some fun.
Whirligigs and wind spinners seem to be making a big comeback, and rightly so because they are really fun (and some are quite amazing). And how sweet is the black lab one (pictured above)?
If you follow the garden art world, you'll certainly recognize this sawblade cat (above, left). When it first appeared online it was immediately shared all over Facebook and Pinterest.
Owls are everywhere! When the Harry Potter books stormed the world, owls seemed to also make a big comeback from their heyday in the 1970s. Inspired by the Owl Postal System, all sorts of owl art and trinkets starting popping up. There's lots of variations on owl garden art and I see no reason not to have an entire collection to display in the garden.
If you're on Team Rust and love bird, there's plenty of choices, from large owls and peacocks, to songbirds and hummingbirds.
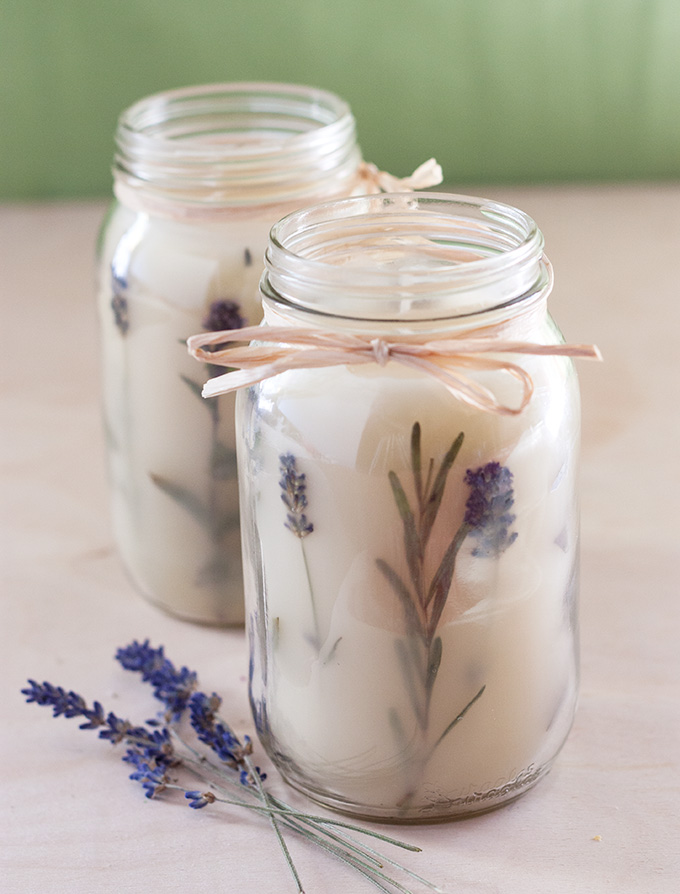
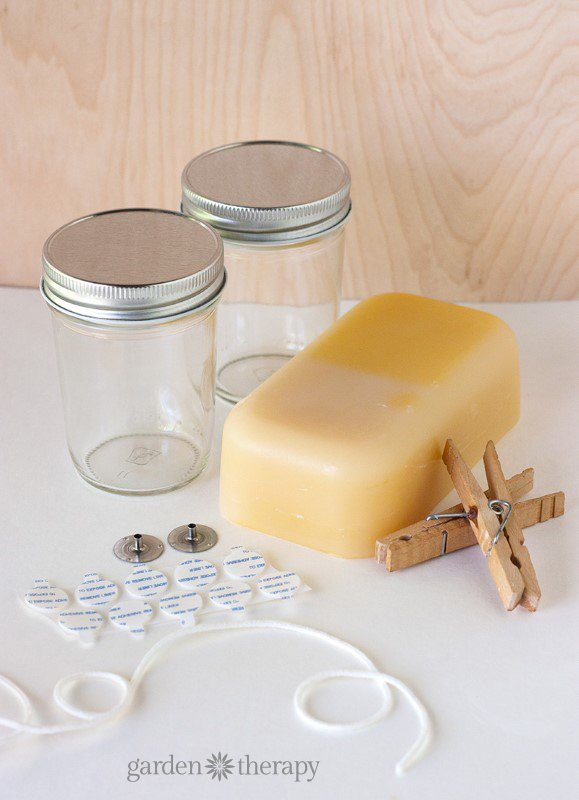
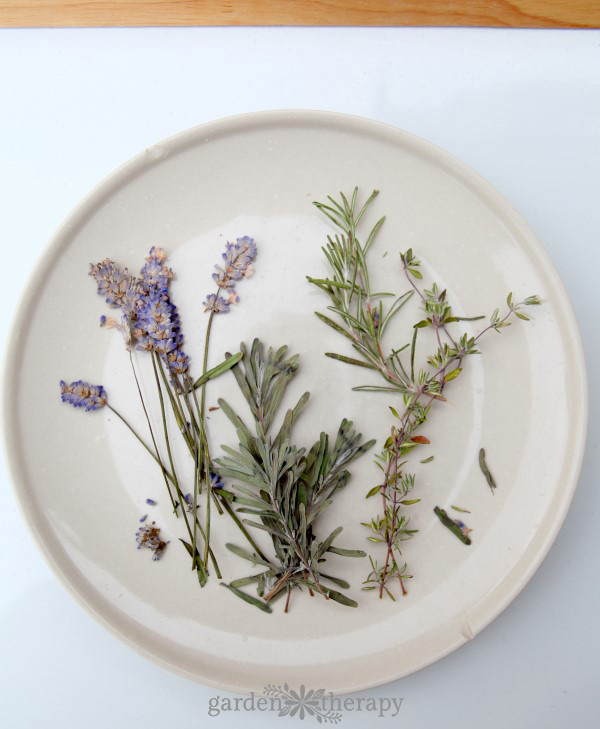
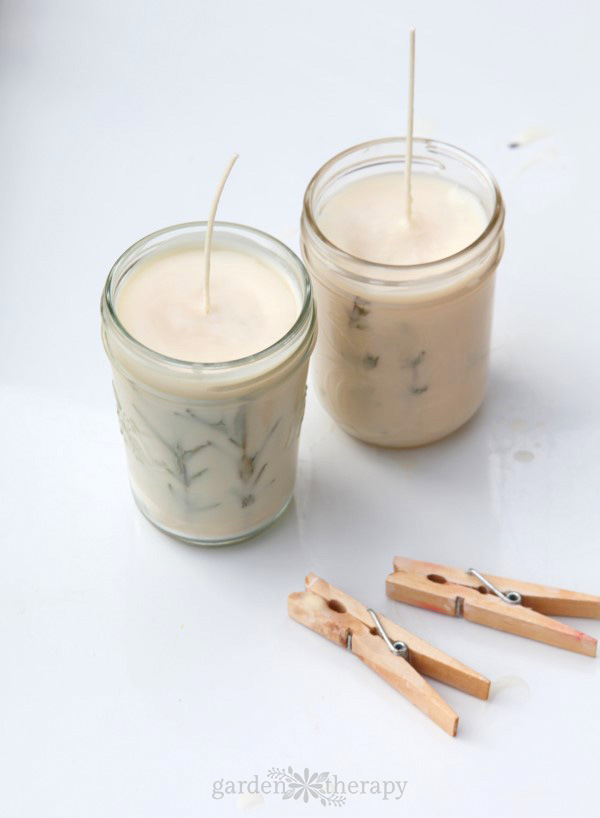
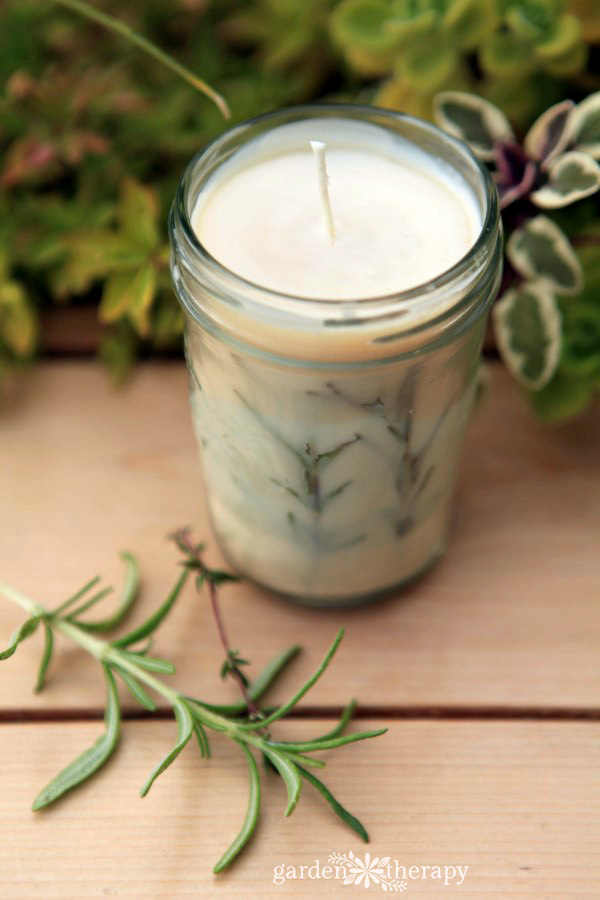
Pressed herb candles are a unique way to preserve the beauty of the garden. Rosemary looks great in these candles, but you can also use herbs like thyme or lavender that are readily available in the garden, grocery store, or garden center. This project uses a mix of beeswax and soy wax, Mason jars, pressed rosemary leaves, and essential oils. These easy-to-make candles can be used as beautiful handmade gifts or a special treat for just you!
This project was originally created by our contributor, Rachel Beyer, who got the inspiration from a local apothecary in Portland, Oregon. Rachel is an accomplished artist and nature lover, so it’s no surprise how beautiful her lavender candles turned out. You can see a few more photos of these lovelies on her blog, Adventures in Making.
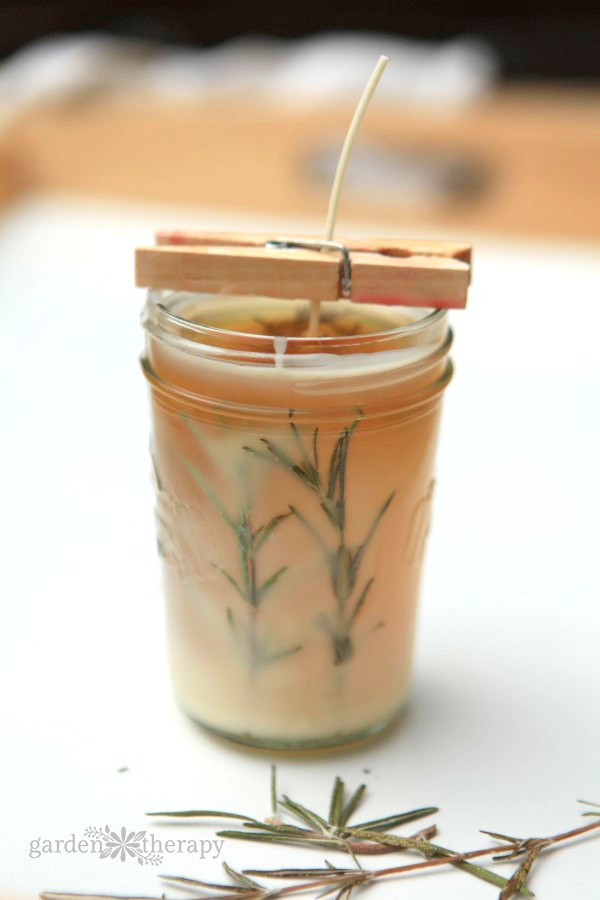
Project Update: If you have come over from Pinterest, you may see a few differences in the photos on this page. In the original photos, the rosemary looked beautiful in the jars but the stems were woody and therefore hard to press against the side of the jar. The rosemary burned when the candles were lit, so for safety’s sake, we remade the project with young rosemary stems that were pressed flat against the jar. The new project turned out great and we are in LOVE with the results. The key is to press whatever herb you choose as flat as possible and use the wax to stick it to the edge of the jar. That way it will stay against the glass jar and away from the flame.
A Note on Safety: Even though we have tested and revised this project, your DIY candles should never be burned unattended, just like any candle. Please always use your common sense with any DIY project, especially when fire is involved.
Rosemary Pressed Herb Candles
Here is how to make these pressed herb candles with rosemary and scented with essential oils. The mix of essential oils can be changed to suit whatever the occasion or season. The rich, earthy notes of evergreens make this a great Christmas gift, but try mint, lime, rosemary, and lavender for other seasons throughout the year.
Harvest young, thin-branched rosemary sprigs or other herbs from your garden and press them between heavy books or a wooden press for a week, until they are very flat and dry. See how to press leaves in a homemade wood flower press here.
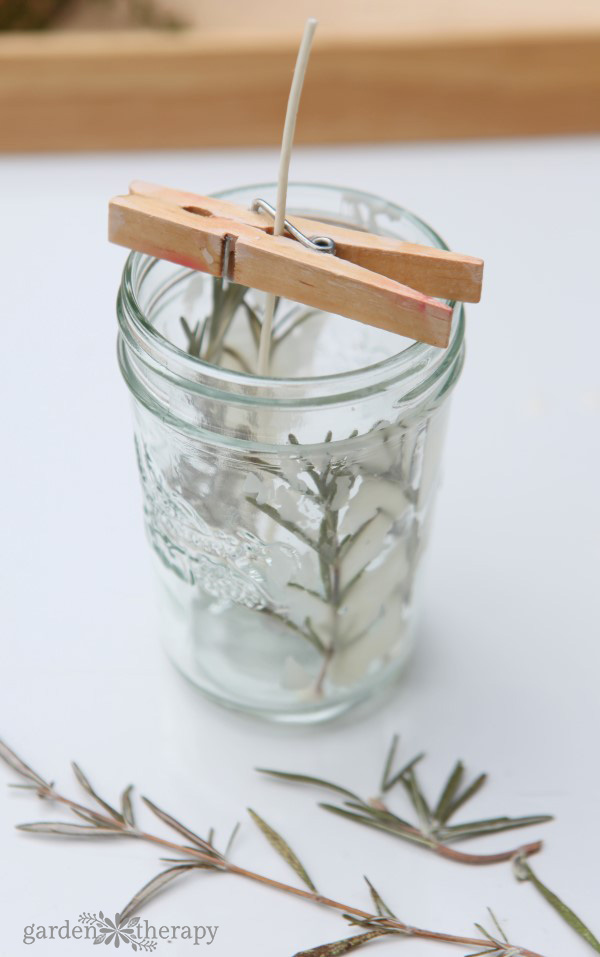
Cut the rosemary sprigs to length so they will sit at least 1″ below the rim of the jar.
When making candles, you can use anywhere from one-half ounce (300 drops) to a full ounce (600 drops) of essential oils per pound of wax, depending on how strong the scents are. Some essential oils can overpower a blend, so adjust accordingly. This recipe uses one-half ounce (300 drops) to create an evergreen scented blend because of the potency of the oils.
125 drops fir needle essential oil
75 drops bergamot essential oil
75 drops Himalayan cedarwood essential oil
20 drops juniper berry essential oil
Once you have the pressed herbs and essential oil blend ready, it’s time to start making candles! Create a double boiler using a saucepan with an inch or two of water and a metal pitcher or tin can. Place the wax into the pitcher and let melt completely.
While the wax is melting, use tongs to dip the rosemary sprigs into the melted wax and then place against the side of the jar. Use a craft paintbrush to brush melted wax over the rosemary to hold it in place.
Cut your wick to size and use pliers to attach a metal tab. Then add a glue dot to the bottom and place into the center of your jar. Use clothespins to secure the wick and keep it centered.
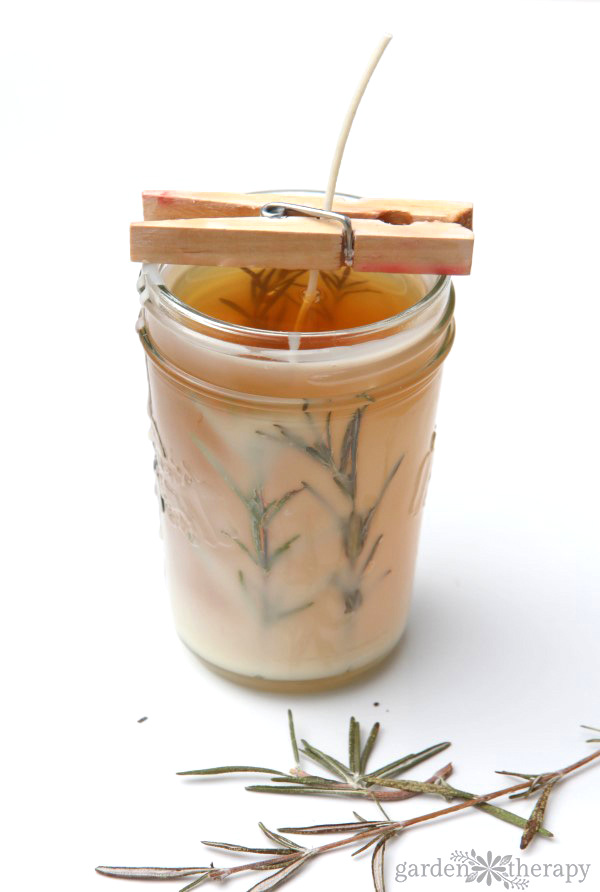
Once your wax is melted, remove from the pan and use a popsicle stick to stir in the essential oils. Then pour the wax into each prepared jar. Let dry.
Wrap the outside of the jars in a dish towel and set aside to set. Cooling slowly and completely will create the best looking candles.
Allow your candle to cure for 48 hours undisturbed. Once cured, trim the wicks with scissors.
Your rosemary pressed herb candles are now ready to burn or give away as gifts.
Disclaimer: This website contains general information about gardening, natural beauty, crafts, DIY projects, and recipes. The information is not advice, and should not be treated as such. While we do our best to provide useful information, any reliance you place on such information is strictly at your own risk and not a substitute for medical, legal, or any other professional advice of any kind.
Original article and pictures take gardentherapy.ca site