Red violet hair dye ideas are literally quite a few.Simply you have to think outside the box to mix this and to get the confident look .There are numerous red-headed celebs to give you secure changed to your look.
It is not easy which hue or red violet color meets your requirements.You will find shades via banana red in order to fiery copper as well as all things in among .Before you decide to get too deep with hair color techniques ,Listed 3 things to consider while looking for red violet hair color ideas.
Skin tone
--> It is crucial for you to consider your skin tone.To find exactly what your skin tone is ,it is wise for you to look at your vein in your arm in natural lighting .Your skin tone is sorted as warm in case you notice green veins . Cool skin tone is when you find blue veins .
Violet red and golden highlights.
Cool skin tone
Red violet hair dye ideas will work perfect for those who have cool skin tone .For those who have cool undertones contains blue or pink . This type of skin tone is excellent with not just red violet ,but also dark browns ,dark violets and dark red .
Red purple hair color
Warm skin tone
On the other hand , for those who have warm skin tone ,avoid red violet color and the additional tones .Simply because that warm skin tone has golden or yellow undertones , this will likely help copper red ,golden browns , or golden blondes .
Eyes color
Dark skin with any eye color with is a great combination for violet color as well as mahogany shades.
Blue eyes and pale skin is best with blonde tones.
Hazel eyes and medium skin looks perfect with copper tones or dark blonde.
red violet hair dye color ideas
Natural hair color
For natural hair color ,red violet hair often is the perfect replacement if you have medium ash ,dark brown,golden blonde , or bluish black hair.
Original article and pictures take hair-fashion-online.blogspot.com site
Don’t pass by that discarded wooden window in the trash. Turn it into a Recycled Window Picture Frame! Old wooden windows can be repurposed into many wonderful, useful things. We have a greenhouse made from repurposed windows and I saved a few extra windows out for other projects. Let friends and family know you are looking, check salvage stores and call window replacement companies to locate old windows for free or cheap.
Here’s part of my little window stash. Several of my vintage finds will become picture frames to display my own art work. This project is planned as a birthday gift for my favorite junking buddy. Once you have a frame, here’s what to do:
Clean the frame, let it dry and then whitewash it with white indoor or outdoor paint. I do this with a very dry brush (dip the brush in the paint and then wipe most of the paint off on the side of the can). Wipe the paint off as you go on the frame with an old rag or paper towel so some of the color underneath shows through. Let it dry thoroughly.
Sanding the frame will yield a distressed finish with some of the original color showing through. This is best done outside or in a well-ventilated area as it causes a bit of dust. (Caution: if your window is old it may contain lead paint. Wet hand sanding and/or an electric sander equipped with a HEPA filtered vacuum attachment should be used)
A foam sanding block is inexpensive and perfect for getting a distressed finish. Sand a bit more on edges and corners to give the frame a well-loved worn look.
Use the cardboard template to cut out three more cardboard pieces that will be the backing behind the pictures. Make sure to measure carefully! Now use the cardboard template to cut the prints to size.
But something just wasn’t right and I couldn’t put my finger on it to save me! So I showed the project to my artist friend and she saw the problem right away. “The birds should face inward, not outward”, she said. And so I took it all apart and redid it. I think she is on to something, don’t you?
Here’s another great inspiration for recycling an old picture frame!
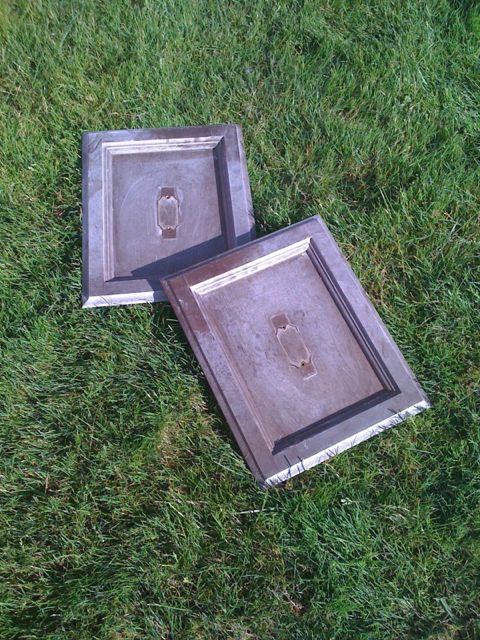
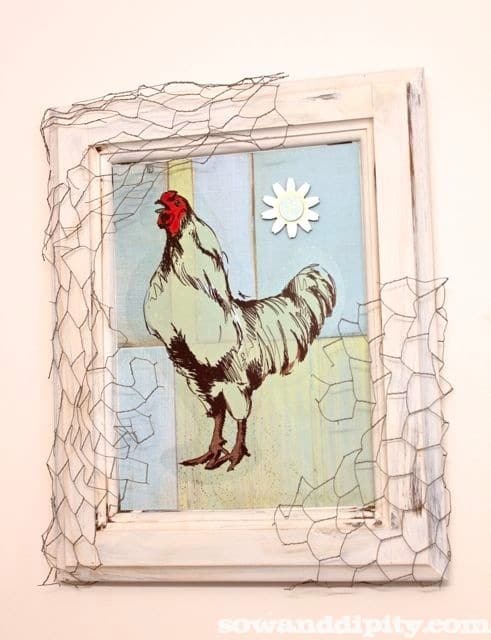
A while back I salvaged a couple of cupboard doors, slapped on some paint and set them aside with the intention of using them in a future project. Well, I love roosters and since chicken wire art is so hot right now, I decided to use one of them for a junk art project.
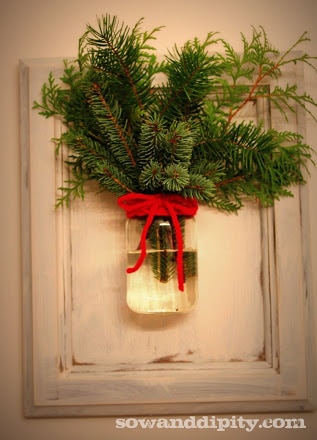
At Christmas time I used one as a Rustic wall art piece to hold fresh cut evergreens with some red wool.
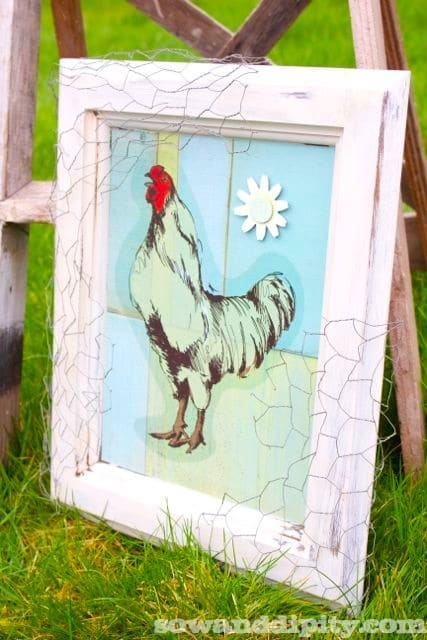
The second cupboard was turned into a mixed media chicken wire art work where I used scrapbook paper, a Rooster wall decal, a daisy chipboard with some old chicken wire.
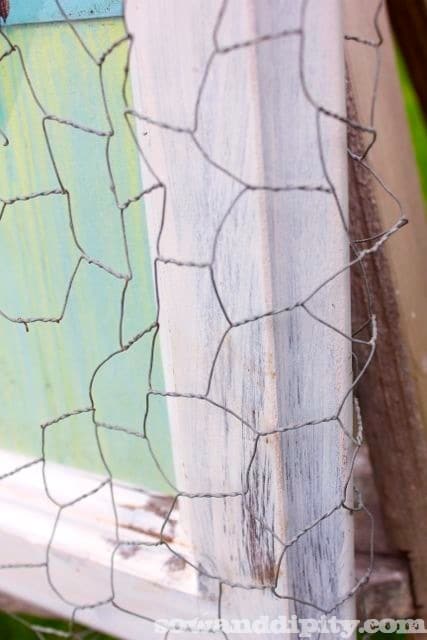
I just used a home made mod podge mixture to attach the scrapbook background and then stuck the other pieces on. Homemade decoupage is easy, just take a bottle of Elmers glue, squeeze it into another container twice it’s size, add water and shake it up! The chicken wire was stapled on to the back and wrapped around the front.
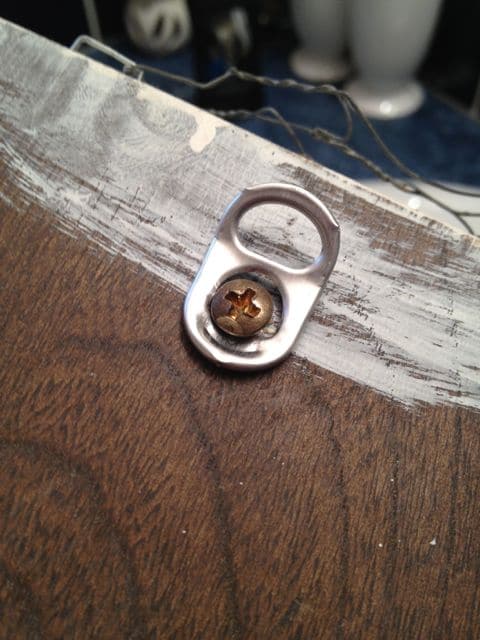
To hang it, I borrowed a trick I saw on Pinterest with an tin can tab. I’ve used this handy picture hanger idea several times now, works like a charm!
And just like that…I have a cool Recycle Chicken Wire Art mixed media piece that I super love!
Peace Love Garden
Original article and pictures take www.sowanddipity.com site
Recycled and repurposed items as garden art Make a bike planter!
For about a year, I have been admiring those bicycle planters on Pinterest and Hometalk and wanting to make one for our garden. Finding the bike was the hardest part! Then my friend, Renee’, bought a fancy new bike and gave her still usable one to another friend, Suzie. Long story made short: I now had Suzie’s old junker, which was perfect for my project!
This old Huffy did not have any baskets, but I had a wire half basket and a woven basket in my shed. A little white spray paint later, they matched and were ready to go!
Here are the materials you will need:
* An old bike (mine has tires flatter than pancakes, but who cares for this?)
* two baskets (you might need wire to attach them to the bike)
* sphagnum moss or decorative spanish moss
* an assortment of potted plants (I used three each for the front and back baskets ~ 4 annual vincas & 2 sweet potato vines)
* plastic grocery bags to line the baskets
* ribbon for streamers
* a piece of metal fence post or rebar to support the bike
The plants were the only thing I didn’t have on hand, so at three for five dollars, this project was done for just ten dollars! Follow the easy pictured steps to create a bicycle planter of your own! This one is drawing lots of compliments parked in our front garden, and I can switch out the plants to keep this planter colorful and seasonal!
*Note – put the metal rod or fence piece support in first. I didn’t and it was more difficult to hold the planted bike while hammering it in at the end.
Assemble the materials ~ two baskets lined with plastic bags, plants, dried moss and an old bike supported by a metal rod or fence post. Step # 1 ~ Fit the baskets onto the bike ~ You can put the basket handle over the seat and let it rest on the back wheel. Attach the front basket to the handle bars. Step # 2 ~ Line the baskets with plastic grocery bags to hold moisture in for the plantings. Tuck in the plants of your choice. Step # 3 ~ Tuck dried moss around the plants for a finished look. Step # 4 ~ Planting is complete, now we need some streamers! My completed bicycle planter complete with ribbon streamers! Bike Planter with pansies! Original article and pictures take ourfairfieldhomeandgarden.com site
Recycle and Repurpose your Thrift Store Finds into Garden Art
Jacki Cammidge is a participant in the Amazon Services LLC Associates Program, an affiliate advertising program designed to provide a means for sites to earn advertising fees by advertising and linking to amazon.com. Other links on this site may lead to other affiliates that I'm involved with, at no extra cost to you.
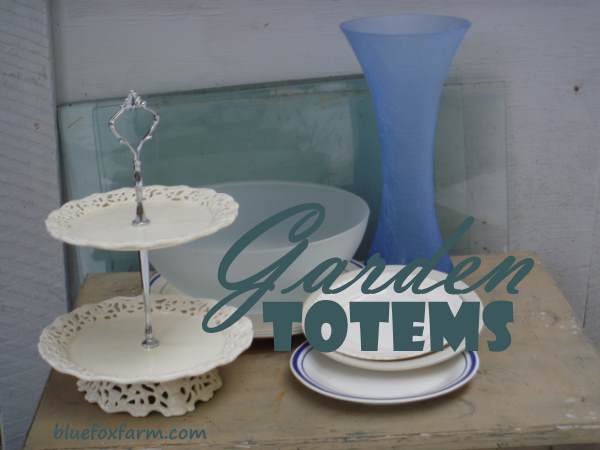
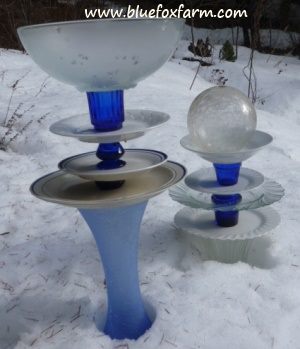
Sometimes called stacks or garden totems, you can combine recycled bowls, vases and plates to form a vertical planter for succulents or mosses to make a stunning accent or even a bird bath.
340Save
How many times have you picked up a beautiful vase or set of dishes in a thrift store or flea market, only to reluctantly put them down and leave them behind because you can’t think of a use for them?
Going back later on, you might find them gone, scooped up by another crafter.
Here’s a unique and fun way to combine all the treasures you find in junque stores, garage sales and yard sales, and repurpose your finds in whimsical garden art.
This is rustic salvage at its finest.
How to make your Thrift Store Totem:
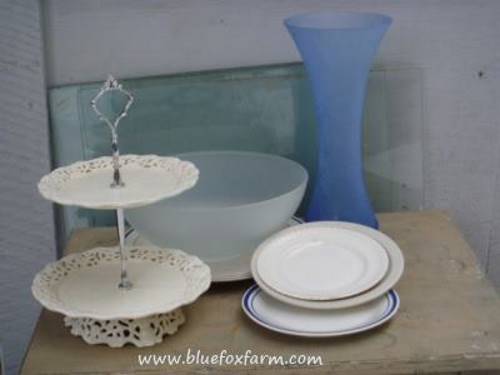
Collect your thrift store finds such as china bowls, dishes and other pottery items; Combine them to see which ones go together, and select several pieces that go well together and in the right colours for your garden.
Using a colour wheel will give you ideas of which colours should blend well together or contrast.
A simple monochromatic scheme works well too – a strict white or off white palette will be stunning in a moon garden, or planted around with herbs in a knot garden.
Cut glass or leaded crystal can give you an eye catching focal point as it glitters in the sun.
340Save
Once you narrow down your selection, glue the pieces together with any of the following types of glue:
E6000 is a craft glue that is used for many outdoor crafts, and will bond pretty much anything. This glue comes highly recommended by many crafters, so it would be worth a try.
I've used tub and tile caulking, a latex or acrylic product that can be either clear or white when it dries - the clear is my favorite, and make sure it's for exterior use if your garden totem will be kept outside all year.
I like this product as it is slightly rubbery, so the piece has some flexibility once it's cured.
Weldbond is a glue product that claims to 'bond almost anything' - and they're not lying!
I've used this glue for lots of crafts, and the only thing I would have to complain about is that the small bottle doesn't hold enough!
Ideally, it will remain flexible, even when it's cold out.
Here's a short list of my favorite kinds of glue for this project - buy them from Amazon here;
I've heard so much about E6000 Craft Adhesive that I absolutely have to try it. Although I haven't trialed it, other reputable crafters have, and given it the green light, so I've added it to the list.
You may find your own favorite type of adhesive - share it in the comments below and I'll add it to the list.
As I've mentioned above, Weldbond 8-50420 Universal Adhesive, 14.2 fl. oz. is another favorite - you can buy this in smaller bottles, like with this link, or in gallon size - that's for the serious crafter!
Garden Totems made from thrift store finds in your favorite colors
All of these types of adhesives will dry out if they aren't kept in an airtight bottle, so make sure you put the cap back on, and keep them above freezing to prevent them from separating.
Some of these kinds of glue give off vapours while drying, so work in a well ventilated area, and as always, use common sense and a be safety conscious.
Care of your Garden Totem:
Water in the dishes of your garden totem may freeze in the winter and break or crack, so drain each one, or lay the totem down on its side for the colder months.
Indoor storage is another option, or put your totem on a covered porch and fill the dishes with glass balls, pine cones or Christmas ornaments for a seasonal display.
Another great way to use old dishes in your garden in the same vein is to make mushrooms - a fluted vase with an upside down cut glass bowl glued to it - make solar powered lights by including a small light inside.
If this has just whetted your appetite for more, check out this Garden Totem Tutorial.
Find out more about the How to be Creative Guide or sign up below - it's free! Original article and pictures take www.bluefoxfarm.com site
Wash and dry your brushes immediately after use! My mom was an artist with a healthy respect for good art supplies (and taking care of what you have). Good brushes can last a lifetime with proper care.
A good work apron is a great idea. I do not want to confess the number of times I have wrecked favourite clothes because I was too eager to work on a project instead of covering up first.
I buy this stuff by the roll and use it for all sorts of things including supporting plants on trellis to garden art making. The lower the gauge number, the thicker the wire.
Protect your eyes, lungs, clothes, and hands when working. Always try gloves on before buying them. It’s essential to get a good fit so you can handle materials easily and have a good grip. So many work gloves are made for giant man hands = not good!
This is my first choice adhesive for garden art projects. Make sure you get GE Silicone II for gutters and flashing (clear drying, waterproof). It’s much less expensive to buy it in cartridge form and use a caulking gun than it is to buy handy tubes.
My first electric drill was quite good and that was a shame because I like to use things up before buying something new! When it finally died, after many years of hard work, I got a good quality cordless drill and it’s so much easier to not have to mess with extension cords. In hindsight, I wish I had purchased two at once because the sale price I got was cheaper for a drill and battery than it is to now buy the battery on its own, so consider this if you’re buying one: it’s great to have a backup battery.
There’s really no way around it: you need different types of drill bits for different surfaces: metal, wood, masonary, and ceramics (diamond drill bit).
This is the key to drilling through items like ceramic plates: diamond drill bits. I have found that some surfaces are fairly easy to drill, others will not budge, so it’s hit and miss when creating garden art flowers. You can see instructions with a short video of how I drill through plates here: