Monday, January 18, 2016

Find Peace of Mind in a Mini Succulent Zen Garden

Find Peace of Mind in a Mini Succulent Zen Garden

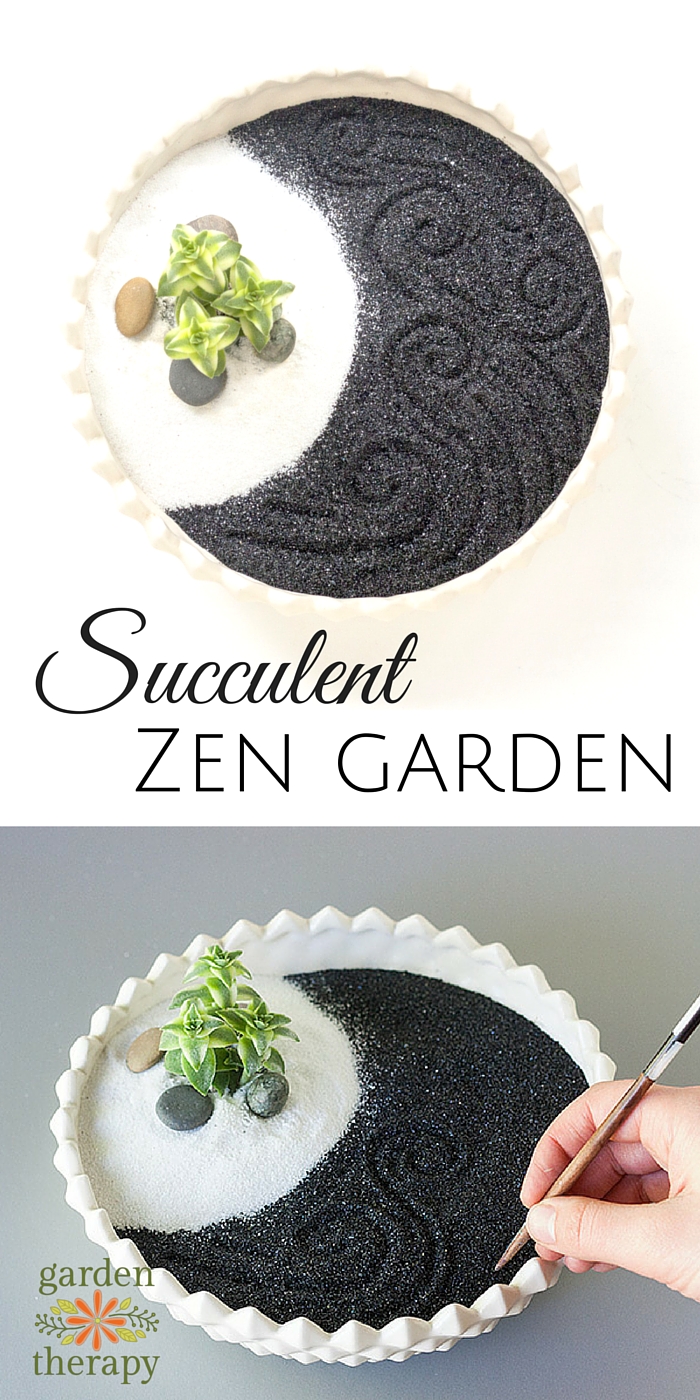
Tap into your inner bliss and capture the intimate essence of nature by creating your very own miniature succulent zen garden. One of my resolutions for this year has been to make more time for self-love and self-care. So far, I’ve fallen in love with my home yoga practice, enjoyed long soaks in a hot bath, and have found myself eager to reconnect with nature through gardening.

How to Make a Therapeutic Succulent Zen Garden

Gardening is something that can be done anytime of year, no matter where you live! I don’t mean digging holes in the snow to plant lettuce, but instead looking at indoor plant projects that can be done no matter what the weather is like. As I looked out my window to see the sun shining, I got the urge to get in some gardening. But then by the time I got my boots on to play outside, the wind was biting and the rain was pouring. Ah, the Pacific Northwest is so unpredictable. To avoid getting drenched outside, I decided to work on a simple gardening project indoors while watching the crazy weather from my living room window.


I remember my mom having a desktop zen garden when I was little and loved playing with the tiny rake in the sand. With that in mind, I gathered up a few supplies and made my very own succulent zen garden that feeds my need for nature and tranquility, along with a healthy dose of nostalgia.


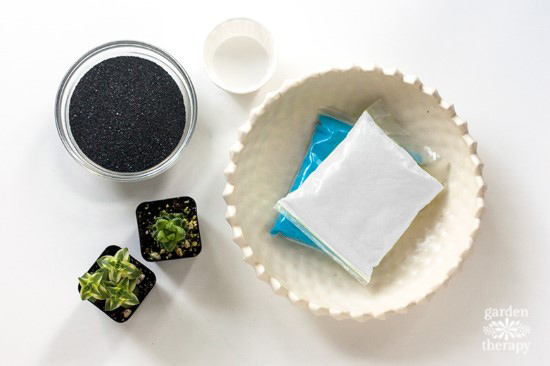
Materials:


  • Shallow, decorative bowl
  • Small succulent
  • Sand (2 colors)
  • Small paper cup
  • Small rocks (for decoration)
  • Chopstick or other ‘drawing’ tool

Succulent Zen Garden Step (1)

Make it!


Choose an indoor succulent for this project that will grow slowly and maintain a tidy shape. Haworthia, Gasteraloes, and Crassula, do well, as will a cactus. On the other hand, rosette-shaped succulents like Aeonium and Echeveria will quickly grow tall and spindly trying to get more sun. Learn more about growing and caring for succulents in the Essential Guide to Succulents.


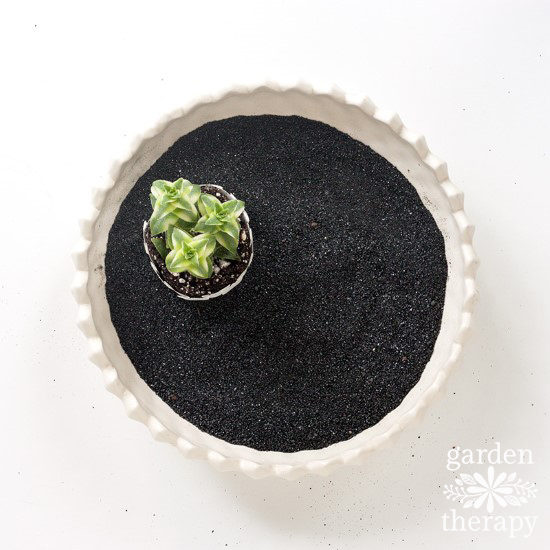
Transfer your small succulent plant to a paper cup. I had to trim my cup to be slightly shorter so that the plant wouldn’t stick out too much from where I wanted to place it in the bowl.
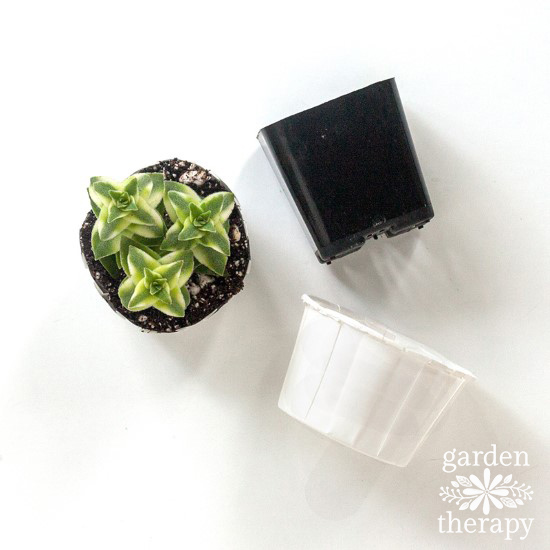

Succulent Zen Garden Step (2)

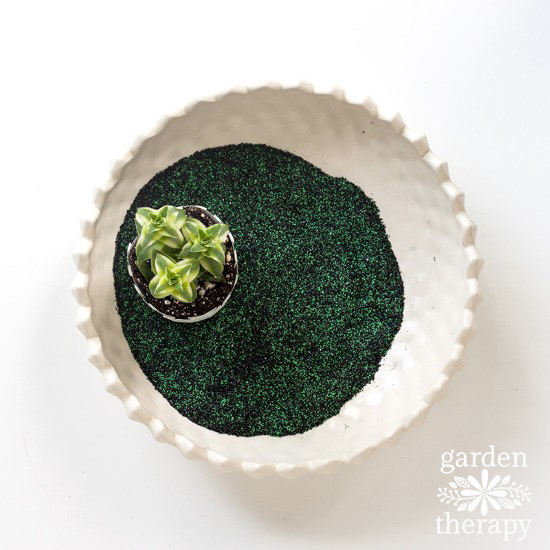
Add some sand to the bottom of the bowl and nestle your plant into place.

Succulent Zen Garden Step (3)

Then fill the bowl up with sand.


Succulent Zen Garden Step (4)

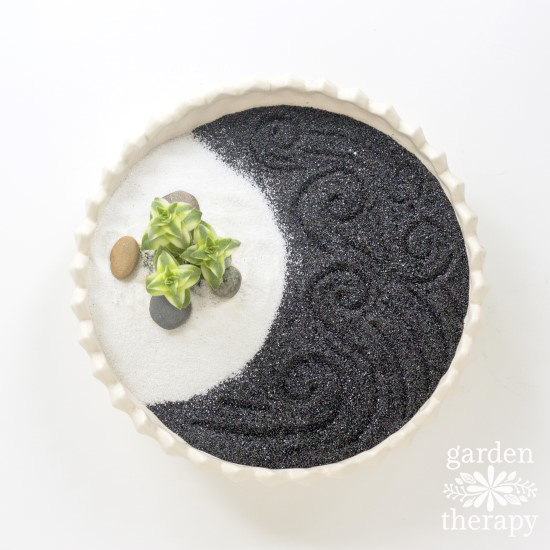
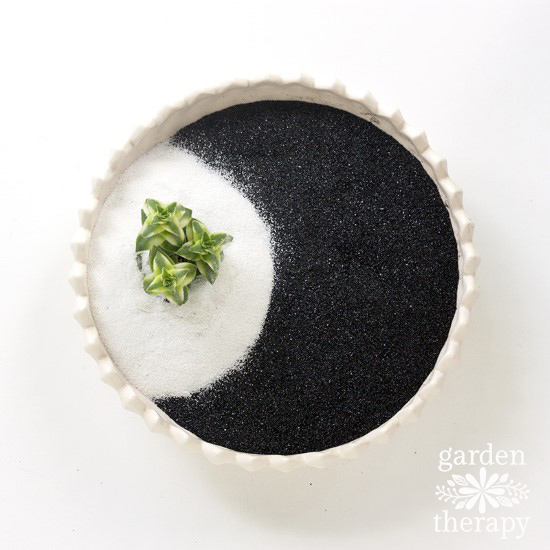
Once the bowl is full, you can then choose the second color sand to fill in around your plant. I personally love the look of the black and white sand I chose to use and like the moon shape it created when I added the white sand around the succulent only.

Succulent Zen Garden Step (5)

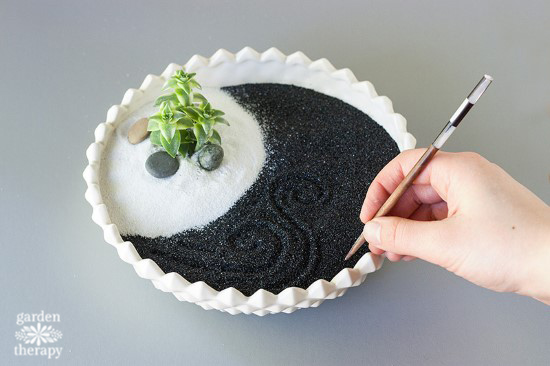
Add a few natural rocks for decoration around your succulent and then use a chopstick or other ‘drawing’ tool to doodle a design into the sand.

DIT Succulent Zen Garden

Ta da!


Succulent Zen Garden Step (6)

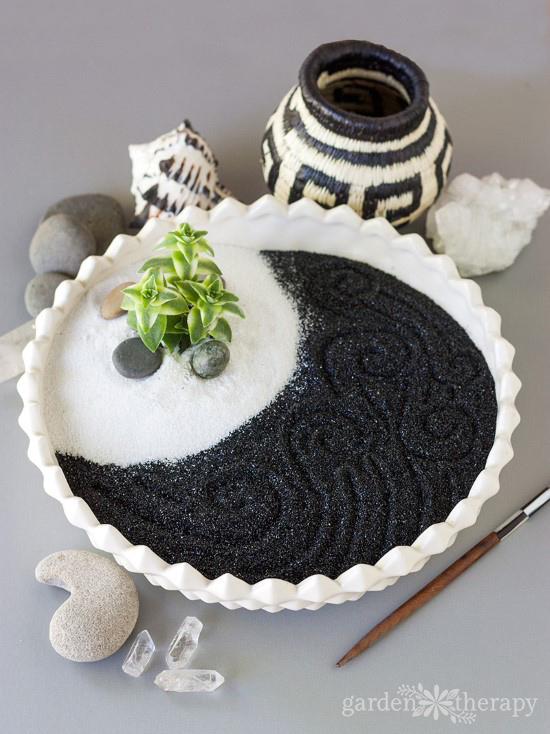
Much like coloring, I find drawing simple designs in the sand to be quite a calming activity and I can now look forward to enjoying my miniature succulent zen garden every day!

Make a calming succulent zen garden

See more modern indoor plant projects you can make all year!
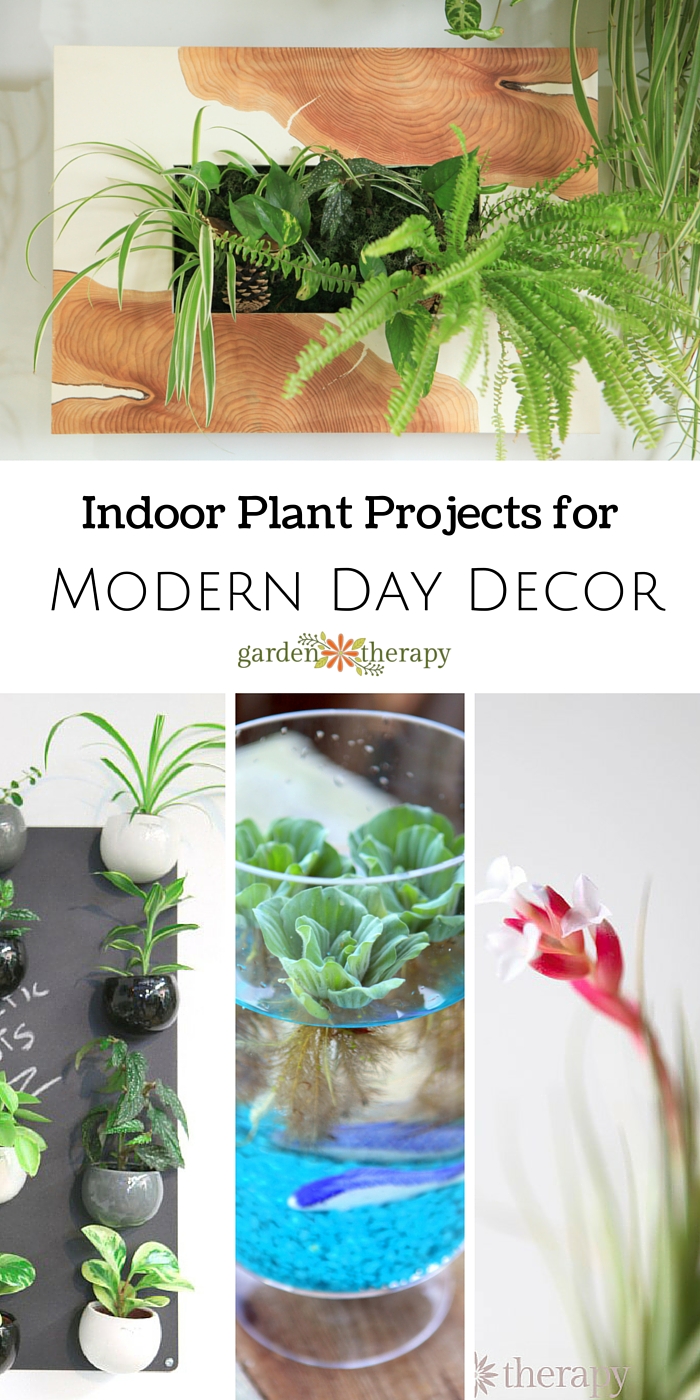

Indoor Garden Projects for Modern Day Decor

Save


Original article and pictures take gardentherapy.ca site

Friday, January 15, 2016

Featured Collections

Featured Collections

About Conde Nast


In many ways, a time capsule of the twentieth century, the Condé Nast Store offers a gateway into collecting images that are at once timeless yet modern. Prints from legends of the photographic medium, including Edward Steichen, Cecil Beaton and Horst P. Horst, are available along with an ever-expanding list of contemporary photographers working right now and offering prints for the very first time exclusively through this collection.


If you are interested in obtaining the rights to use any of the Condé Nast images featured on the site for your own projects, please email image_licensing@condenast.com or call 212-286-4408 and a member of the Condé Nast team will help you find the perfect image from its vast archive of nearly 8 million photos, cartoons, and illustrations.


Original article and pictures take condenaststore.com site

Thursday, January 14, 2016

Faux Vintage Crate Signs

Faux Vintage Crate Signs

Faux Vintage Crate Signs


I love vintage seed packet art work.

Just Google ‘vintage seed packet art’ and you will get an eyeful of colorful and fun images.

I can’t really explain why I enjoy it so much…

but it just might be because it combines two of my favorite activities…

Gardening and Painting so building these Faux Vintage Crate signs was pure joy.


Vintage Crate Seed Packet Sign Art, FlowerPatchFarmhouse.com

It took me a while to get these done, much longer than I really wanted…..

not because they were hard, not at all, it is just that life happens.


First I am going to share how I built the faux crate type surface.

I am not sure what to call them.

They are supposed to mimic the ends of a wood crate.

So here goes.

First cut your lumber to size.

I used 1 x 6’s and 1 x 4’s in pine.

I cut them to 18 1/4 inches.

I chose that number as I thought that was what the dimension of the boards stacked together would equal but once I got them all attached it only came to a wee bit under 18″, I was going for a square but since this is not rocket science or brain surgery a bit off is just fine by me.

I started the top with a 1 x 4 then used 2 -1 x 6’s , then the last is a 1 x 4.

clear as mud?— thank goodness for photos

I used 1 x 2 furring strips to make the frame and cut 2 the same dimension as the boards combined height which ended up being just a hair shorter than 18 inches.


Vintage seed packet crate sign art, FlowerPatchFarmhouse.com (1 of 10)

I applied a good amount of wood glue to the unstained back side of the furring strips.

Oh, did I fail to mention I stained the wood?

I stained the boards with MinWax Dark Walnut stain before I cut them.


Vintage seed packet crate sign art, FlowerPatchFarmhouse.com (3 of 10)

I used a well worn old paint brush to apply the glue.

Be careful not to get too much on it, you really don’t want the glue squishing out when you screw the furring strip to the boards.

Once you get the furring strip all lined up on the edge of your boards, then screw it down.

I used 1 1/4″ screws in black so they would be dark like the wood.

I spaced them so they would fall close to the center of the boards underneath.


Vintage seed packet crate sign art, FlowerPatchFarmhouse.com (4 of 10)

Do this on both sides of the sign.

Now measure the distance between the 1 x 2 strips already screwed on.

Do this at both the top and the bottom.

The dimension can be different and since it is a snug fit you need to get it right.

The top of mine was just a 1/16 of an inch narrower than the bottom.

Cut the next two top furring strips to fit your dimensions.


Vintage seed packet crate sign art, FlowerPatchFarmhouse.com (8 of 10)

Once you have applied the glue as before then screw them on.

Keep checking that you are lined up with the edges of the boards beneath.

One thing I failed to do was stain the ends of the cut boards before assembling the crate sign.

I will be sure to do so the next time around.

But they were easy enough to do later.


Vintage seed packet crate sign art, FlowerPatchFarmhouse.com (9 of 10)

Clean up any glue that oozes out before it dries.

And before you know it you have one of these..


Vintage seed packet crate sign art, FlowerPatchFarmhouse.com (10 of 10)

It is all ready to paint on your design.

I will post that next time so come on back!

Just in case you want to Pin this project, here is a nice sized image.


Vintage Crate Seed Packet Signs, FlowerPatchFarmhouse.com

click here to see how to paint the radish and carrot


Faux vintage crate art DIY instructions, pattern to paint them in link, FlowerPatchFarmhouse.com

You May Also Like


Learn to Paint Sunflowers @ FlowerPatchFarmhouse.com
Learn to Paint Sunflowers

DIY Potting Bench
DIY Potting Bench

Original article and pictures take www.flowerpatchfarmhouse.com site

Monday, January 11, 2016

Fast & Creative Pumpkin Decorating Tips (No Carving)

Fast & Creative Pumpkin Decorating Tips (No Carving)

Here’s some tips for creating fun jack-o-lantern characters without having to carve the pumpkin. With a few tricks, items found in the fall garden and kitchen pantry work perfectly to create pumpkin people with funny hair and faces.


If you love crafting from natural materials, also see 12 Simply Lovely Nature Crafts.


DIY no-carving required jack-o-lantern pumpkins

I may receive a commission if you purchase something mentioned in a link on this post for sites including Amazon.com. Other links may go to websites where I have been paid to write a blog or article. See the entire disclosure here.


Make A Fabulous Pumpkin In Less Than 20 Minutes


DIY no-carving required jack-o-lantern pumpkins

Halloween and autumn pumpkin carving is a fine, old tradition with its own rewards but if you don’t want to spend a lot of time (or money), there’s plenty of ways to get great results in minutes without touching a knife or pumpkin guts. Plus, uncarved pumpkins last a lot longer, of course.


These ideas focus on creating a real (not plastic) pumpkin with a face, in a quick and frugal way, but you could adapt them for anything you like, of course. The goal is fun, right?


Plus, the great news is, you probably already have exactly what you need both to create the face and attach everything together. Quickly.


Fast & Creative Pumpkin Decorating Tips (No Carving)
1. Start with A Pumpkin…Or Not

If you’re lucky, you’ll have choices for colours (orange, white, striped, variegated) and sizes (from mini to jumbo). You can also spray paint them for whatever effect you want. I prefer them in their natural state.


Look for pumpkins with the stems still attached. Those make excellent noses and hair.


DIY no-carving required jack-o-lantern pumpkins

No Pumpkin, No Problem


Other options include squashes, gourds, watermelon. Anything with the size, colour, and texture you want. Check the produce section of your grocery store. See what talks to you. Just don’t let anyone see you talk back.


2. Let Your Supplies Give You Ideas


I’m a big fan of making use of things I have on hand. Seriously, 99% of what we own is rarely ever used so why not use stuff here?


Shop in your own home and see what grabs you. I’ve provided lots of ideas below.


DIY no-carving required jack-o-lantern pumpkins

3. Tell A Story


Once you start gathering supplies, perhaps a theme, storyline, or emotion you want to convey comes to mind.


  • Do you want it funny, cute, sad, gruesome, weird, or what?
  • Do you want a human face or an animal? Or perhaps an alien or favourite character? Maybe your pumpkin will look like you. Bonus!

Again, it does not have to take a lot of time or work to be fun and creative. Sometimes the random thing you try as a joke turns out to be the best one. Personally, I like them quite simple.


Use items you find around the house to create a wonderful Halloween or Fall pumpkin | empressofdirt.net
4. Super Fast Face Supplies

Forget the carving! You’ve got instant faces all around you. Boo!


If you want to see a lot of ideas first, try a Google image search for ‘pumpkin faces’ and see what you get.


Your choices for how to approach this will depend on how long you want to display the pumpkin (days or weeks), and whether it will be placed where wild things (squirrels etc.) might nibble your accessories.


DIY no-carving required jack-o-lantern pumpkins

If you cut or carve into the pumpkin, the display time is shorter, as it starts to slowly rot. This might not be a bad thing if you want something gross to display outside.


Additions like walnuts, corn, and acorns may be eaten by pesky admirers.


Un-carved pumpkins decorated with junk (like the corks and keys you see below by Barb Rosen of Our Fairfield Home & Garden) last for weeks or months.


Junk-O-Lantern by Barb Rosen http://ourfairfieldhomeandgarden.com/diy-make-a-junk-olantern/
Fabulous Junk-O-Lantern by Barb Rosen http://ourfairfieldhomeandgarden.com/diy-make-a-junk-olantern/

Tips for creating a fabulous Halloween or fall decor pumpkin using household items
Think about eyes, ears, nose, mouth, horns, hair, pipe, tongue, freckles, arms, legs, wings, tails….

5. Ways to Attach Things


When I was a kid we considered these things “cheating”. Are you kidding me? We missed out on so much fun by restricting ourselves that way!


DIY no-carving required jack-o-lantern pumpkins

Options


  • Electric drill – Super quick way to make holes for inserting accessories or creating a luminary. Keep in mind, anything that opens up the pumpkin, speeds up the rotting process.
  • Nails – Don’t want to make a hole for that carrot nose? Nail it on!
  • Pins – Smaller items like pieces of pine cone or magazine clippings attach instantly with straight pins.
  • Tacks and Pushpins – Use them as part of the decoration and/or to attach things. How about a tacky smile?
  • Glue Gun – When in doubt, haul out the glue gun (see it at Amazon.com).
    TIP: If your pumpkin is cold, apply the glue to the item you’re attaching instead (so it doesn’t harden before a bond is formed).
  • Pipes and Wire – These are very useful for attaching several pumpkins together, whether you’re forming a tipsy tower (like the mini pumpkins above) or a caterpillar made from mini pumpkins.

Fast & Creative Pumpkin Decorating Tips (No Carving)


Put It All Together


  • The great thing about this super fast pumpkin decorating method is, if you don’t like something, it’s easy to change. Just pull stuff off and try again.
  • Play around with a few ideas until you find what you like.
  • Combine different materials to come up with something new.

Have fun and I’d love to see what you create.


~Melissa the Empress of Dirt ♛


Fast & Creative Pumpkin Decorating Tips (No Carving)

Original article and pictures take empressofdirt.net site

Fall in Love with These Autumn Crafts from Nature

Fall in Love with These Autumn Crafts from Nature

It might be the colorful leaves. Or it could be the ornamental seed heads. Or perhaps the acorns. No matter what the inspiration is, making crafts goes hand-in-hand with fall. Head out to the garden and collect some materials. Got them? Ok, now let’s get busy! Here are some of my favorite fall nature crafts.


I love this collection of easy nature-inspired craft projects!

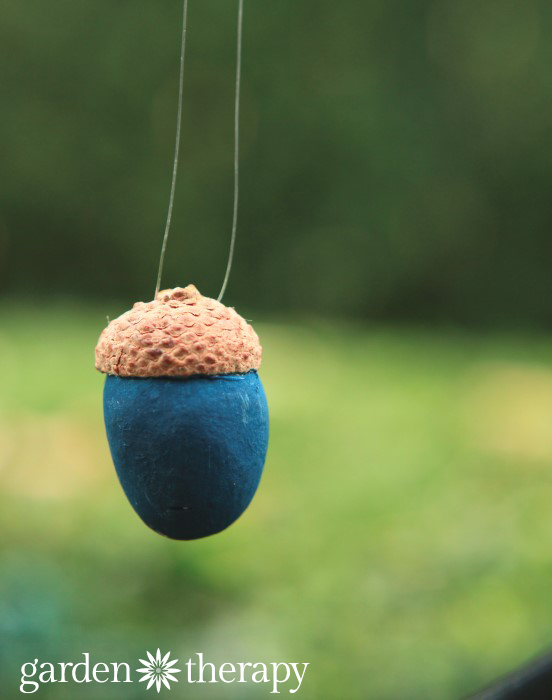
Make these with air-dry clay and acorn caps. Paint them however you like; the possibilities are endless.


Cute blue clay acorn ornament from the DIY ornament tutorial

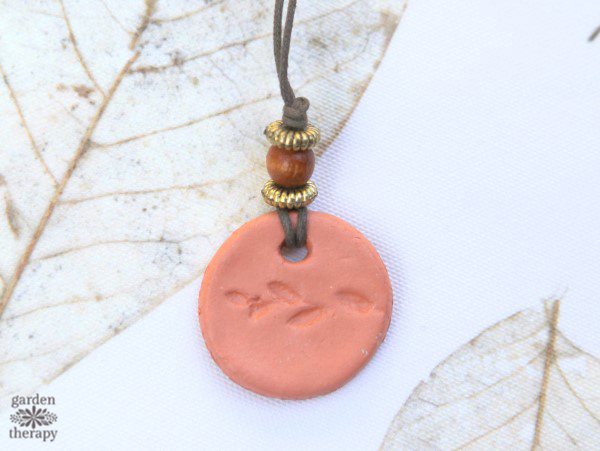
Air-dry clay is a staple for preserving the garden! Collect interestingly shaped leaves to press into a pendant, then drip your favorite essential oil on it and bring your garden therapy with you wherever you go.


aromatherapy clay pendant

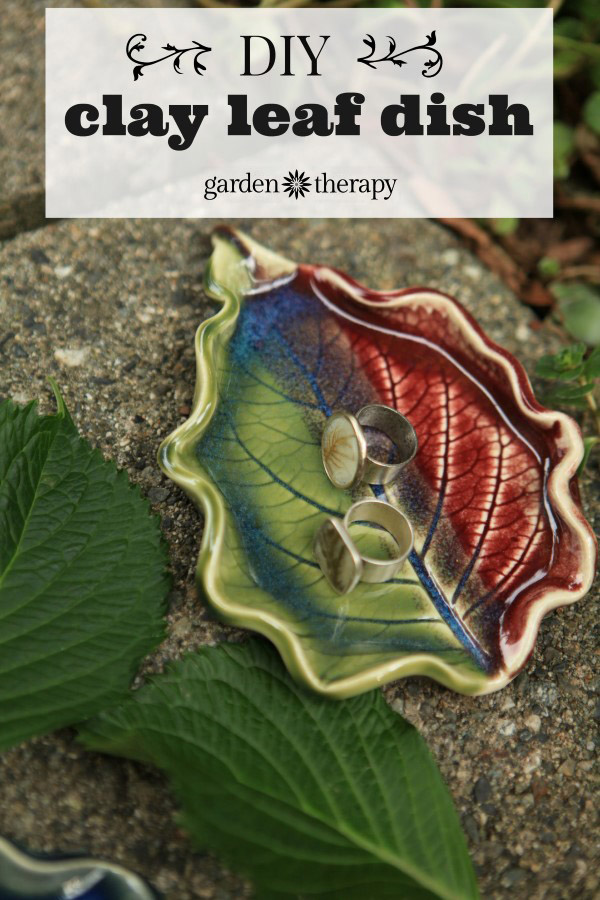
Use a hydrangea leaf as a mold for a clay leaf dish. Make sure to press the outside of the leaf to the inside of the dish to get the strongest veins showing through. See full instructions on how to make one here.


Clay Hydrangea Leaf Dish

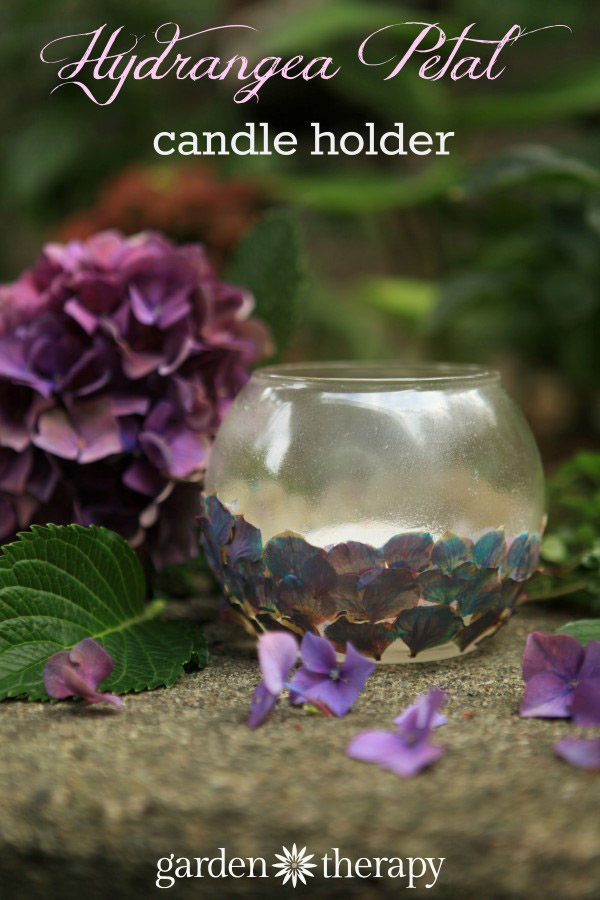
Hydrangea Candle Holder


Pretty hydrangea petals look darling when glued to a glass candle holder in a mosaic pattern. This design would also make a great vase for, well, hydrangeas! Simply glue the petals onto a candle vase and add a bit of paint to ensure the color stays vivid!


Hydrangea Petal Tealight Holder craft project

Garden Ring


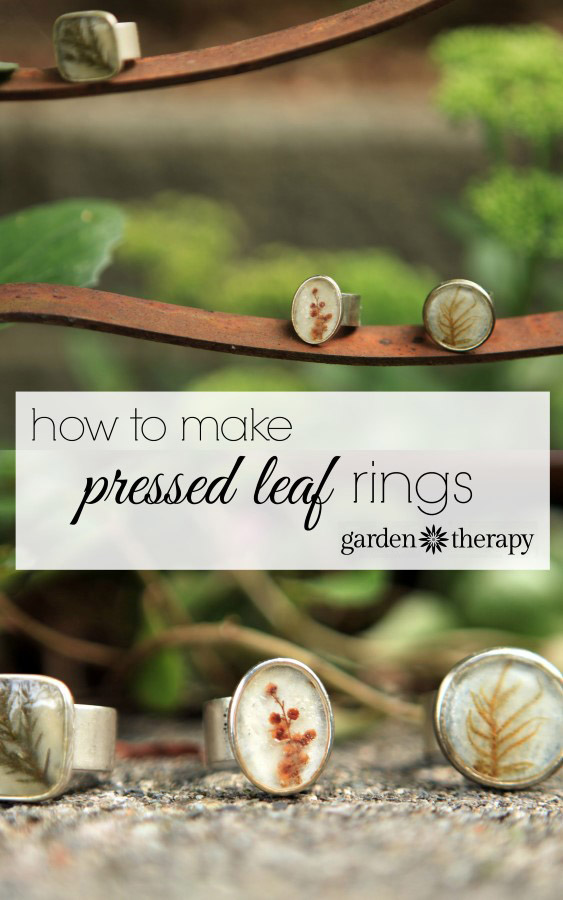
Collect just a tiny leaf or a few small blooms and dry them between the pages of a heavy book. The instructions for this project are easy. Get some of these rings, then paint the back of the metal with white paint. Use a dab of glue to attach a pressed leaf. Get a box of this epoxy resin and set them in the epoxy according to the instructions. Easy peasy! Now the garden will come with you wherever you go!


How to Make Pressed Leaf Rings and preserve the garden

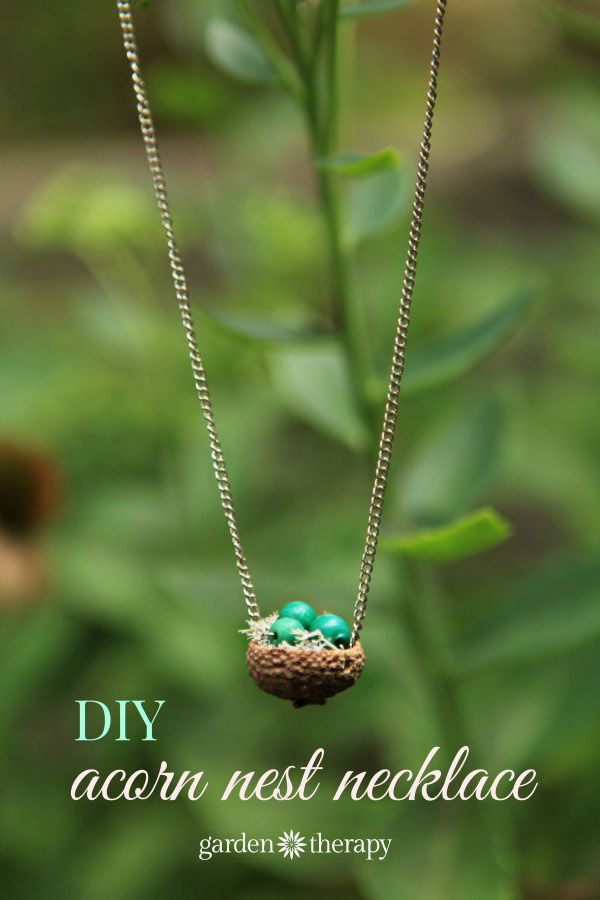
Make this acorn nest necklace by gluing some beads and moss into an acorn cap. This would make a lovely gift as well.


Acorn Nest Pendant Necklace

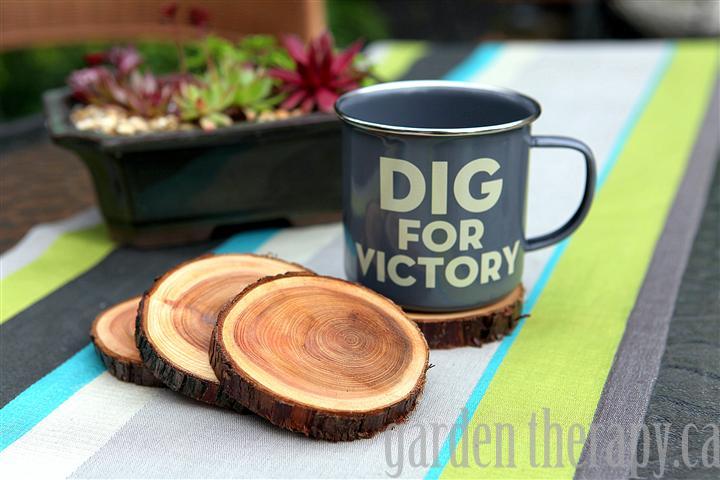
Use the fallen branches from your trees to make natural coasters.


Natural Branch Coasters

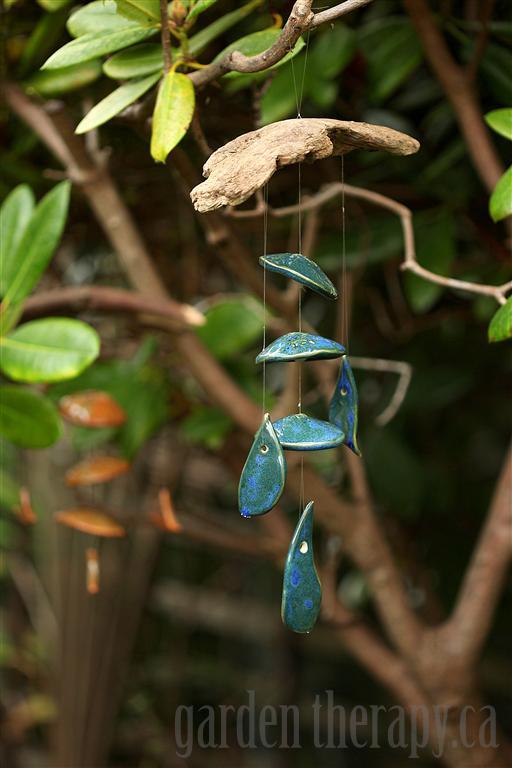
Add some music to the garden with a wind chime made from clay pieces and driftwood.


Peacock blue and bamboo clay wind chimes

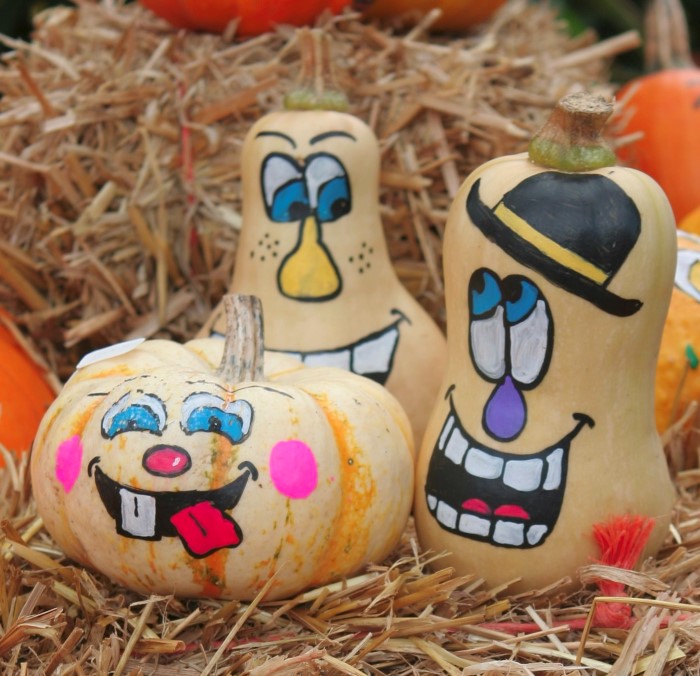
These silly painted squash are a fun project for kids!


Painted Squash Faces - pumpkin and butternut

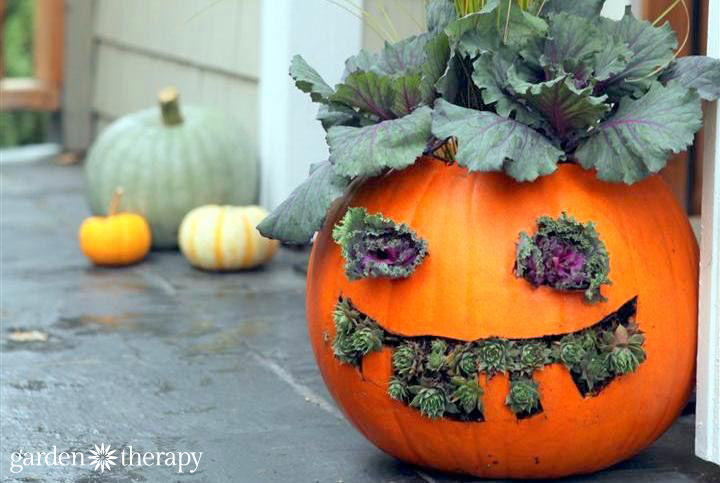
See how to make these great Jack-o-Planterns here.


How to Make Jack-o-Planterns cute and creepy

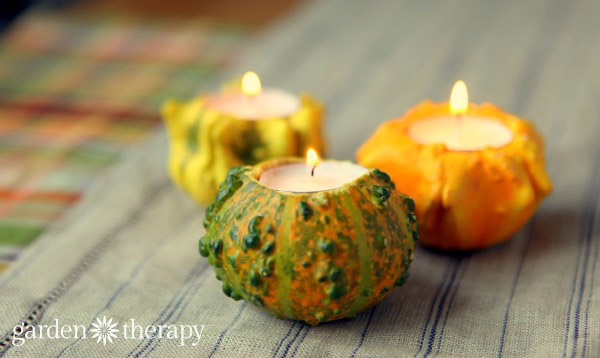
Cut a hole in the top of a gourd and pop in a tea light. Now you have a table decoration that will last for a few weeks!


Ornamental gourds make beautiful fall candles

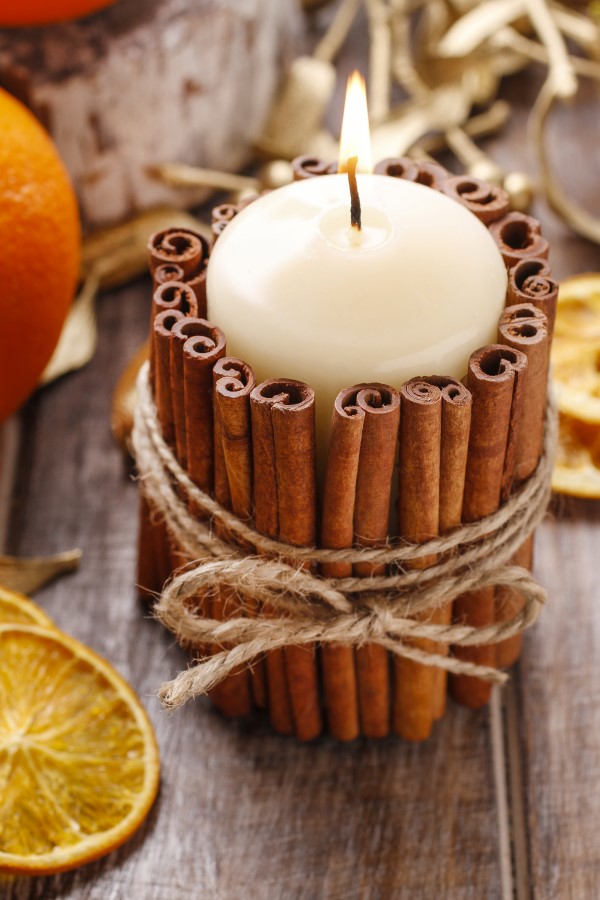
Cinnamon Candles


To make these, simply tie cinnamon sticks around a candle with a piece of twine. It will make a fast and stylish addition to the table.


cinnamon stick candle holder DIY project

Original article and pictures take gardentherapy.ca site

Wednesday, January 6, 2016

Fairy Garden Round Up

Fairy Garden Round Up

Not long ago I shared adorable Easter Basket Fairy Gardens from Beverly Turner, one of the co-authors of Fairy Gardening: Creating Your Own Magical Miniature Garden, and I learned that people just love these little gardens!

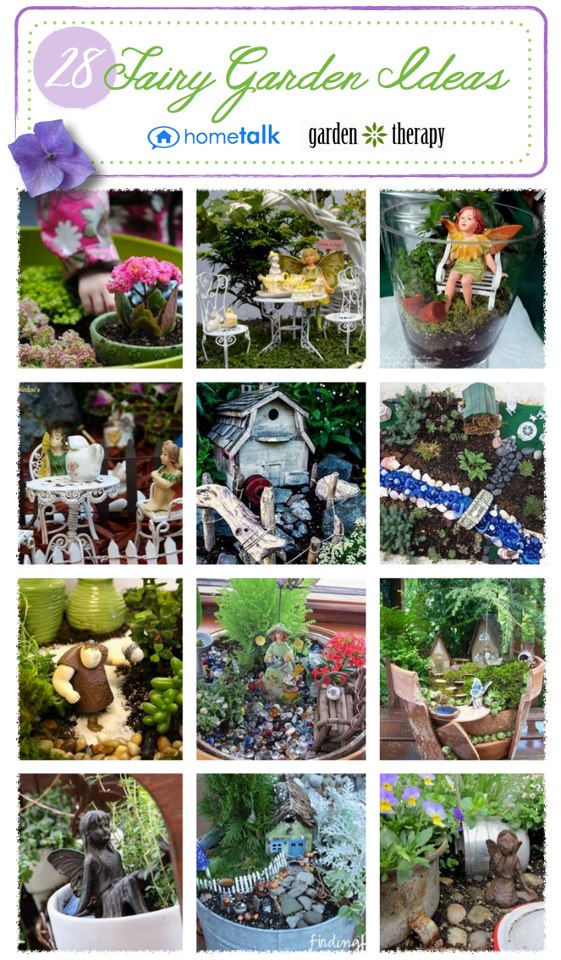
Fairy Garden Ideas
28 Fairy Garden Ideas

From this post on Hometalk, I’ve seen that there are a lot of fairy garden fans out there. So I did a little snooping around and created this round up of the different fairy gardens that have been shared on Hometalk. (PPS: If you haven’t been to Hometalk yet, you will be delighted to find professionals, bloggers, homeowners and renters who share information, questions, and more in an online community. It’s like having an army of advice right there at your fingertips, and it’s a fun place to show off your hard work around the home and garden.)


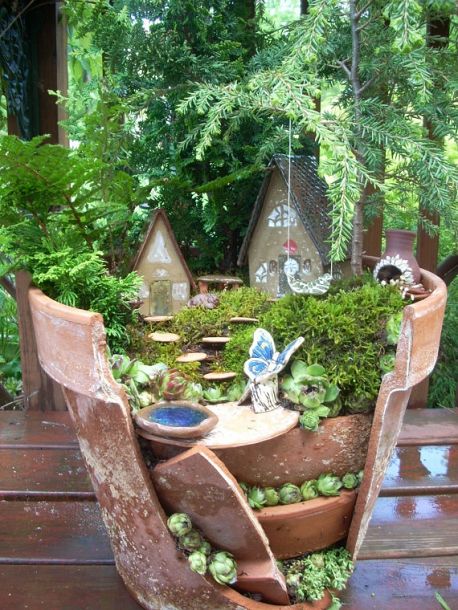
Wow, they are some pretty creative little worlds there! I particularly liked this fairy garden in a broken terracotta pot. What’s cool is that this is a kit that you can buy on Etsy thanks to Laughing Orange Studio.


Broken Terracotta Garden Kit by Laughing Orange Studio on Etsy

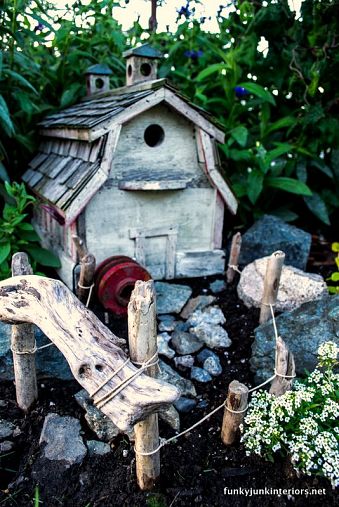
I also love this farmhouse style mini garden by the uber-talented Donna from Funky Junk Interiors. Rustic and absolutely spot on for Donna’s junkin’ chic style.


Farmhouse Mini Garden by www.funkyjunkinteriors.net

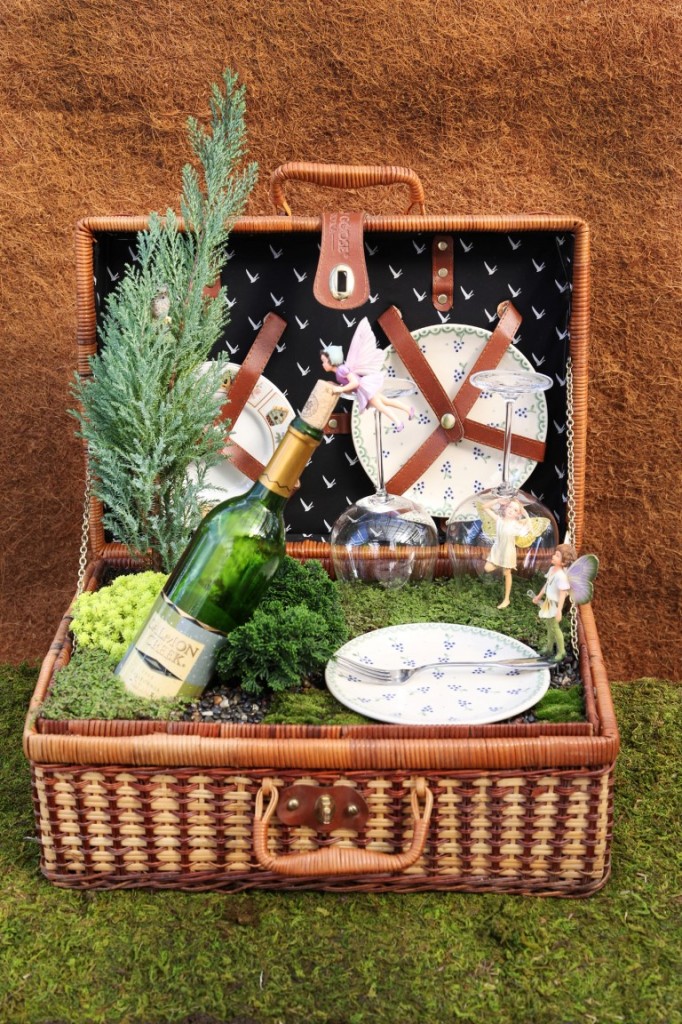
The authors of Fairy Gardening also shared a few more projects with us. How much do you love this picnic basket garden?


Fairy Garden Picnic Basket

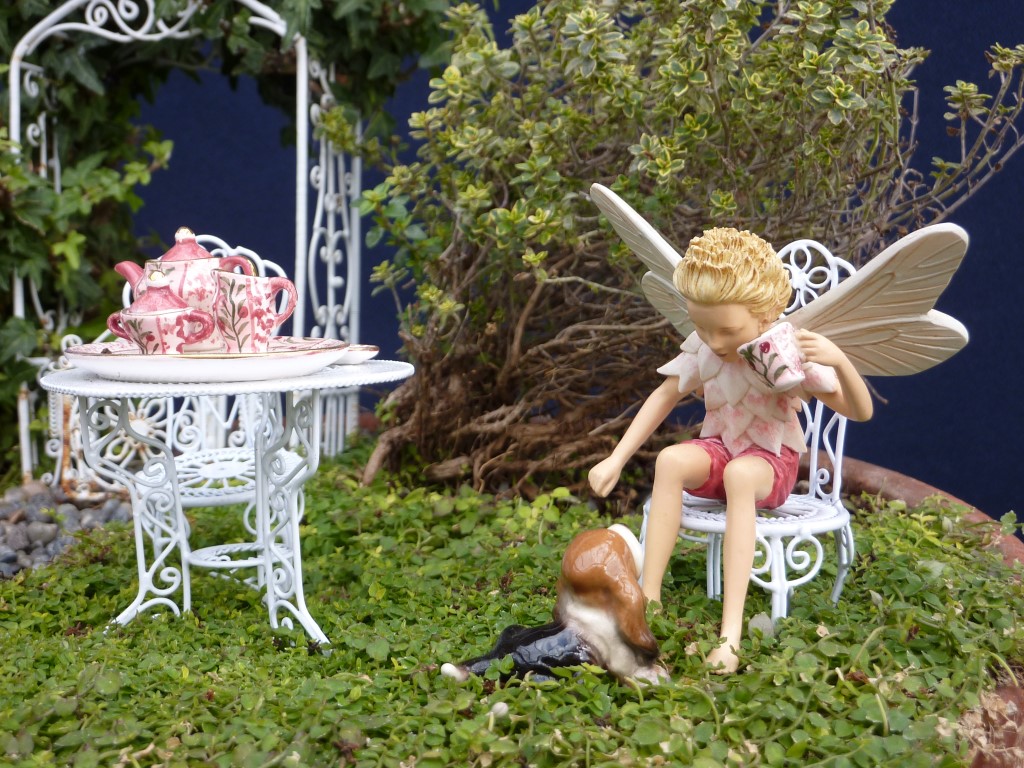
Or a fairy garden tea party?


Fairy Boy and Dog Tea Party

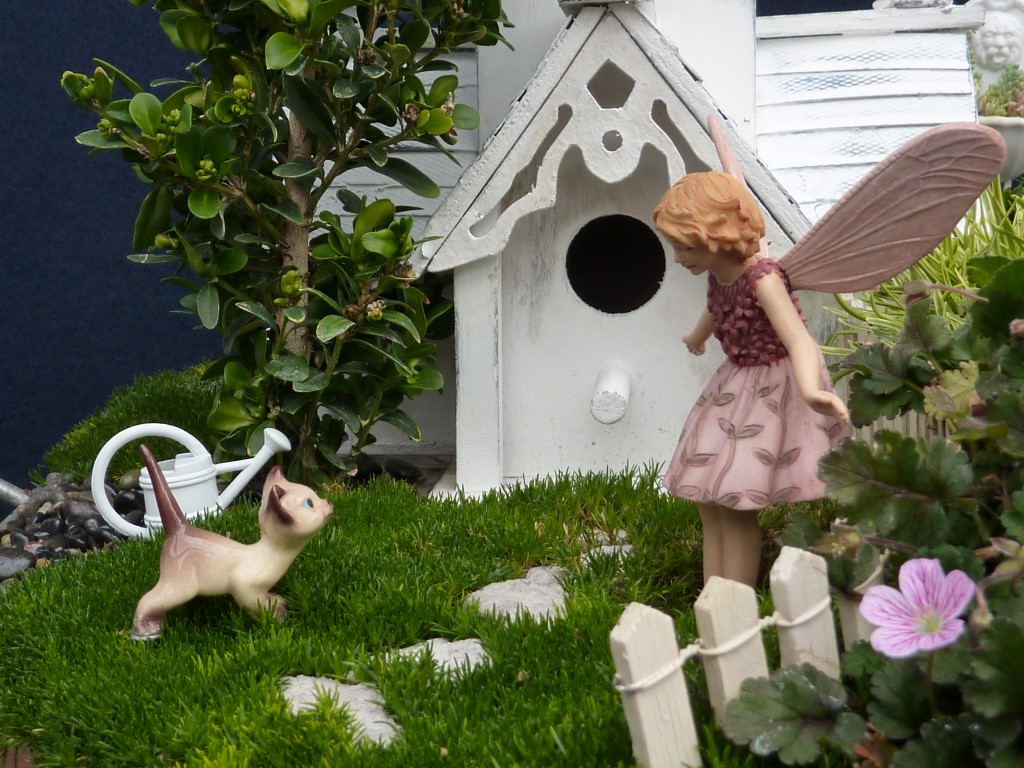
This garden reminds me of how much fun it was to garden with my old cat.


Fairy Greeting Cat
Fairy Greeting Cat

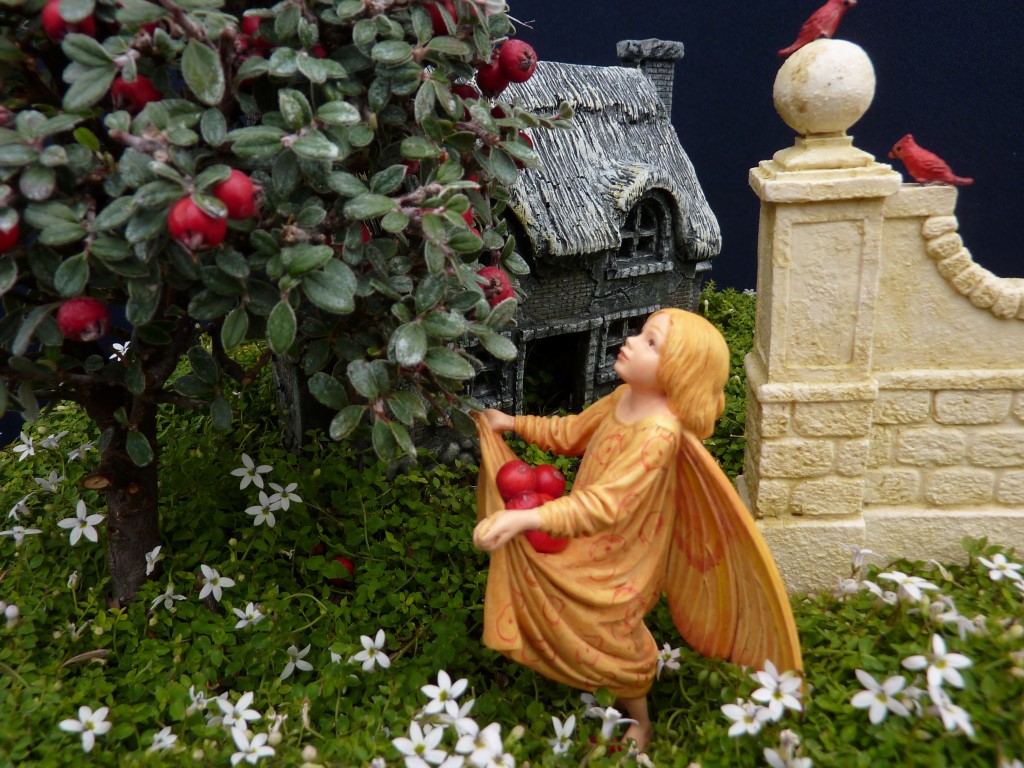
Using cotoneaster as an apple tree – oh the possibilities!


Fairy with Apple Tree

Who knew that there was such a huge little world out there and that so many people who have used these gardens to show off their creativity? Please take some time to check out the Hometalk round up of Fairy Gardens and if you have one of your own, don’t forget to share!


Original article and pictures take gardentherapy.ca site