-
SUMMER LOVING X OPI -
YES NO -
JUST BECAUSE -
FASHION & JAMIE FRAISER -
RUN A MILE -
SPARK A LIGHT -
A REALLY BIG DIAMOND
Original article and pictures take www.theyallhateus.com site


Today is cooler and the temperature may dip to 37 degrees tonight so I stopped flower planting, and worked on setting up my terra cotta pot edging under a spruce tree in my yard.

The soil is dry and leaves and pinecones need to be raked up.

All raked up.


I loosen the dirt, dig any weeds in the area, and line up the little pots first. You can stick a piece of bark mulch under one side if the pots don't sit straight.


If you have run out of ideas for flower bed edging try terra cotta pots!


.


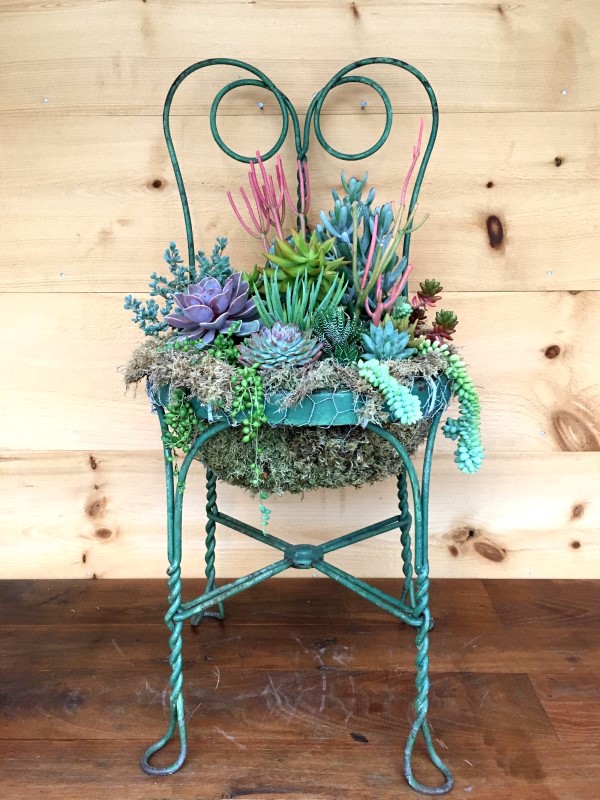
Have you ever walked around a flea market or a yard sale and spotted a metal chair with no seat? I Iove looking for unusual pieces that can be turned into planters. Here is an idea for upcycling an old chair into a beautiful piece of garden art: a succulent chair planter.
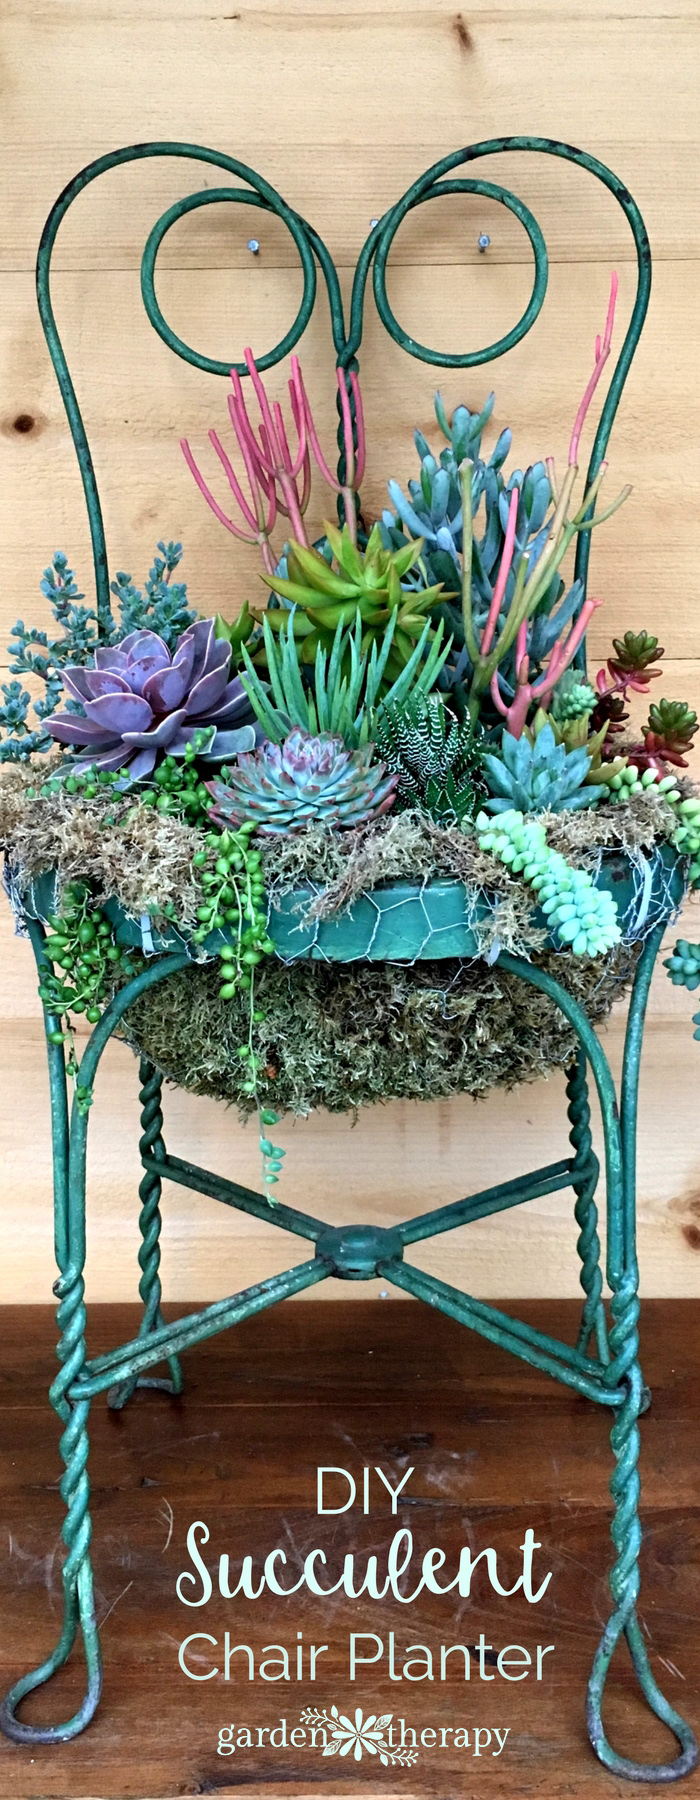
A succulent chair planter is part garden and part sculptural art that adds interest as a focal point in the garden. I love that this project can fit into an expansive space or a small patio with ease. No matter what size your garden, a chair planter will fit right in. See how to make this planter using an old metal chair, chicken wire, moss, and a variety of succulents.
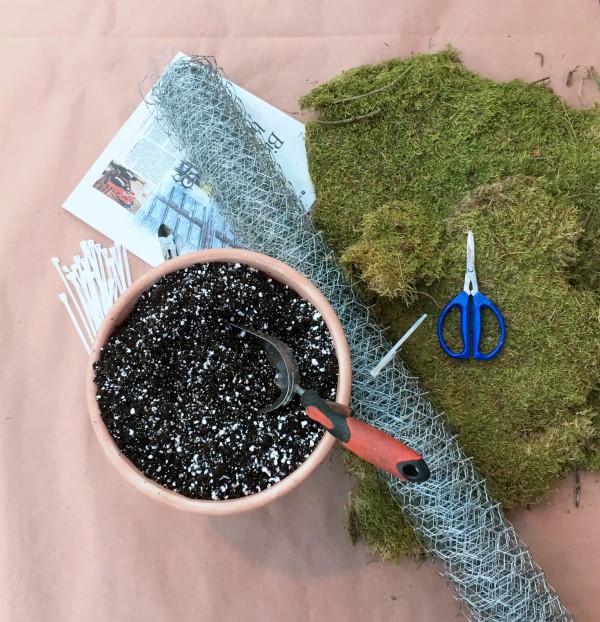
Materials
It’s easy to build a basket into a chair for planting all sorts of plants. I like to plant with succulents because once these plants have become established in the basket, they are easy to maintain. Of course, you can plant hanging basket plants, annuals, or even herbs and edibles in the basket if you wish. This project will show you how to make the chair into a planter, and you can add the plants you like.
Make it!
Cut a section of chicken wire that will be large enough to fit inside the chair to form the basket and extend over the chair edge.
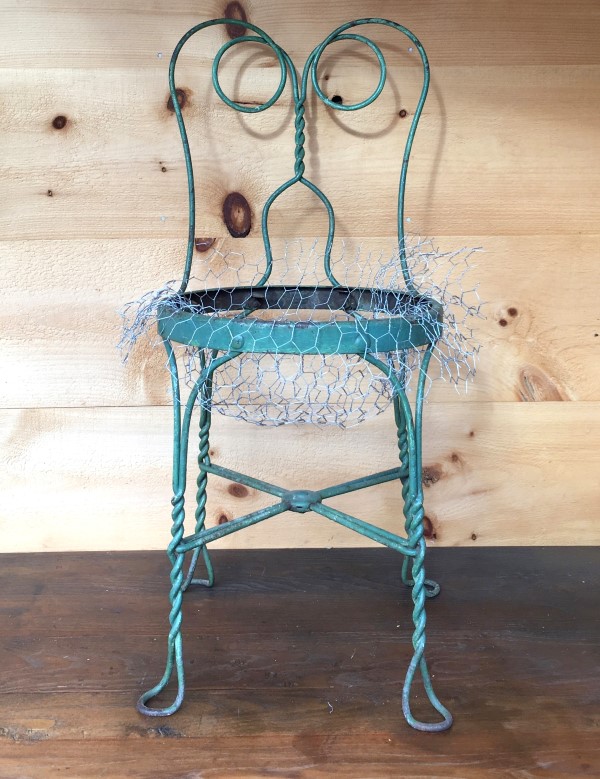
Gently push the wire down into the seat and spend a few minutes forming a nice basket shape. The basket depth will depend on the size of the chair. Succulents do not require as much soil as other plants. The basket for this succulent chair is 8 inches deep.
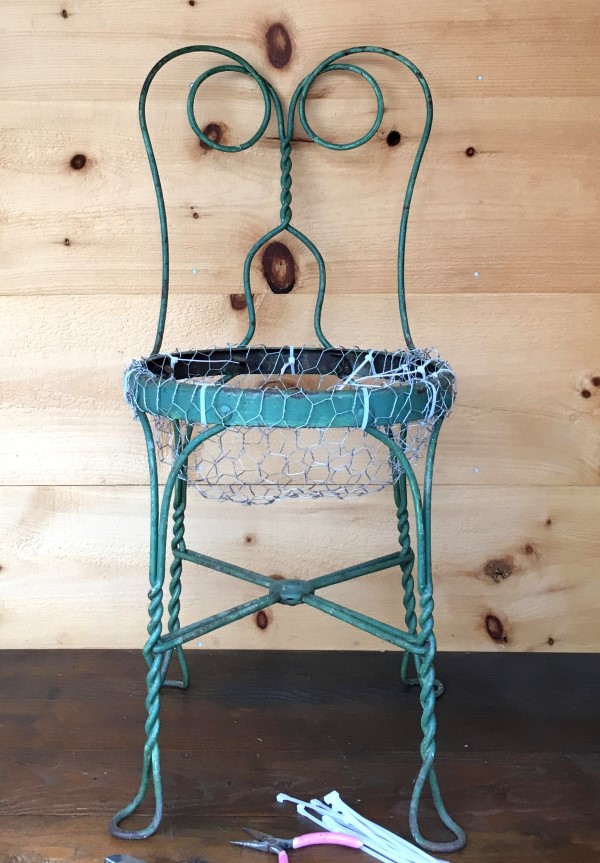
When you are happy with the shape of the basket, bend the excess wire over the edge of the chair. If there is too much excess wire, cut away some of the wire but make sure to leave enough to secure the basket to the chair.
Begin securing the basket to the chair. Surround the seat with cable ties. Nine wire ties were used for this project. Trim away any excess chicken wire. Needle nose pliers can be used to tuck the chicken wire ends under the metal seat. Trim back the tails of the cable ties.
Now it’s time to line the basket with the sheet moss. Lay a large piece of moss, good side down, into the basket. If you are using multiple pieces, overlap them slightly. You do not want to see through the moss. Line the whole inside of the basket and up over the seat edge.
Take 2 to 3 sheets of newspaper and lay it down inside the basket on top of the moss. Any excess newspaper will be cut away later.
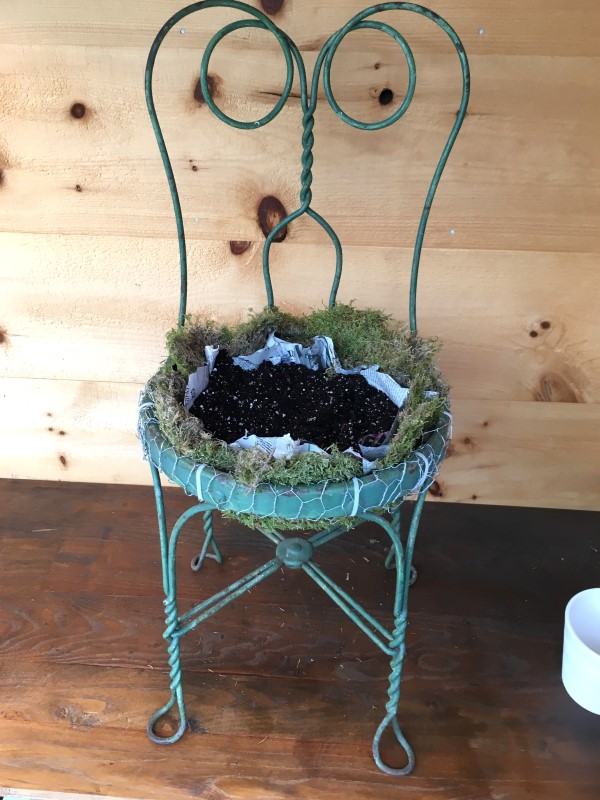
Fill the basket with soil. Cut away the excess newspaper approximately 2″ above the chair. After planting, any extra newspaper will be trimmed away.
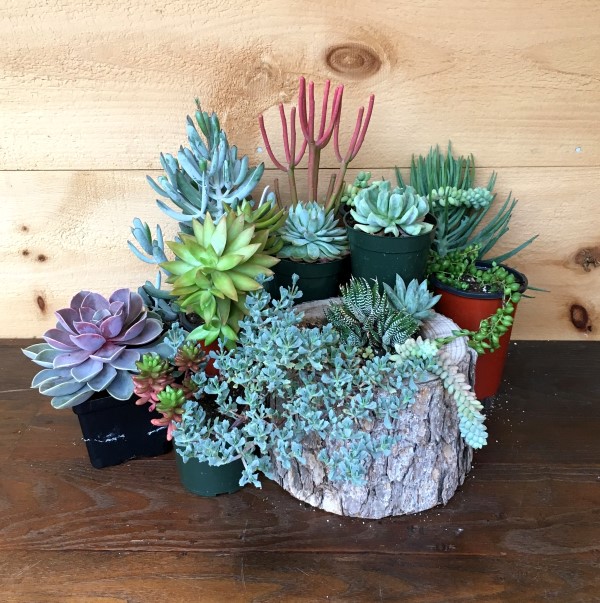
Now you are ready to plant. Consider which succulents will look best in the back, middle and front of the chair. I like to have something tall in the back that can grow up the chair and include succulents growing over and down the chair. Mix it up with different colors and different shapes and textures to create an interesting arrangement. If tall succulents seem a bit floppy, tie them loosely with garden twine to the back of the chair for additional support.
After planting is complete and you are happy with how the chair looks, cut back any newspaper that is showing. If the wire ties are showing, now is a good time to tuck some small pieces of moss over them. Gently water the plants, but do not overwater. Succulents do not like soggy soil. Water your chair regularly and allow the soil to dry out slightly between waterings.
Place your succulent chair somewhere where it can be seen and enjoyed.

Marie Meiklejohn is the owner of Marie’s Garden, a seasonal greenhouse located in Pennsylvania. She grows unusual annuals for butterfly and cut flower gardens, is crazy about growing succulents, and specializes in designing custom seasonal containers for her customers. Workshops are held in the greenhouse throughout the year. Marie has studied horticulture at Temple University, Delaware Valley University, and Longwood Gardens. She has received a Certificate of Merit in Ornamental Horticulture from Longwood Gardens and a Certificate in Horticultural Therapy from Delaware Valley University.
This sweet and succulent valentine is just what Dr. Love ordered for the winter blues. It’s a thoughtful way to brighten up someone’s day without all the extra calories. A colorful collection of succulent cuttings set in a heart-shaped candy box will surprise and delight your lucky loved one, and it’s also just the right … Continue reading
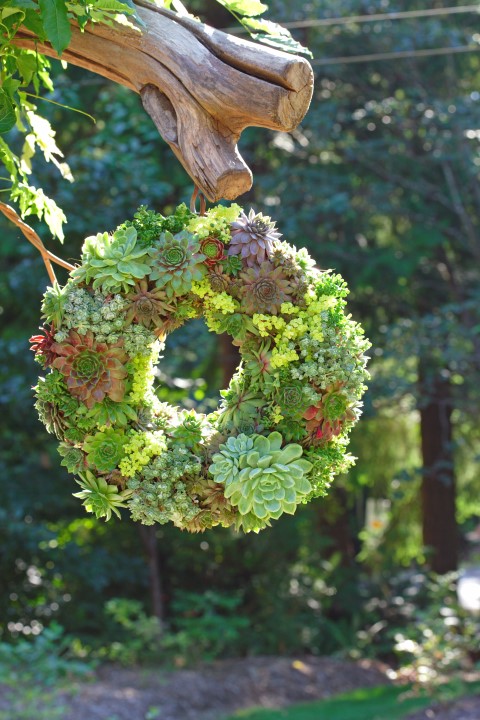
This succulent wreath is much easier to make than you think. It will take some time and finesse to put together, but as it fills in it will wow anyone who sees it. A succulent wreath like this from a florist or garden center can be hundreds of dollars, but with these tips you can make … Continue reading
This succulent wreath is much easier to make than you think. It will take some time and finesse to put together, but as it fills in it will wow anyone who sees it. A succulent wreath like this from a florist or garden center can be hundreds of dollars, but with these tips you can make one for a fraction of the cost. Succulents are easy to care for if you know a little about them so maintenance is limited and they will last year after year. Unless you are in a warm climate, succulents probably aren’t all that inexpensive, so look for overgrown pots of hens and chicks (Sempervivum) at the garden center and use this guide to give you some bang for your buck: Thrifty Gardening: How to Divide Succulents).

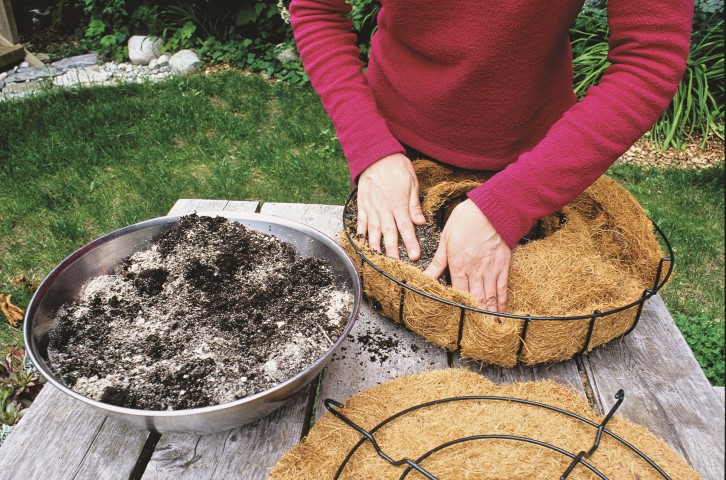
Please welcome authors John Gillespie & Christina Symons of the fabulous garden craft book Everyday Eden: 100+ Fun, Green Garden Projects for the Whole Family to Enjoy (Harbour Publishing). I’m overjoyed that they have joined us today to share a project on making a succulent wreath, as I have had my eye on these for a while now. I’ll be out at the garden center getting my supplies, and I bet you will be too when you finish reading how to make this beautiful Semper”viva” Wreath!
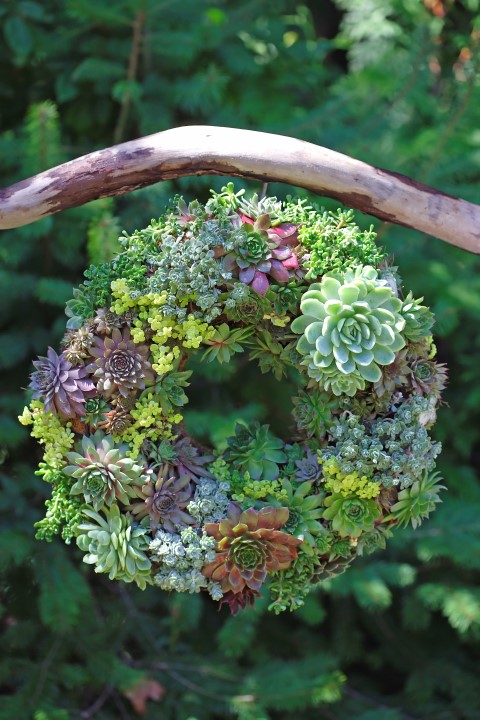
A lush living wreath is easy to make yet guaranteed to get lots of “oohs” and “ahs,” whether you place it in the garden or use it as a table centerpiece for special occasions. You can grow your living wreath for many seasons or simply re-position your succulents back into the garden when you’re done with it.
Materials
Make it!
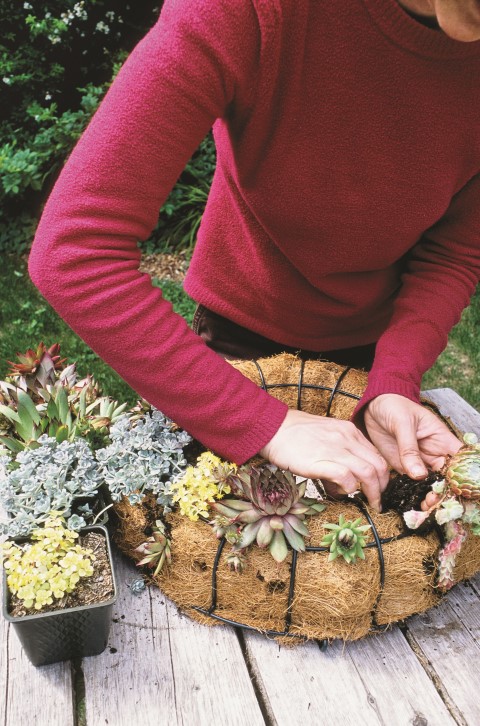
Here’s what we planted in our succulent wreath:

Be sure to grab a copy of Everyday Eden: 100+ Fun, Green Garden Projects for the Whole Family to Enjoy. The book is filled with projects using inexpensive, often recycled, materials and easy techniques, this lively collection of garden projects and practices will delight beginner and experienced green thumbs alike.
You Might Also Like:
Save
Looking for a garden-friendly favor for a spring wedding or a bridal or baby shower? These colorful seed packets are a fun way for guests to take away a lasting memory. Guests can plant them, watch them grow, and remember the wonderful time they had each time they step into the garden.
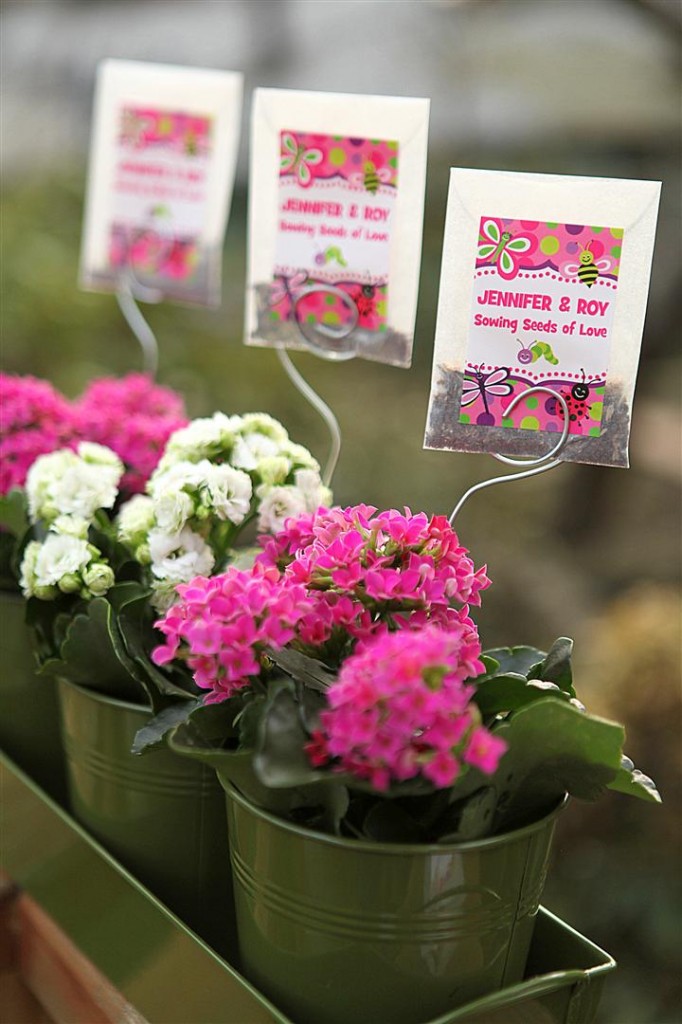
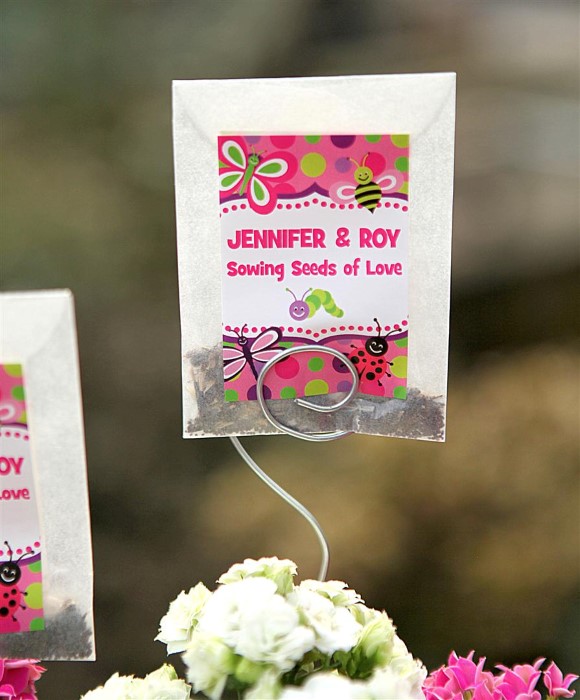
These seed packets are even cuter when displayed on wire curlicues like butterflies fluttering around. Perfect considering they are filled with a blend of seeds for attracting butterflies!
To Make the Seed Packets
First, buy a butterfly or bee blend of seeds from your local nursery. They usually contain a mix of perennials and annuals that will grow best in your climate. You can also make your own mix by purchasing seeds for flowers that you or the guests-of-honor love and mixing them yourself. Fill small glassine envelopes with about a tablespoon of seeds. I just love how you can see the seeds through the envelope! Apply a decorative label to the front of the packet and add planting instructions to the back.
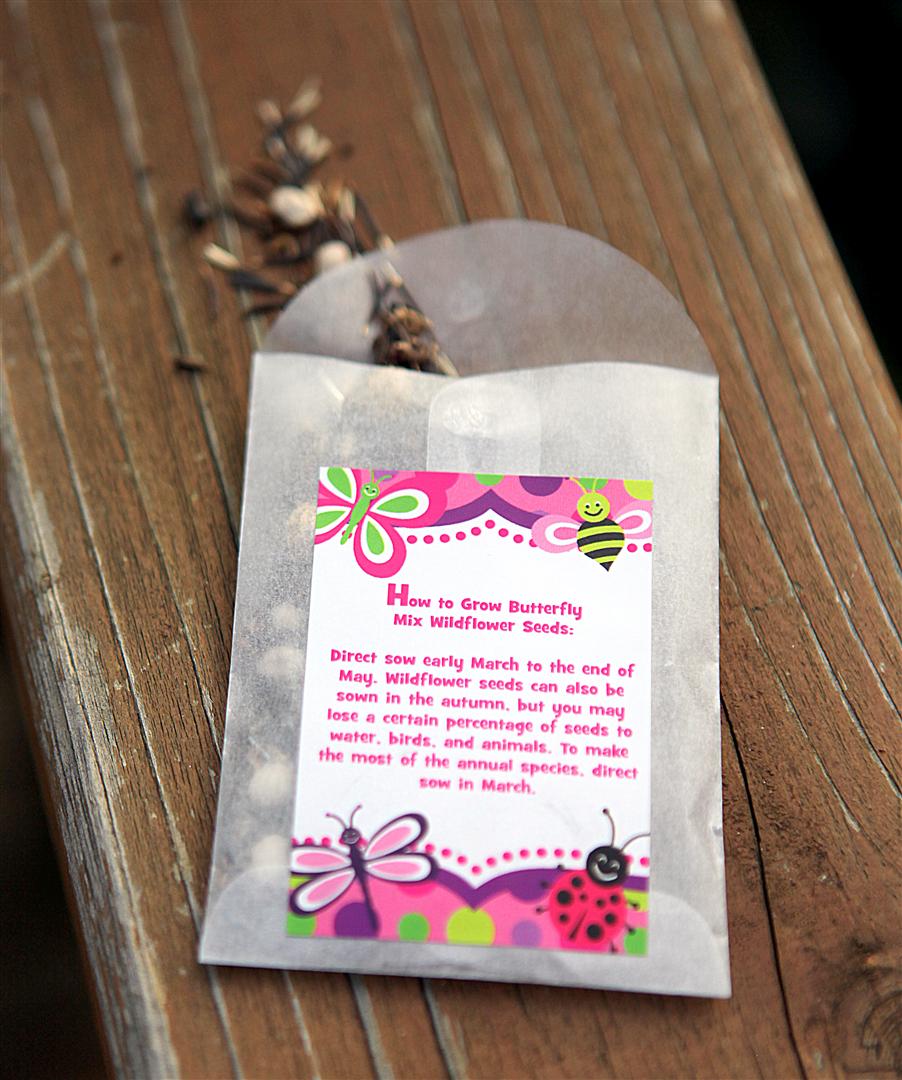
Instructions for Planting:
Direct sow early March to the end of May. Wildflower seeds can also be sown in the autumn, but you may lose a certain percentage of seeds to water, birds, and animals. To make the most of the annual species, direct sow in March.
To Display the Seed Packets
To stake the seed packets into a floral centerpiece, you can make these curlicue stands with a length of 14-gauge galvanized wire, a wire cutter, and a pair of needle-nose pliers. Snip about 8″ to 10″ of galvanized wire and use the needle-nose pliers to twist a curl on one end. Pull the inner circle of the curlicue out and insert the seed packet. Place the other end in the flowers and you have the perfect way to display your favors.
For the complete instructions on making these delightful favors, check out the full post at the Evermine Blog.
Some things are just classic. LBDs, red lipstick, perfect eyebrows, nude nails. We think side-swept hairdos are one of those classics that we’re sure Audrey, Marilyn and Liz Taylor sat around one day and decided would be a timeless staple. And that’s why we’ve found 10 quintessential side-swept ‘dos that you can do all by your little old self.

1. Braided Sweep: A delicate braid close to your hairline is perfect for many occasions, from your cousin’s wedding to your best friend’s baby shower. (via Ruffled)

2. Curly Side Bun: Flaunt that texture. Just gather up your tousled waves and pin them in place. In a matter of minutes, you can master this look. (via Hair and Makeup by Steph )

3. French Sweep: No need to speak the language of love to master the French braid. This look is lovely if you have darker lowlights. Try this out next time you go out to dinner with your beau. So sophisticated, oui? (via Hair Romance)
4. Variety Braid: Um, so this braid features like three different types of braids, and we literally cannot get over it. So gorgeous for sweater weather days! (via Liz Marie)
5. Slicked Braided Side: Keep your cheekbones highlighted and your temples bronzed when pulling off this secret side braid. It almost makes you look like you have one badass asymmetrical cut. (via Irrelephant)
6. Faux Fall: This lovely look creates the illusion that all your hair is cascading perfectly off to the side. (The trick is bobby pins!) (via Hair and Makeup by Steph )
7. Highlighted Beauty: Do you rock multi-dimensional hair? A side part will create a dramatic look that will shake up your everyday ‘do. (via Bridal Musings)
8. Boho Inspired Bun: When you’re missing Coachella, a loose bun will bring back all your flower-crown feelings. (via Mu and Me)
9. Half up-Half Down: Out running errands? Brunch with the gals? Impromptu photo session with your man? Never fear, a side part and twists is always at the ready to wow. (via Beauty Stylish)
10. Chic Side Bun: Arm yourself with some hair spray, an elastic band and some bobby pins. In six easy steps, you’ll be stepping out of the house in this classic old Hollywood chignon. (via Cosmopolitan)
Whose side-swept look made you want to try it at home? Comment below!